My blog has moved!

You should be automatically redirected in 6 seconds. If not, visit
http://www.spachethespatula.com/
and update your bookmarks.

Wednesday, March 31, 2010

Chicken Hand Pies

Chicken Hand Pies

I made these adorable hand pies while I was home last week. I wanted my mom to have something homemade to bring on the plane with her (she flew to Chicago to celebrate her birthday!). They turned out WONDERFUL if I do say so myself *smug face*. But I mean really, how can you go wrong with chicken pot pies that are portable?! I think my addition of fennel added a unique flavor to the mix, and I would actually just use a whole bulb next time. These were both comforting and hearty (plus super cute), and would make a great addition to any picnic basket. Also, these are a much better alternative to Hot Pockets for kids (for instance you actually know what ingredients these hold)!
I had a bit of trouble with the dough, but only because the food processor that I had to make it in only held 3 cups, ha ha. Also, I had a TON of leftover filling,which is excellent just served in a bowl topped with a biscuit, but I would recommend at least doubling the dough recipe for the amount of filling this makes.
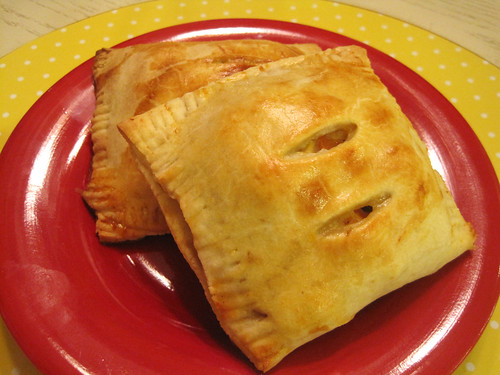
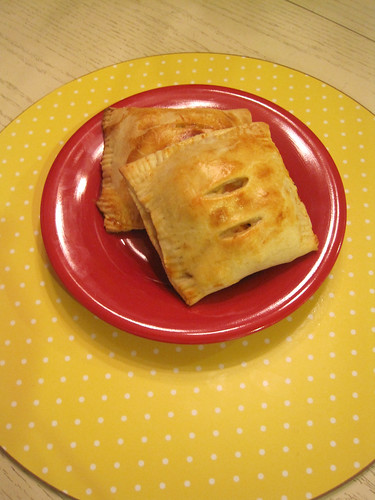
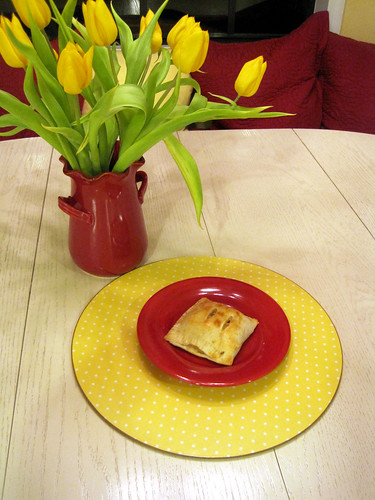
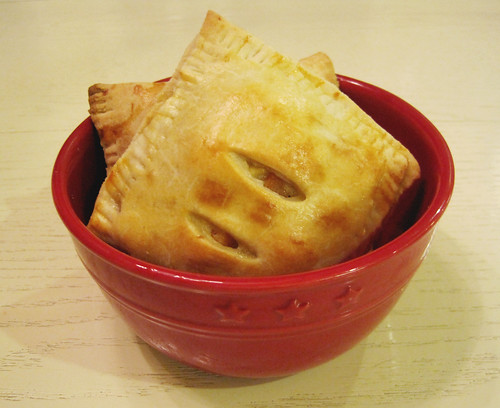

Chicken Hand Pies
Chicken Hand Pies

Chicken Hand Pies
recipe slightly adapted from here
makes 6 hand pies with lots of leftover filling

ingredients:
  • 1 potato, peeled and diced
  • 1 tbsp olive oil
  • 2 large carrots, diced
  • 1 stalk of celery, diced
  • 1/2 small fennel bulb, sliced
  • 1 small onion, diced
  • 1 tbsp butter
  • 1 tbsp all-purpose flour
  • 14 ounces chicken stock
  • 1 tsp bouillon powder (or 1 bouillon cube)
  • 2 boneless skinless chicken breasts, cut into small bite-sized pieces
  • salt and pepper, to taste
  • pastry dough (recipe below)
  • 1 egg + 1 tsp water, beaten
  1. Place the potato chunks in a small saucepan and cover with water. Bring to a boil and cook until fork-tender. Drain and set aside.
  2. In a large skillet, heat the olive oil over medium heat. Add in the onions, carrots, celery, and fennel and cook until the onions are very tender, about 15 minutes.
  3. Melt the butter into the veggie mixture and stir in the flour to create a roux. Let cook for around 2 minutes to cook out the flour taste. Add in about half of the chicken stock and the bouillon and let simmer for a few minutes. Then, taste and adjust seasonings.
  4. Add the chicken pieces to the pan and add the chicken stock in until you have reached your desired consistency (more than likely you will use all of it). Cook until the chicken is cooked through. Store mixture in the fridge until ready to use (the pies are easier to assemble when the filling is cold).
  5. Line a baking sheet with parchment paper. Set aside.
  6. Roll out the pastry dough on a lightly floured surface into about an 18 X 22 inch rectangle. Cut in half, and then cut each half into thirds to make 6 small rectangles.
  7. Scoop 1/4 cup of the filling onto each pastry rectangle, a bit off center. Wet the edges of the dough with a pastry brush and water. Fold the longer end of the pastry up and over the filling. Press down the sides to seal it, and then crimp the edges with the tines of a fork. Place the prepared pastries on the lined baking sheet. With a sharp knife, create two incisions on the top of each pastry. Brush the tops of each with the egg/water. Refrigerate the pastries for at least 30 minutes.
  8. When ready to bake, preheat the oven to 425 degrees. Bake the pastries for 15-20 minutes, until golden-brown and puffed.
*These can be refrigerated after being baked and then reheated in a preheated 350 degree oven for 10 minutes.

Pastry Dough

ingredients:
  • 2 1/4 cups all-purpose flour
  • 1 1/2 tsp sea salt
  • 1 tsp sugar
  • 8 tbsp (1 stick) cold unsalted butter, cut into 1/2 inch cubes
  • 1 egg slightly beaten
  • 1/3 cup ice cold water
  • 2 tsp apple cider vinegar
  1. In a food processor fitted with a blade attachment, pulse together the flour, salt, and sugar. Add in the butter and pulse a couple of times until the mixture is crumbly.
  2. Combine the egg, water, and vinegar in a small container. While the food processor is running, pour in the egg mixture and pulse until just combined.
  3. Pour mixture onto a floured surface and knead a few times to bring all of the ingredients together. The dough can be rolled out immediately, or wrapped in plastic wrap and refrigerated for up to 2 days.
Chicken Hand Pies
Chicken Hand Pies

Tuesday, March 30, 2010

Italian Salad

Italian Salad


This is the salad that I served up the other evening with the Mussels and Fennel with Saffron Cream Sauce. I know I promised to have it up just a day after the mussels, but it's been a seriously hectic week starting my new quarter of school, plus trying to show my little sister all around Seattle!
The salad turned out AMAZING! I loved how herb-y the dressing was, and paired with the salty olives and cheese it was simply sublime. It was my personal favorite portion of the meal. Even Mikey, who only ever eats Caesar salads liked it!
This could also easily be made into an entree by adding a grilled chicken breast on top.


Salad Veggies

Italian Salad
Italian Salad sans Dressing


Italian Salad
recipe from here
serves 6 as a side salad

ingredients:
for the salad:
  • 3 hearts of Romaine, washed, dried and cut into bite-sized strips
  • 1 large carrot, peeled into strips
  • 1 cucumber, diced
  • 1 red bell pepper, diced
  • handful of pitted olives (I used Nicoise olives)
  • handful of grape tomatoes, halved
  • Ricotta salata cheese, to taste
for the dressing:
  • 1 cup loosely packed fresh Italian flat leaf parsley
  • 10 big fresh basil leaves
  • 1/4 tsp dried oregano
  • 3/4 tsp sea salt
  • 1/4 tsp black pepper
  • 2 cloves garlic
  • 1 1/2 tsp honey
  • 1/4 cup red wine vinegar
  • 3/4 cup extra virgin olive oil
  1. Make the dressing: add all of the dressing ingredients into the bowl of a food processor and blitz to combine. The dressing should be fairly thick. Pour into a container, cover and refrigerate until ready to serve salad.
  2. Make the salad: combine all of the salad ingredients in a large bowl. Toss with the dressing, being sure to fully cover all the veggies. Serve immediately.
Italian Salad

Wednesday, March 24, 2010

Mussels and Fennel with Saffron Cream Sauce

Mussels and Fennel with Saffron Cream Sauce

Spring Break has officially started for me (we've been here since Thursday but technically our Spring Break week just started Monday), and Mikey and I are enjoying it with my family down on the west coast of Florida. Naturally, we are spending the majority of our time lazing around at the beach and pool soaking up the rays (which we don't get a lot of back in Seattle), but we did put our lounging on hold for a bit yesterday and went deep sea fishing! 
I've always loved Emeril Lagasse's recipes, but never much cared for his shows- yet I'm still quite sad to see them get cut from Food Network. His shows may not have been that entertaining, but he can still cook a hell of a lot better than most of the schmucks that they have on there now (I'm looking at you two Rachael Ray and Sandra Lee).
I was looking through my Emeril's TV Dinners cookbook a while ago and as soon as I saw this recipe, I knew it had to go on my Florida menu for my mom's sake- she loves mussels. 
The mussels turned out fantastic. It was my first time ever cooking mussels, and to be honest, my first time eating them ha ha. I loved the anise-flavoring that you get from both the fennel and the Herbsaint. And, though as it turns out I, personally, am not that biggest fan of mussels, everyone else said they were the best they had ever had! The sauce is creamy, yet not too heavy paired with the vegetables. The saffron adds in a nice rich flavor. You definitely are going to want some crusty bread on hand to sop up the creamy sauce. It's a perfect dish to enjoy outside on a sunny Florida evening- cool breeze, pink sky, sangria- what more could you ask for?
I served this dish up with a nice big Italian salad (recipe coming tomorrow).


Mussels and Fennel with Saffron Cream Sauce

Mussels and Fennel with Saffron Cream Broth
recipe from here
(I doubled the recipe for 6 people and we had no problem finishing it.)

ingredients:
  • 2 dozen live mussels, scrubbed and de-bearded
  • 1 tbsp olive oil
  • 1 1/2 cups fennel, julienned (about 1/2 a bulb) (reserve some of the green fronds to garnish)
  • 1 red bell pepper, julienned
  • 1 yellow bell pepper, julienned
  • 1 tbsp shallots, minced
  • 1 tsp garlic, minced
  • 2 ounces Herbsaint (or other anise-flavoured liqueur)
  • 2 cups heavy cream
  • pinch saffron
  • salt and pepper, to taste
  • 2 tbsp parsley, chopped

  1. Heat the olive oil in a saute pan. When the pan is hot, saute the fennel, peppers, shallots, and garlic for 2 to 3 minutes. Season with salt and pepper.
  2. Pull the pan away from the heat and flame the Herbsaint. Place back on the heat and add the cream. Stir in the saffron. Pepper and Fennel in Saffron Cream
  3. Bring to a boil and then reduce to a simmer. Add the mussels and cover. Simmer the mixture for 3 to 4 minutes, or until the mussels open.
  4. Spoon the mixture into shallow bowls and garnish with the chopped parsley and fennel fronds.
Mussels and Fennel with Saffron Cream Sauce

Monday, March 22, 2010

St. Louis Gooey Butter Cake


St. Louis Gooey Butter Cake

Some days you just want to eat something that is absolutely terrible for you, and savor every bite. This is a cake for those types of occasions and my-oh-my is it worth every buttery calorie! When I saw this cake over at Smitten Kitchen, I knew it was completely necessary to make, despite the fact that I'm supposed to be on a diet. It just called to me, "Raaachaaaeel, maaaake meee!" I'm sorry, I had to listen.
I love everything about this sinful delight: the crackly top, the melt-in-your-mouth center, and the way I can gobble up three pieces without thinking twice about it. Okay, maybe I don't totally love that last part since this cake is not exactly healthy, buuut... *shrug* you gotta do what you gotta do, am I right?
I baked this up for a brunch yesterday morning with my extended family and everyone absolutely loved it!
If you need some comfort in the form of gooey goodness, or your looking for something to wow your friends, this cake is for you.

St. Louis Gooey Butter Cake

St. Louis Gooey Butter Cake
recipe from The New York Times
16-20 servings

ingredients:
for the cake:
  • 3 tbsp milk, at room temperature
  • 2 tbsp warm water
  • 1 3/4 tsp active dry yeast
  • 6 tbsp unsalted butter, at room temperature
  • 3 tbsp granulated sugar
  • 1 tsp sea salt
  • 1 large egg
  • 1 3/4 cup all-purpose flour
for the topping:
  • 3 tbsp + 1 tsp light corn syrup
  • 2 tbsp water
  • 2 1/2 tsp vanilla extract
  • 3/4 cup (12 tbsp) unsalted butter, at room temperature
  • 1 1/2 cups granulated sugar
  • 1/2 tsp sea salt
  • 1 large egg
  • 1 cup + 3 tbsp all-purpose flour
  • confectioners' sugar, for dusting
  1. In a small bowl, combine the milk and water. Add the yeast and whisk gently until dissolved; the mixture should foam slightly.
  2. In an electric mixer fitted with a paddle attachment, cream together the butter (for the cake), sugar, and salt. Scrape down the sides of the bowl and add in the egg. Next, alternately add in the flour and milk mixture, beginning and ending with the flour, and scraping down the bowl between each addition. Beat on medium speed until the dough forms a smooth mass and pulls away from the sides of the bowl, about 7 to 10 minutes.
  3. Press the dough into an ungreased 9 x 13 inch glass baking dish that is at least 2 inches deep. Cover the dish with plastic wrap and put in a warm place to rise for 2 1/2 to 3 hours.
  4. When ready to bake, preheat the oven to 350 degrees.
  5. Prepare the topping: in a small bowl mix together the corn syrup, water, and vanilla extract.
  6. In the bowl of an electric mixer fitted with a paddle attachment, cream together the butter and sugar until light and fluffy, about 5 to 7 minutes. Scrape down the sides of the bowl and add in the egg; beat until combined. Alternately add in the flour and corn syrup mixture, beginning and ending with the flour and scraping down the sides of the bowl between each addition.
  7. Spoon the topping in large dollops over the risen cake and, using a spatula, gently spread it in an even layer.
  8. Bake for 40 to 45 minutes. The cake will rise and fall in waves and have a golden brown top, but still liquid in the center when done. Allow to cool in pan before sprinkling with confectioners' sugar and slicing.
St. Louis Gooey Butter Cake


This is NOT a low-cal dessert (But let's be honest, if you are craving something like this cake, then you don't care about the calories; here they are anyway)! 20 servings at about 240 calories each OR 16 servings at around 300 calories each.

St. Louis Gooey Butter Cake

Saturday, March 20, 2010

Milk Chocolate, Coconut, and Banana Chip Mini Muffins

Milk Chocolate, Coconut, and Banana Chip Mini Muffins

I whipped these miniature muffins up the night before I took off to Florida so that I would have some goodies to bring my family. I was in the mood for something tropical and saw a can of coconut milk in the pantry, perfect! I didn't have a particular recipe in mind, so I just stuck to the Ratio of 2 parts flour: 2 parts fat: 2 parts liquid: 1 part sugar and came up with these exotic treats. In keeping with the tropical theme, I replaced regular sugar with palm sugar. It's flavor complements coconut in a wonderful way. As for the mix-ins, I knew shredded coconut would obviously be a component, and then I saw banana chips and thought they would add a nice crunch while still sticking to the theme. I'm usually not much of a milk chocolate person, personally preferring super dark chocolate above all else, but I thought that a mellow milk chocolate would fit in nicely with the other ingredients. I topped them with a simple coconut glaze and garnishes of coconut and banana chips.
I think they turned out really delicious and were exactly what I was going for- not super sweet with a tropical flare. Plus, I was pretty proud of myself for just pulling this recipe out of thin air! They ended up being a great way to kick off Spring Break, and received a whole lot of "Mmm's" from family and friends!
By the way, this recipe really doesn't make a lot so you may want to double the recipe (especially if you are making regular-sized muffins).


Milk Chocolate, Coconut, and Banana Chip Mini Muffins


Milk Chocolate, Coconut, and Banana Chip Mini Muffins
my batter made 17 mini muffins

ingredients:
  • 4 ounces whole wheat pastry flour
  • 1 tsp baking powder
  • 1/4 tsp sea salt
  • 4 ounces (4 tbsp or 1/2 stick) unsalted butter
  • 2 ounces palm sugar
  • 1 large egg
  • 1/4 tsp coconut extract
  • 4 ounces (1/2 cup) lite coconut milk
  • 1/4 cup broken banana chips
  • 1 1/2 ounces (1/2 a regular bar) milk chocolate, chopped
  • 1/4 cup unsweetened flaked coconut
  1. Preheat oven to 350 degrees. Grease or line a mini muffin tin, set aside.
  2. In a small bowl, combine the flour, baking soda, and salt. Set aside.
  3. In the bowl of an electric mixer fitted with a paddle attachment, cream together the palm sugar and butter for about 3 minutes. Add in the egg and extract and beat until combined (remember to scrape down the sides!).
  4. Alternately add the flour mixture and coconut milk to the butter/sugar mixture, beginning and ending with the flour. Mix until just combined.
  5. Stir in the banana chips, coconut, and chocolate.
  6. Scoop into prepared muffin tins and bake for about 15 minutes, or until a toothpick inserted into the center comes out clean!
  7. Cool in the tray for about 10 minutes and then transfer to a wire rack to cool further.
  8. *The glaze is optional. I just mixed up a tablespoon or two of the coconut milk with some confectioners' sugar until I got the consistency that I wanted. Then I just topped half of the muffins with a banana chip, and the other half with some unsweetened flaked coconut.
Milk Chocolate, Coconut, and Banana Chip Mini Muffins

Thursday, March 18, 2010

Whole Grain Linguine with Kale, Dried Cranberries, and Pistachio Sauce

Whole Grain Linguine with Kale, Dried Cranberries, and Pistachio Sauce

This is another recipe that I have had on the back-burner for quite a while, and finally just got around to it. Unfortunately, the original recipe called for pomegranate arils which are now out of season, so I decided to make some alterations! I substituted dried cranberries for the pomegranate; they worked beautifully!
The dish turned out phenomenal! Pistachios are one of my favorite nuts, and I think they really shine in this pasta. The cranberries impart just enough sweetness to counteract the hearty kale.
Try this pasta. Not only is it super easy, but the flavors and textures mingle in your mouth in a glorious fusion of sweet, hearty, salty, and  crunchy (plus it's pretty darn healthy). I don't think you'll be disappointed :).


Whole Grain Linguine with Kale, Dried Cranberries, and Pistachio Sauce

Whole Grain Linguine with Kale, Dried Cranberries, and Pistachio Sauce
recipe adapted from 101 Cookbooks
serves 4
ingredients:
  • 8 ounces whole grain linguine
  • 2/3 cup pistachios, toasted
  • 1 garlic clove, minced
  • 1/4 tsp sea salt
  • 1/4 cup extra virgin olive oil
  • 1 bunch of lacinato kale, washed, de-stemmed, and chopped
  • 1/4 cup dried cranberries
  1. Bring a large pot of salted water to a boil.
  2. While the water is heating, make the pistachio sauce by pureeing half of the pistachios, garlic, salt, and olive oil in the bowl of a food processor. Set aside.
  3. When the water is boiling, cook the pasta per the package instructions. At the last second, add in the kale and then drain right away and rinse under cold water. Spin in a salad spinner to fully dry the pasta/kale.
  4. Toss the pasta and kale with the pistachio sauce and 1/2 of the dried cranberries. Season with salt and pepper if necessary. Top with the remaining dried cranberries and pistachios and serve!
4 servings at about 495 calories each 


Whole Grain Linguine with Kale, Dried Cranberries, and Pistachio Sauce

Tuesday, March 16, 2010

Red Wine Sangria a la Bobby Flay

Fruity Red Wine Sangria

Yesterday was an absolutely gorgeous day in Seattle; today- not so much :(. Sorry that it's been so long since my last post, but school has been absolutely crazy these past few weeks as the quarter ends. The good news is that I'm almost done! I finished my last paper last night, and the last thing I have is a final tomorrow morning; then Mikey and I are off to Florida to visit friends and family :D!
I'm not someone who really drinks much at all, but I do enjoy the occasional cocktail and the such. I recently had some less-than-stellar sangria at a tex-mex restaurant and was rather disappointed. I had wanted something loaded with fruit, and instead received a small ($6!) glass of the stuff with one small orange slice, and a tiny lime wedge.
The sad excuse for sangria left me unsatisfied and I knew I had to take matters into my own hands, so I decided to attempt to make some of my own.
I generally don't much care for Bobby Flay, but there are a few things I trust him completely on: grilling, sauces, and cocktails. Plus, I had heard good things about his Sangria recipe so I thought it'd be a good one to try-out.
This sangria turned out phenomenal! It was super fruity (what I had been craving!), but not too sweet. Don't even think about skipping the 24 hours in the fridge or you'll be very sorry. The flavors need time to mellow and meld. This was a perfect treat for someone who has been longing for summer, and of course this would make a great cocktail at a outdoor Barbecue or Grill-out. YES, all you crazy northerners, there is a difference. You have to actually be eating/making something that is Barbecued to call it a Barbecue, ha ha.


Fruity Red Wine Sangria


Fruity Red Wine Sangria
recipe from here
makes about 4ish servings


A word to the wise, I used a TON of fruit in mine (because I like it that way). You may want to cut what I put in mine in half if you aren't into an equal ratio of liquid to fruit, ha ha.

ingredients:
  • 1 bottle red Spanish table wine
  • 1/2 cup brandy
  • 1/4 cup triple sec
  • 1/2 cup orange juice
  • 1/2 cup pomegranate juice
  • 1/4 cup simple syrup, or more if you'd like (this is simply equal parts of sugar and water that has been heated until the sugar dissolves and then cooled; if you're Ã¼ber lazy, I know they sell it at Trader Joe's)
  • orange slices (I used 1 blood orange and 1 Cara Cara orange)
  • apple slices (I used 1 Fuji apple)
  • blackberries (I used about 6 ounces)
  1. Mix all of the ingredients together and put into the fridge in a tightly sealed container for at least 24 hours before serving.
Fruity Red Wine Sangria

Wednesday, March 3, 2010

Moroccan Carrot and Goat Cheese Sandwich with Green Olive Tapenade

IMG_5642


Spring is in the air! Out here in Seattle it's warming up (or rather trying to), the cherry blossoms are blooming, daffodils are sprouting up everywhere you look, and and in the past couple of weeks I think I've seen the sun more times than not. I'm getting excited!


Cherry Blossoms

In honor of the approaching spring, I decided to make a great picnic-y sandwich that is even better when enjoyed out in the warm(ish) rays of the sun.
I've been holding onto the recipe for quite a while; ever since I saw it on Love and Olive Oil I knew it was a sandwich for me. I'm happy to report that I was oh-so-right. This sandwich is certainly unique, with a flavor combo that is out-of-this-world! I love the way the sweet-yet-spicy kick of the carrots blends with the tangy, creamy goat cheese. Then, you get this wonderful saltiness imparted by the olive tapenade that really just brings everything over-the-top!
So, go grab a blanket, spread it on the lawn outside, and whip up a few of these sandwiches to share with a few good friends in the nice weather... or at least open a window or something :).


IMG_5633
IMG_5629


Moroccan Carrot and Goat Cheese Sandwiches with Green Olive Tapenade
recipe slightly adapted from here

I, of course, cheated and used some pre-made tapenade in my version as many reviewers said to do and I'm quite glad I saved myself the extra work. I am certain there was no flavor-loss (and hey, you have less to screw up, right?). I made up the entire batch of carrots and just kept the extras in a tupperware in the fridge to pull out and eat at my leisure.

ingredients:
  • 2 tbsp honey
  • 1 1/2 tbsp freshly squeezed lemon juice
  • 2 tsp sweet paprika
  • 1 tsp ground cumin
  • 1/2 tsp cinnamon
  • 1/4 tsp cayenne
  • 1 tsp sea salt
  • 1/4 cup extra virgin olive oil
  • 1 to 1 1/2 lbs carrots, sliced
  • green olive tapenade
  • soft goat cheese
  • pumpernickel bread
  1. Whisk together the honey, lemon juice, spices, salt, and olive oil in a large bowl.
  2. Cook the carrot slices in a pot of boiling, salted water for approximately 45 seconds, until crisp-tender. Drain well and then immediately toss with the dressing. Cool to room temperature, stirring occasionally, then cover and pop in the fridge to marinate for at least 4 hours.
  3. To assemble the sandwich(es), spread one slice of bread with tapenade, and smear the other slice with some goat cheese. Layer the carrot slices onto the goat cheese and put the two slices together. Enjoy!  Simple. Easy. Delicious.
IMG_5636

Each sandwich is about 580 calories when you use 1/8 of the carrot mixture and 1 oz. each of the goat cheese and olive tapenade on two slices of pumpernickel bread.
Related Posts with Thumbnails