▼
Tuesday, July 26, 2011
Friday, July 22, 2011
My Blog Has Moved!
I have some very exciting news to share:
My blog has moved to its own custom URL!
Head on over to spachethespatula.com to see the new design along with a new post with the recipe for a Cherry-Mint Julep!
My blog has moved to its own custom URL!
Head on over to spachethespatula.com to see the new design along with a new post with the recipe for a Cherry-Mint Julep!
Sunday, July 17, 2011
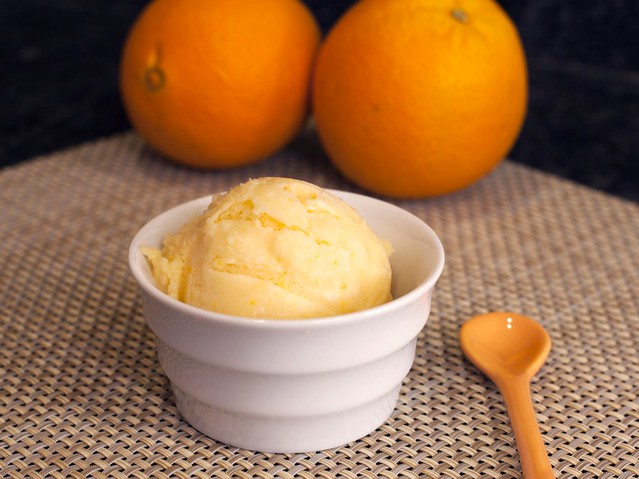
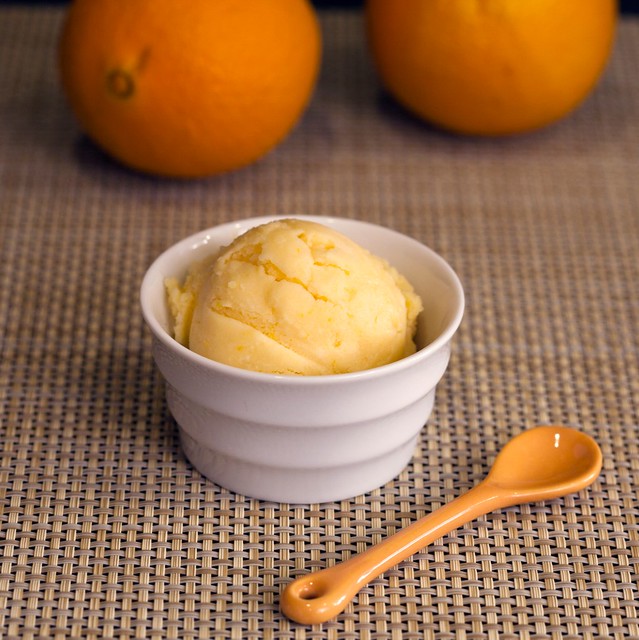
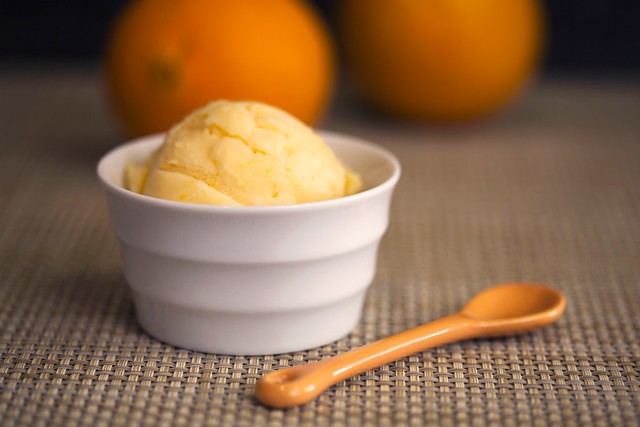
Orange Sherbet
A couple of weeks ago, a reader asked me if I had any good sherbet recipes that stayed creamy even after freezing, instead of turning into a big, icy block. This is a common problem with sherbets as their fat content is so low (1%).
This orange sherbet recipe is my personal favorite, and even Mikey, a self-proclaimed orange sherbet connoisseur thinks it's the bees' knees!
Of course true sherbet will never be as creamy as an ice cream---especially one with a custard base---simply due to the lack of cream, eggs, etc., but I think that this recipe is far creamier than others I have tried (especially as it starts to melt in the summer sun!).
I particularly love this recipe because it actually tastes like real oranges as opposed to that pretend, artificial orange flavoring that a lot of standard orange sherbets have. You see, I normally hate orange sherbet! Actually, I normally hate all orange-flavored things because they are so fake-tasting. But, this, this is so zingy and delicious!
But, while you get the fresh, citrusy, bright notes of true orange flavor, it is ever-so-perfectly matched with a creamy, vanilla base that together boast the best darn creamsicle flavor you have ever tried!
I should note that in my recipe I used raw milk. Of course you are welcome to use homogenized, pasteurized milk, but I find raw milk more enjoyable and creamy, personally.
(In regards to the reader's question about replicating Trader Joe's Pomegranate Blueberry Sherbet, I haven't tried this yet, but I would omit the orange zest, and replace the orange juice with Pom Wonderful's Blueberry-Pomegranate juice and see how that works out!)
Orange Sherbet
recipe adapted from here
ingredients:
- 7 ounces granulated sugar
- zest from 1 large orange
- 1/4 tsp kosher salt
- 2 cups freshly-squeezed orange juice
- 1 tbsp freshly squeezed lemon juice
- 2 tsp pure vanilla extract
- 1 1/2 cups very cold whole, raw milk
- In the bowl of a food processor, combine all of the ingredients except the milk and process until the sugar is fully dissolved (about a minute or two).
- Transfer the mixture to a large bowl and whisk in the milk.
- Cover the mixture and refrigerate for at least 2 hours.
- Pour the chilled mixture into your ice cream maker and freeze according to your manufacturer's directions. (Mine took about 35-40 minutes, much longer than other ice creams I have made which are usually done in about 15-20 minutes.)
- Transfer the sherbet to a container and freeze for at least 3 hours.
Wednesday, July 13, 2011
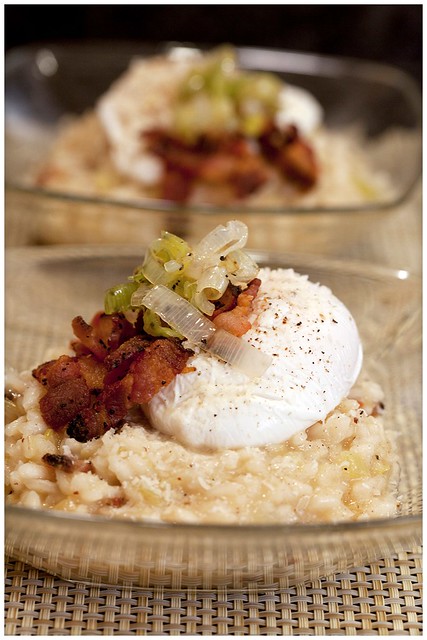
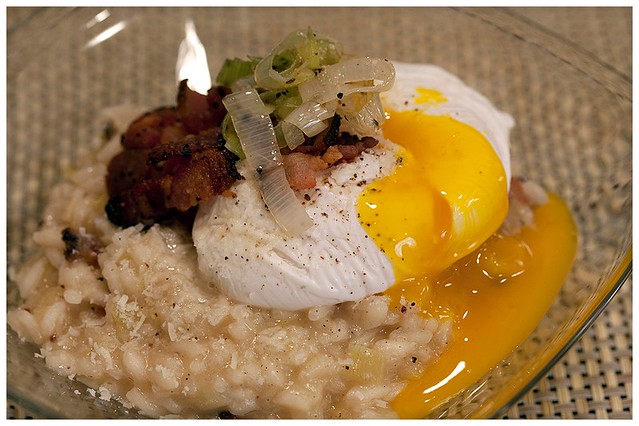
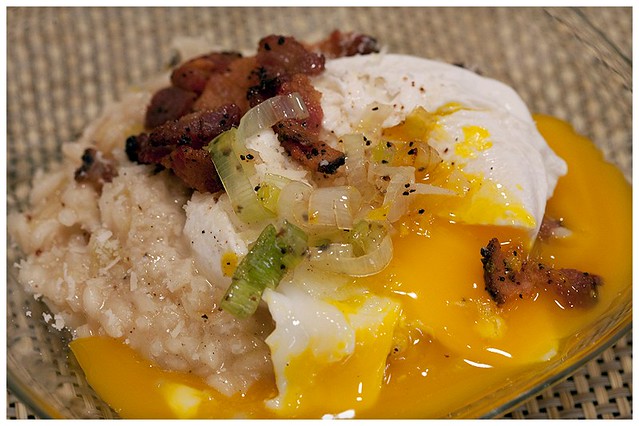
Bacon and Leek Risotto with White-Wine Poached Duck Eggs
I made this dish as a part of a meal for an online cooking competition (fingers crossed that I place!), so there are more pictures than usual of the actual process... something I'm sure you won't mind when you lay eyes on this dish :)
In my opinion, there is nothing more appetizing than an oozing egg yolk. How can you make this better? Use a bigger egg! Bigger egg= bigger yolk. In this case, I used duck eggs on top of a sumptuous risotto.
I have to be honest, I LOVE this dish... far more than most other dishes. What can I say? I'm a sucker for comfort food, and this dish takes all of my favorite comfort foods and combines them: runny yolks, risotto, and bacon. What's not to love?
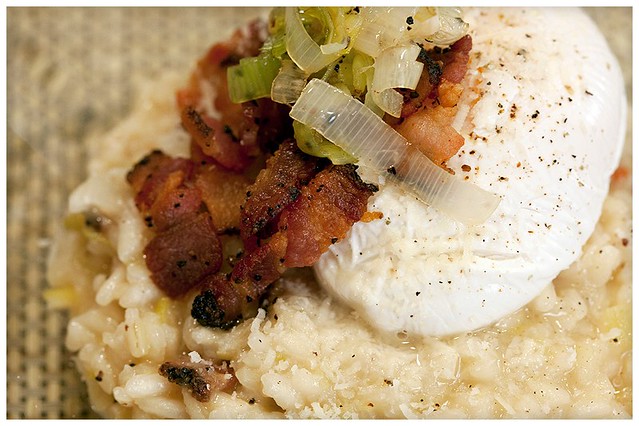
There are so many glorious textures and flavors that play off of one another here: rich, velvety egg yolk, crisp, peppery bacon, soft, sweet leeks, chewy, creamy rice... basically one of the best things you will ever lock your jaws around.
(By the way, I have a redesign for my blog being worked on and I CANNOT wait for it to be done because I am so sick of Blogger! It never works right for me. For instance, I have ZERO clue why my font is much smaller than normal here.)
Bacon and Leek Risotto with White-Wine Poached Duck Eggs
recipe adapted from here
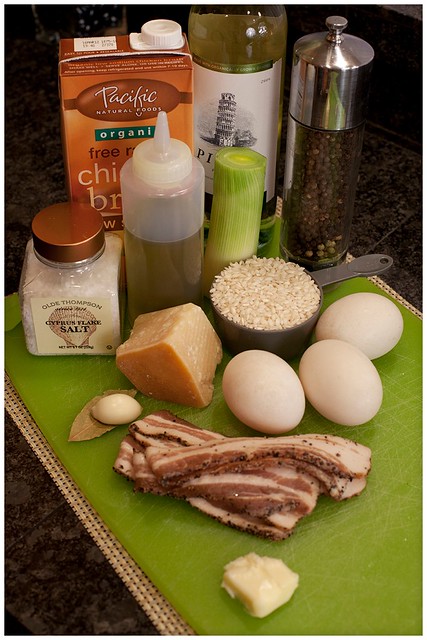
ingredients:
- 2-3 duck eggs
- 1 bay leaf
- 1 garlic clove
- splash of vinegar (not pictured)
- 3-ish cups low-sodium chicken broth
- ½ tbsp. extra virgin olive oil
- 4 slices thick bacon, somewhat diced (I used a peppered bacon)
- 1 leek, thinly sliced (white and pale green only, please)
- ¾ cup Arborio rice
- ½ cup dry white wine + more for poaching eggs (I used a Pinot Grigio)
- sea salt and freshly ground pepper
- ½-1 tbsp. butter
- 1-ish tbsp. grated parmigiana reggiano + more for garnish
First we need to poach the eggs:
- Get a sauce pan and fill it with a couple inches of white wine. Bring it to simmer with the bay leaf, garlic clove, salt, pepper, and a splash of vinegar.
- Crack an egg into a ramekin and carefully drop it into the liquid. Repeat with remaining eggs. Cook the eggs for about a minutes, spooning hot wine over the tops.
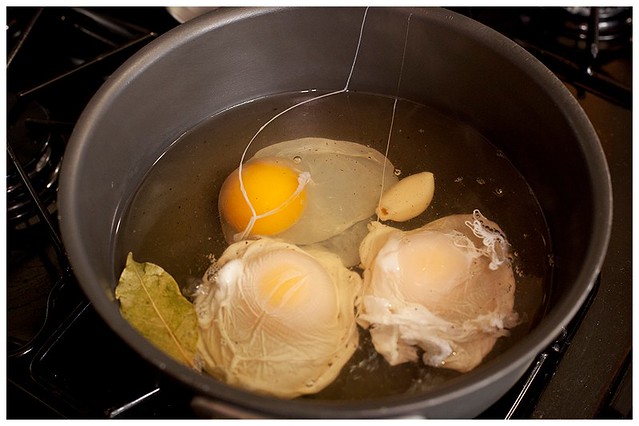
- Remove the eggs with a slotted spoon and place in a cold water bath. Turn the wine off but leave it on the stove (we're going to reheat the eggs in the wine when the risotto is done).
Now for the risotto:
- Make sure that your broth is simmering in a pot on the stove. Get a nice big dutch oven or saute pan and heat the olive oil over medium or medium-high heat. Add in the bacon and cook until crisp. Remove the bacon with a slotted spoon and place onto some paper towels, but leave the drippings in the pan.
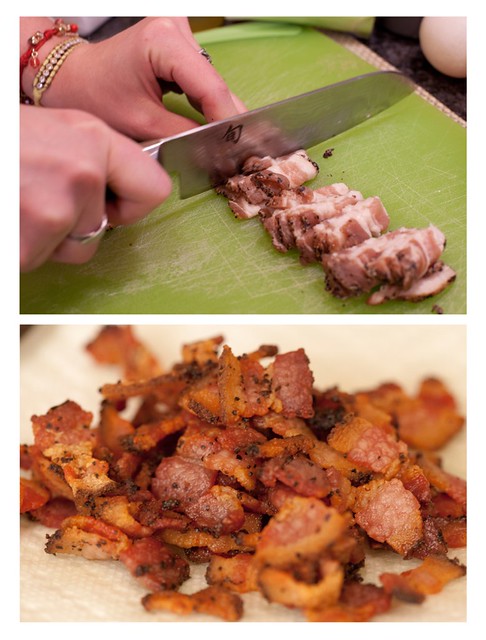
- Add the leeks to the pan and cook for about 5 minutes, until soft. Take two tablespoons full of the leeks and set aside in a small bowl to garnish the dish later.
- Add the rice to the pan and toast the grains up for a couple of minutes. Add in the wine and stir until it is absorbed.
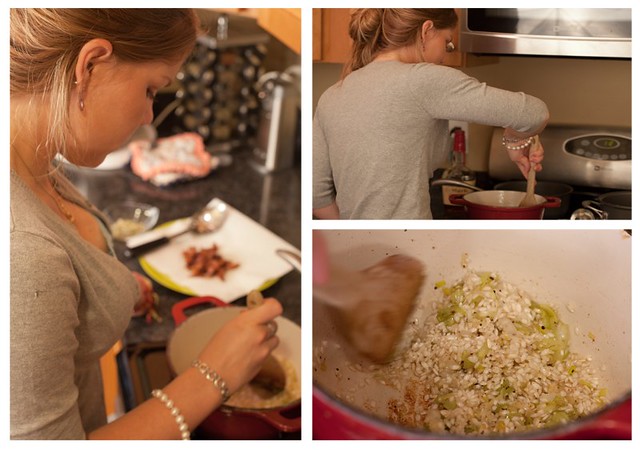
- Now start adding in the broth, one or two ladle-fulls at a time, and stirring after each addition until the broth is absorbed. Do this until the rice is done (the grains should have a slight bite to them), about 25 minutes.
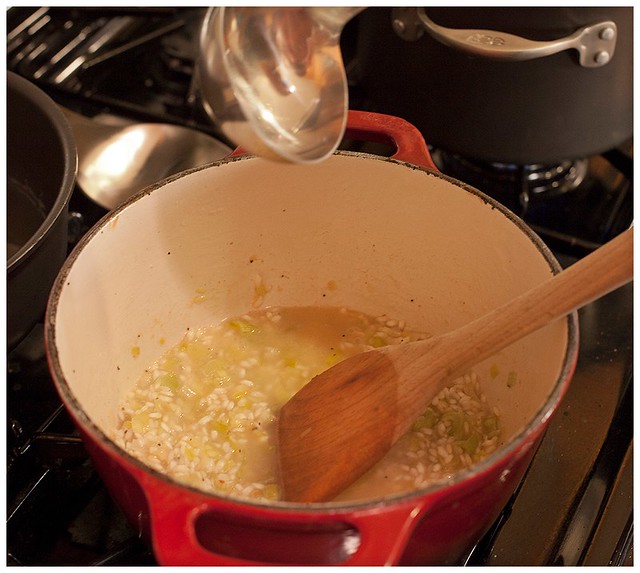
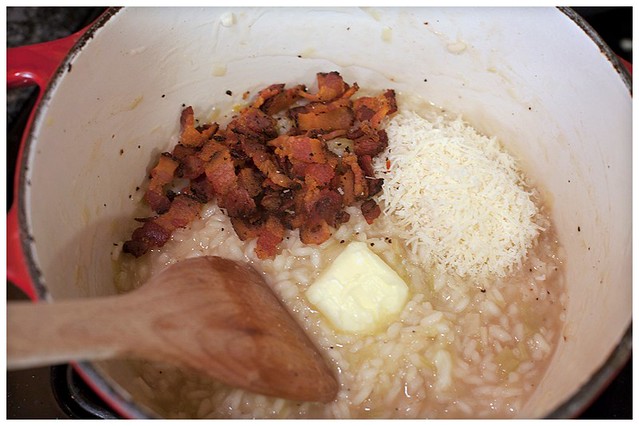
- Stir in the bacon (be sure to leave some out if you want it for garnish), butter, and parmigiana reggiano. Season with salt and pepper, to taste.
- Reheat the poached eggs in the wine for a minute or so until heated through.
- Top each bowl of risotto with a poached egg (remember to season with salt and pepper), your reserved leeks and bacon, and extra parmigiana reggiano.
Tuesday, June 21, 2011
Strawberry-Pistachio Rolls
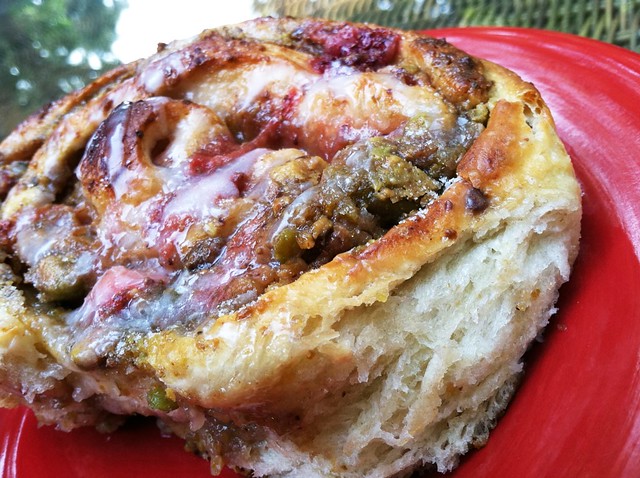
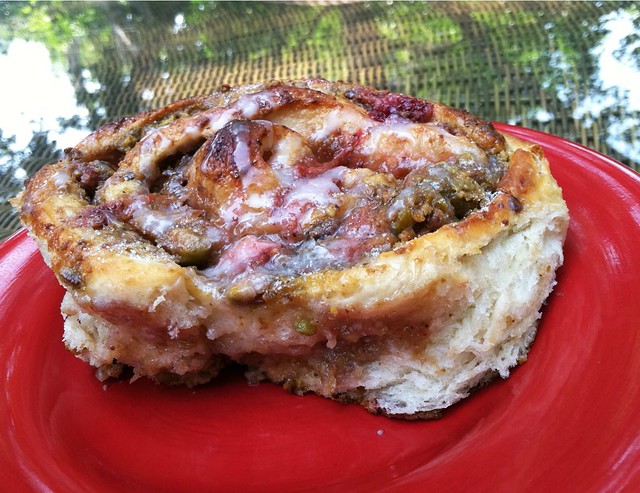
I'll start by saying sorry for the pictures as they were taken with my iPhone. But, the exciting part of that is that I FINALLY HAVE AN iPHONE! Yayyy! I made these rolls in Florida where I didn't have my amazing photographer there to help me out.
I love experimenting with different sweet rolls (like these Meyer Lemon Sweet Rolls), so when I saw these on Kaitlin's blog, Whisk Kid, I knew I had to give them a try. If you're wondering, they are just as good as they look. The sweet strawberry and pistachio fillings play off each other, creating an amazing harmony of salty/sweet-fresh/rich flavors that make it quite easy to down an entire roll (which are about the size of your entire hand) all by yourself (not to mention the fact that the red and green look beautiful together).
While these are still amazing cooled, I find them to be at their peak enjoyment state when they are nice and warm out of the oven. I mean a) who doesn't love warm bread in any situation? and b) the fillings are all gooey and oozing about in the most delicious way.
I think it would be a wonderful idea to add a whole vanilla bean in there somewhere, perhaps in the strawberry filling, just to really put these babies over the top. Someone try it and report back?
pre-bake obviously:
Strawberry-Pistachio Rolls
recipe slightly adapted from here
Dough:
ingredients:
- 2 1/2 tsp active dry yeast
- 1/2 cup lukewarm water
- 66g (1/3 cup) granulated sugar
- 1/2 milk, warmed
- 78g (1/3 cup) butter, unsalted, melted and cooled to room temperature
- 1 large egg, at room temperature, beaten
- 1 tsp salt
- more or less 500g (4 cups) flour
- extra sugar for sprinkling
- In the bowl of an electric mixer fitted with the paddle attachment, combine the yeast, water, and sugar. Let sit for 5 to 10 minutes until the yeast is activated (the top should be foamy).
- Add in the milk, butter, egg, and salt, and mix to combine. Add in the flour, 1/2 cup at a time, until the dough pulls away from the bowl. Switch to the bread hook attachment and mix, on high, for 15 minutes.
- Dump the dough into a buttered bowl. Cover with plastic wrap and allow to rise in a warm area for about an hour, until doubled in size.
- Turn the dough out onto a lightly floured surface and roll into a 10 x 24 inch rectangle. Spread with the two fillings (recipes below), leaving a 1 inch border on each side. Tightly roll the rectangle up, and slice into 10+ rolls.
- Preheat oven to 350 degrees. Butter a pie dish (or individual ramekins, etc.) and place the rolls in, leaving a bit of space between each (DO NOT stuff your pan as the rolls will rise again and overflow the pan.... I'm speaking from experience here people).
- Allow to rise again for about an hour. Sprinkle the tops with sugar and bake in the oven for 25-30 minutes until golden-brown and baked through. (You can drizzle the tops with a simple glaze made from confectioners' sugar and milk if you desire, which you should, because it looks nice :).)
Strawberry Filling:
ingredients:
- 1 pint strawberries, hulled and quartered
- 50g (1/4 cup) granulated sugar
- 1/2 tsp salt
- 1-2 tbsp fresh lemon juice
- 1 tbsp cornstarch
- Combine all ingredients in a small saucepan and cook on medium heat for about 15 minutes, stirring frequently, until the berries have slightly broken down and the mixture is thickened.
- Cool and set aside.
Pistachio Filling:
ingredients:
- 128g (1 cup) pistachios, roasted and salted
- 50g (1/4 cup) granulated sugar
- 1/2-1 tsp pure vanilla extract
- 28g (2 tbsp) butter, unsalted, at room temperature
- 1 large egg, at room temperature
- Place all ingredients into the bowl of a food processor and process until the mixture is a thick paste.
- Set aside.
Sunday, June 19, 2011
Orange Poppy-Seed Cake with Berries and Crème Fraîche
I just got back from a wonderful visit to Florida to see my family and friends and had a ton of fun :). I got to spend time sunning myself at the beach AND I finally made it to Harry Potter World in Universal Islands of Adventure-- something I've been wanting to do forever. You see, I am a Harry Potter freak and so my friends and I went to the park on the opening day. After waiting in line for 8 hours, me passing out with heat exhaustion and having to go to the medic room, and a long argument to get our refunds, we saw NOTHING. It was one of the most disappointing experiences of my life. But, I finally got to go and it was really quite fun! However, I do not recommend the Butter Beer. It's ultra weird and has a strange foamy, creamy layer on the top that I was told is a "non-dairy butterscotch flavoring." Ew.
Tomorrow I start my last quarter of college, EVER and I can't freakin' wait to get it over with :P!
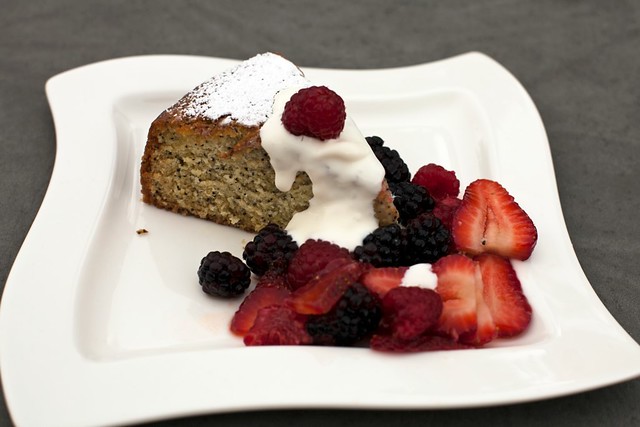
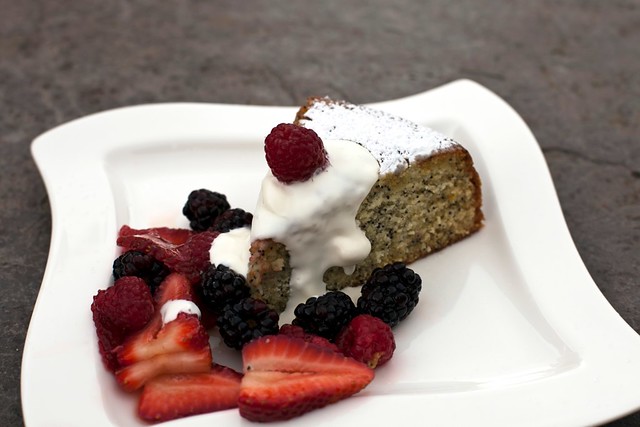
So, about this cake... It's pretty amazing. It's fresh and unique and a perfect alternative to a rich, chocolate dessert. The orange syrup that is poured on the cake straight out of the oven gives it an extremely moist texture that can be described as almost pudding-like. The orange-Cointreau macerated berries are a nice counterpoint, and the creamy crème fraîche is a rich, zingy contrast.
Orange Poppy-Seed Cake with Berries and Crème Fraîche
recipe slightly adapted from here
ingredients:
for the cake:
- 1 1/2 cups cake flour
- 3/4 tsp salt
- 1 tsp baking soda
- 1/2 tsp baking powder
- 1/4 cup poppy seeds
- 3/4 cup (1 1/2 sticks) unsalted butter, at room temperature
- 1 1/4 cups granulated sugar, divided
- 2 tsp orange zest
- 4 large eggs, separated
- 2/3 cups sour cream
- 2 tsp pure vanilla extract
- 1/4 tsp cream of tartar
for the berries/syrup:
- 1 cup freshly squeezed orange juice
- 1/4 cup + 2 tbsp Cointreau
- 3 tbsp granulated sugar
- 1/4 cups strips of orange zest
- 3 cups mixed raspberries, blackberries, and strawberries (strawberries should be halved or quartered)
- confectioners' sugar, for dusting
- crème fraîche, to serve
for the syrup:
- In a small saucepan, combine the orange juice, Cointreau, 3 tbsp sugar, and strips of orange zest over medium-high heat. Cook, stirring frequently, for about 5-10 minutes until the sugar is dissolved. Remove pan from heat.
- Fish out the zest strips with a fork and discard. Pour 1/3 cup of the syrup into a bowl and reserve the rest for the cake.
- Add the berries to the bowl with the 1/3 cup syrup and place in the fridge, covered, to macerate for at least 2 hours and up to 24.
for the cake:
- Preheat the oven to 350 degrees. Butter and flour a 9 or 10-inch springform pan and set aside.
- In a medium bowl, combine the flour, salt, baking soda, baking powder and poppy seeds. Set aside.
- In a small bowl, whisk together the egg yolks, sour cream, and vanilla. Set aside.
- In an electric mixer fitted with the paddle attachment, beat the butter, 1 cup of the sugar, and orange zest for about 5 minutes until light and fluffy. Alternately add in the flour mixture and yolk mixture, beginning and ending with the flour mixture, beating well after each addition.
- In another bowl, with a hand mixer, beat the egg whites with a pinch of salt until they are foamy. Add in the cream of tartar and beat until soft peaks. Add in the remaining 1/4 cup sugar, a little at a time, and beat until stiff peaks.
- Stir 1/3 of the meringue into the cake batter and then gently fold in the remainder.
- Pour the batter into the prepared pan and smooth the top. Bake for 40-45 minutes, until a toothpick inserted into the center comes out clean.
- As soon as you remove the cake from the oven, poke the top all over and brush the top with 1/2 of the reserved syrup. Let stand for 10 minutes. Run a thin knife around the side of the pan and remove the cake. Invert it on a rack and poke the bottom all over. Brush the remaining syrup over it, re-invert the cake on another rack or plate, and let stand until entirely cool. (You can keep the cake like this wrapped in plastic wrap at room temperature for a day before serving.)
- Before serving, sift confectioners' sugar over the top and serve with the macerated berries and crème fraîche.
Sunday, June 5, 2011
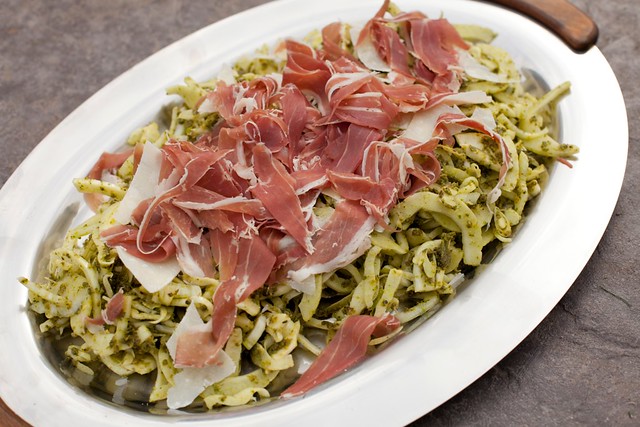
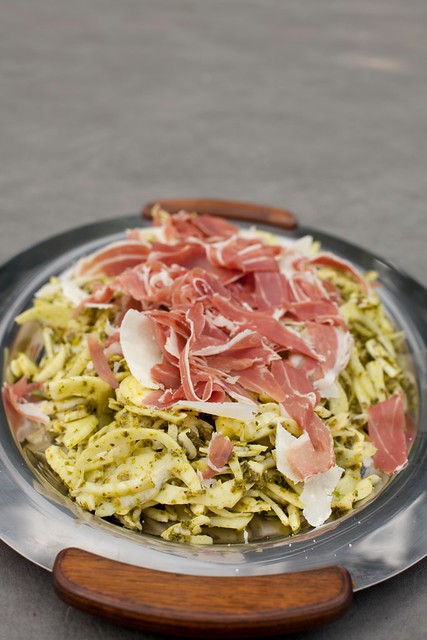
Fennel Slaw with Pistachio-Parsley-Thyme Pesto, Prosciutto di Parama, and Parmigiana Reggiano
This recipe comes from Giada de Laurentiis, who happens to be one of only about three Food Network chefs that I trust anymore. I mean really, the channel seems to be less and less about good food, and more and more about over-the-top personalities (I'm looking at you Guy Fieri).
This slaw/salad is the perfect addition to any summer cook-out or picnic. It couldn't be easier to make, and yet, it tastes seriously incredible! Also, it's really pretty to look at :)
The pesto brings a very bold flavor to the table that it balanced by the buttery prosciutto and sharp parmigiana reggiano. The crunchy, anise-flavored fennel makes the entire salad refreshing and light and will have you going back for thirds!
Fennel Slaw
recipe slightly adapted from here
ingredients:
- 4-5 fennel bulbs (about 3 1/2 lbs), thinly sliced
- Pistachio-Parsley-Thyme Pesto (recipe below)
- 4 ounces prosciutto di parma
- 2 ounces (or to taste) shaved parmigiana reggiano
- Toss the fennel with the pesto and transfer to a serving platter.
- Slice the prosciutto into 1/2 inch strips.
- Top the fennel with the shaved cheese and prosciutto.
Pistachio-Parsley-Thyme Pesto
ingredients:
- 2 cups lightly packed fresh flat-leaf parsley
- 1 tbsp fresh thyme leaves
- 3/4 cup shelled pistachios, toasted
- 3 garlic cloves
- 3/4 cup extra virgin olive oil
- salt and freshly ground pepper, to taste
Thursday, June 2, 2011
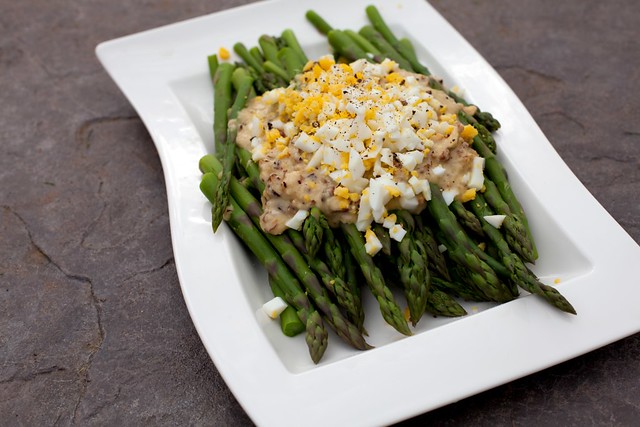
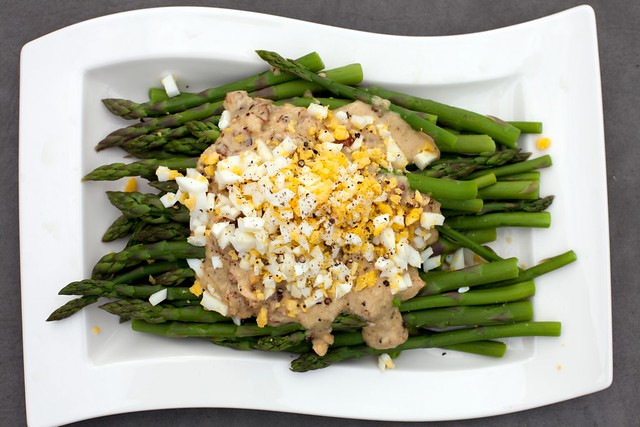
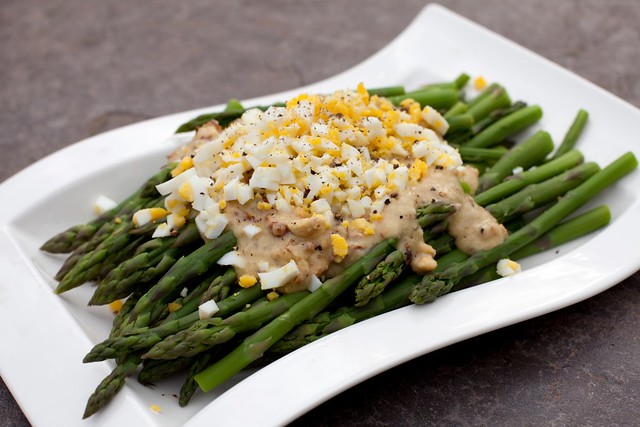
Asparagus with Hazelnut Vinaigrette and Chopped Egg
*Phew*! I got my first of three papers finished this morning! The next is due on Monday, and my final paper (the longest at 10-12 pages) is due on Tuesday. I. CAN'T. WAIT. for this quarter to be over! It's totally been throwing a wrench in my cooking/baking time.
Anyways, on to the food! Last weekend, Mikey and I went to Pike's Place Market to shop for Memorial Day ingredients. Produce stands were completely stocked with gorgeous Spring veggies and the very first produce of Summer. I wanted to take everything home with me but I settled on a few select items--including a bunch a beautiful, local asparagus.
This dish turned out better than great! The asparagus keeps a nice, crisp bite thanks to only being cooked for a couple of minutes, and the creamy, thick, tart vinaigrette and chopped egg are nice counterpoints.
Asparagus with Hazelnut Vinaigrette and Chopped Egg
recipe slightly adapted from here
ingredients:
- 2 lbs asparagus, washed and trimmed
- 1 large hard-boiled egg, chopped
- 1 large shallot
- 2 tbsp sherry vinegar
- 1 tbsp dijon mustard
- 1/2 tsp granulated sugar
- 1/3 cup extra virgin olive oil
- salt and freshly ground pepper, to taste
- 1/4 cup chopped hazelnuts, toasted
- In a food processor, combine the shallot, vinegar, mustard, and sugar. Process until the shallot is minced and everything is combined. Slowly, with the motor running, drizzle in the olive oil until emulsified. Season with salt and pepper and transfer to a bowl and stir in the hazelnuts.
- Bring a large saute pan filled with 2 1/2 inches of salted water to a boil. Add in the asparagus and cook for 2-3 minutes. Drain and transfer to a serving dish.
- Top the asparagus with the hazelnut vinaigrette, chopped egg, and more salt and pepper. Serve!
Monday, May 30, 2011
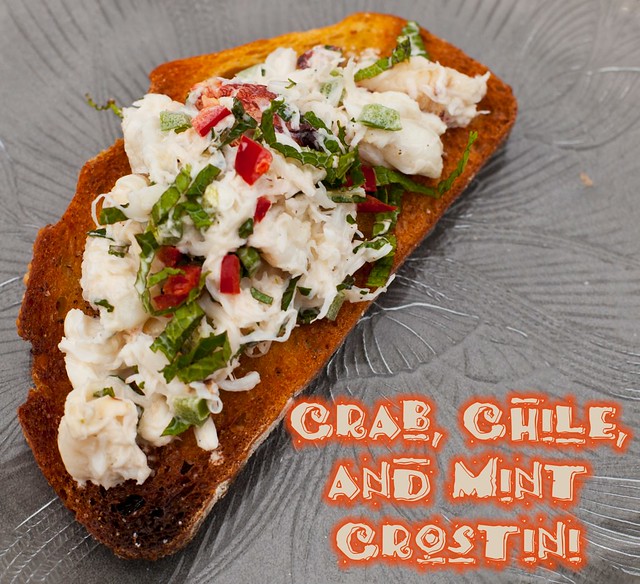
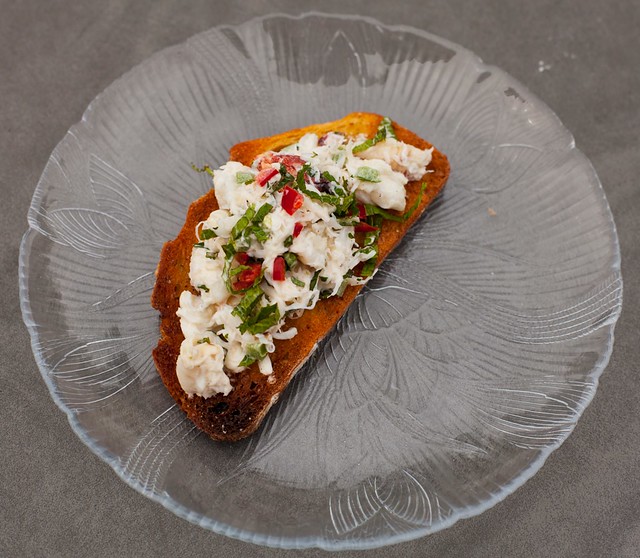
Crab, Chile, and Mint Crostinis
It's been a while! I sincerely apologize! I know I'm always full of excuses, but I truly have been a busy bee. Not only am I finishing up my second to last quarter of my college life (!!!!), but my best friend flew out to Seattle to surprise me last weekend which led to an impromptu trip to Vancouver. Then of course I was busy celebrating Memorial Day by cooking up a storm.
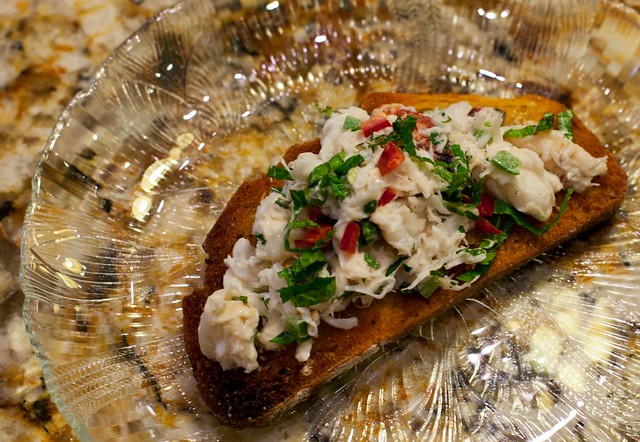
Anyways, I hope you can forgive me. I come bearing gifts. Check out these delicious looking crostinis! These were the perfect start to a Memorial Day cook-out meal. They are fresh, creamy, and slightly spicy, with a delicious crunch- basically everything good ever in one thing.
Crab is probably one of my favorite foods, and definitely my favorite shellfish, and this dish truly lets it shine. The tart lime juice and fresh mint gives the crab a wonderful clean flavor that is amazing paired with the moderately spicy chiles. It's truly incredibly how much flavor only a few ingredients can pack!
As you can see, our party of four pretty much devoured these crostinis :)
Crab, Chile, and Mint Crostinis
recipe from June 2011 Bon Appetit
serves 4-6
ingredients:
- 8 ounces cooked lump crab meat
- 3 tbsp mayonnaise
- 2 tbsp freshly squeezed lime juice
- 1 tbsp finely chopped fresh mint, plus more for garnish
- 1/2 Fresno chile, deseeded and minced
- 1 red jalapeno, deseeded, minced, and divided
- Salt and freshly ground pepper
- Sliced sourdough bread, as much as you would like
- Extra virgin olive oil
- Drizzle each slice of bread with olive oil and sprinkle with salt and pepper. Broil for 3 minutes, flip over, salt and pepper the other side, and broil for another 3 minutes; set aside.
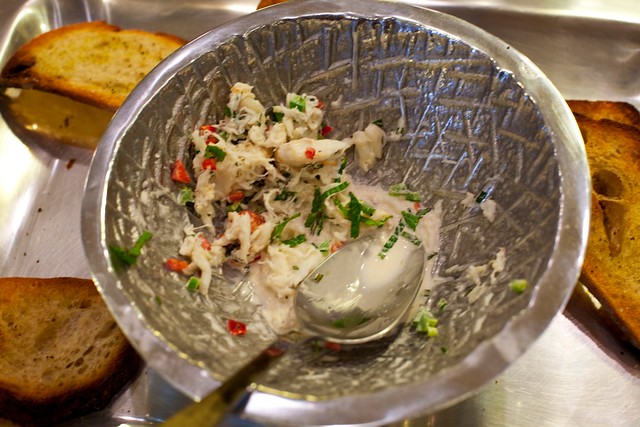
- In a medium bowl, gently combine the crabmeat, mayo, lime juice, mint, fresno chile, and 1/2 the jalapeno. Season with salt and pepper to taste.
- Garnish with extra mint and the other 1/2 of the jalapeno. Serve with toasted bread.
Tuesday, May 10, 2011
Maui
Hey guys!
Sorry for not being around for a bit. Mikey and I just got back from Maui (SO FUN) and I'm trying to get school stuff done (had a paper due today, mid-term tomorrow, paper next week, etc.).
I'll be back to blogging probably next week.
In the meantime, please enjoy these pictures from our vacation!
We had a blast :) We went SCUBA diving, snorkeling, to a luau, on a helicopter ride, and lounged about:
