My blog has moved!

You should be automatically redirected in 6 seconds. If not, visit
http://www.spachethespatula.com/
and update your bookmarks.

Showing posts with label mascarpone. Show all posts

Friday, February 25, 2011

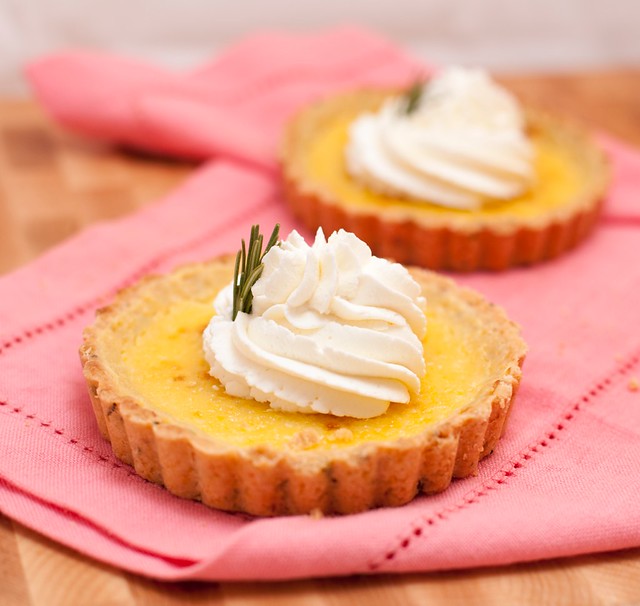
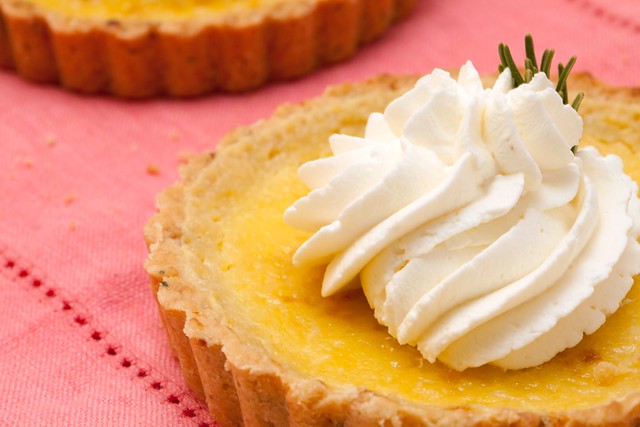
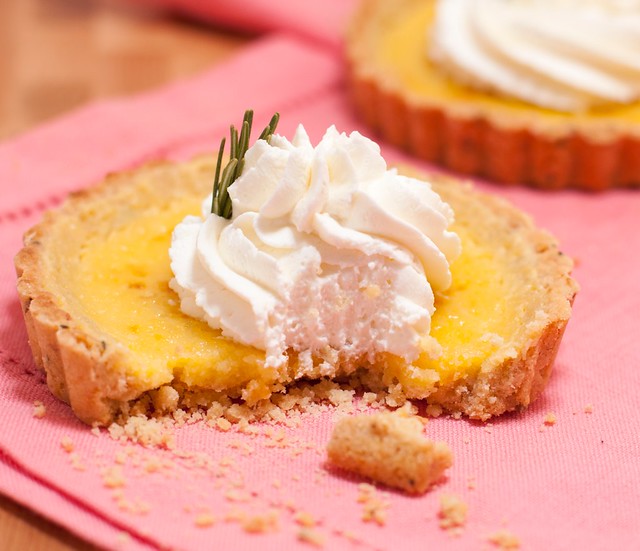
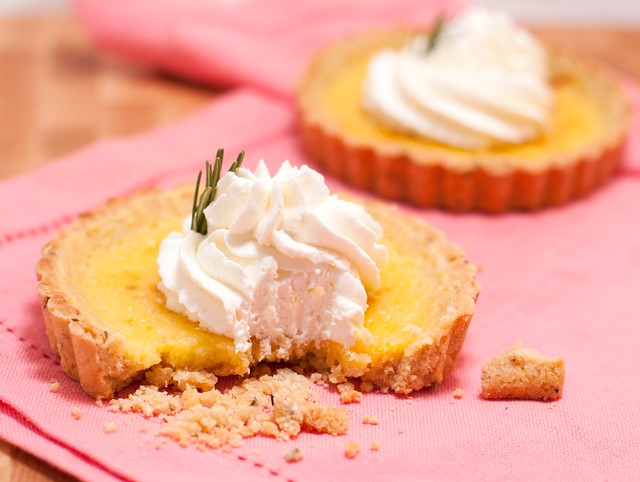
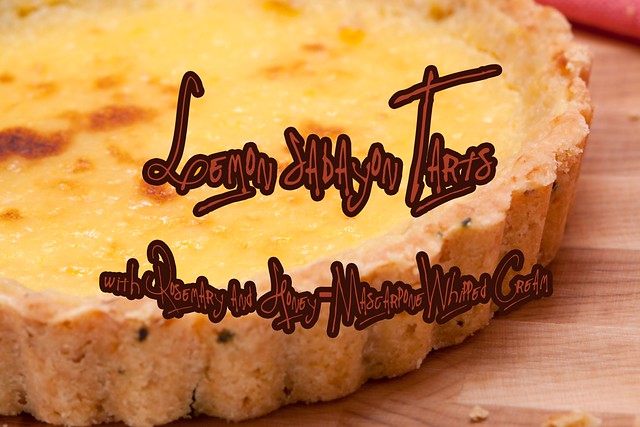
Thomas Keller's Lemon Sabayon Tarts with Rosemary and Honey-Mascarpone Whipped Cream

IMG_0253

So remember when I said a few weeks ago that I was going to share the dessert that I made for Mikey's parents' dinner party? Well here it finally is! The reason it took so long is that last time I had no time to photograph the tarts before I handed them over to Amy, Mikey's mom, for her party. So, on Monday, while I had no class due to President's Day, I went over to his parents' home and Amy and I made them again!

These tarts are tasty and unique, and a wonderful finish to any meal. The best part is that the tartness and freshness from the lemons make them a lot lighter than a chocolate or ice cream dessert. The filling is creamy and smooth, and the pine nuts and rosemary in the crust add a nice earthiness. The honey-mascarpone whipped cream cuts the sourness from the citrus and ties the entire dessert together, leaving you with a dessert that looks and tastes far more sophisticated than it really is ;).

This dessert is fairly easy to make, but, you need to be ready for a workout because you will have to whisk continuously for a good 10-15 minutes. Having to do this twice in one day left my arm feeling like I just lifted weights at the gym! However, the whisking is the only truly difficult part of the recipe, and even that doesn't take any special skill.

I think that it would be fun to experiment with different nuts and herbs in the crust and different citrus in the filling. For instance, a brazil nut and maybe mint crust with a blood orange filling, or keep the pine nut crust and add in grapefruit as the filling! Adding cocoa powder into the crust might even be an interesting alteration.

If you have any extra sabayon, it is positively delectable served over fresh berries!

IMG_0272
IMG_0260
IMG_0279

Thomas Keller's Lemon Sabayon Tart with Rosemary
recipe slightly adapted from here
the crust recipe will make enough for 3 large tarts or an array of smaller ones (also, I wouldn't recommend  trying to third the crust recipe as it would be difficult to measure 1/3 of an egg)
the filling is for 1/3 of the crust recipe (I find it's easiest to make the filling in smaller batches)

crust:
  • 10 ounces (2 cups) toasted pine nuts (you simply must toast them; it makes all the difference)
  • 3 sprigs fresh rosemary
  • 1/3 cup granulated sugar
  • 1 lb (3 cups) all-purpose flour
  • 1 tsp sea salt
  • 8 ounces (2 sticks) unsalted butter, at room temperature
  • 1 large egg
  • 1 tsp pure vanilla extract
  1. Place the pine nuts in a food processor and pulse a few times. Add in the sugar, rosemary leaves, salt, and flour and continue to pulse until the nuts are finely ground.
  2. Transfer the mixture to the bowl of an electric mixer fitted with the paddle attachment. Add in the butter, egg, and vanilla extract and mix to incorporate.
  3. Divide the dough into three equal parts. Wrap each piece in plastic wrap and refrigerate for at least 10 minutes before using. (You can freeze any extra dough for up to a month.)
sabayon & assembly:
  • 2 large eggs, cold
  • 2 large egg yolks, cold
  • 3/4 cup sugar
  • 1/2 cup fresh lemon juice
  • 1-2 tbsp fresh lemon zest
  • 6 tbsp unsalted butter, cold and cut into 6 pieces
  1. Preheat the oven to 350 degrees. Butter and flour (I only buttered and it worked great) a 9-inch fluted tart pan (or rectangular equivalent- or many smaller tart pans) and refrigerate it while the oven preheats.
  2. Remove the tart pan from the fridge. Using your fingers, press the chilled dough into the tart pan(s), and up the sides.
  3. Bake the crust for 10 to 15 minutes, then rotate it and bake for 10-15 minutes more until evenly golden-brown. Remove the crust from the oven and let it cool while you make the sabayon filling.
  4. Bring about 1 1/2 inches of water to a oil in a pot that is slightly smaller than the diameter of the bowl you will be making your sabayon in.
  5. In a large metal or glass bowl, whisk together the eggs, yolks, and sugar for about a minute until the mixture is smooth. In a measuring cup, combine the lemon juice and zest; set aside.
  6. Set the bowl over the pot, creating a double boiler, and whisk the mixture vigorously. After about 2 1/2 minutes, when the eggs are foamy and have thickened, add 1/3 of the lemon juice. Continue to whisk vigorously, and after another 2 1/2 minutes when the mixture has thickened again add another 1/3 of the lemon juice. Again whisk for another 2 1/2 minutes and then add the final 1/3 of lemon juice. Whisk for 2-3 minutes until the mixture has thickened and is light in color. You can judge if it's thick enough by placing a wooden spoon in the mixture, taking it out, and running your finger down the back of it. If the trail left by your finger stays, it is thick enough.
  7. Turn off the heat and leave the bowl over the water. Whisk in the butter, a piece at a time.
  8. Pour the warm sabayon into the tart crust and place the tart pan on a baking sheet.
  9. Preheat the broiler. While the sabayon is still warm, place the tart under the broiler. Leaving the door of the oven open, brown the top of the sabayon, rotating if necessary to get an even color. (This won't take very long, so DON'T walk away!)
  10. Let the tart sit for at least an hour before serving. (I served mine at room tempeature but you could, alternatively, serve it chilled.) Serve with Whipped Honey-Mascarpone Cream recipe below).
Honey-Mascarpone Whipped Cream

ingredients:
  • 1 cup heavy whipping cream
  • 6 tbsp mascarpone
  • 2-3 tbsp honey
  1. Combine all ingredients in a bowl and whip until stiff peaks.
IMG_0277

Monday, August 9, 2010

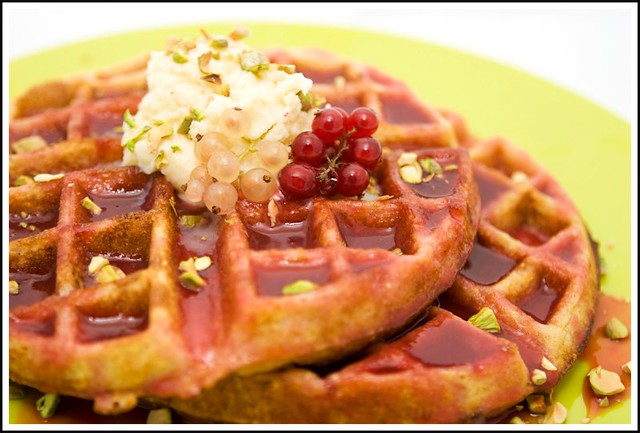
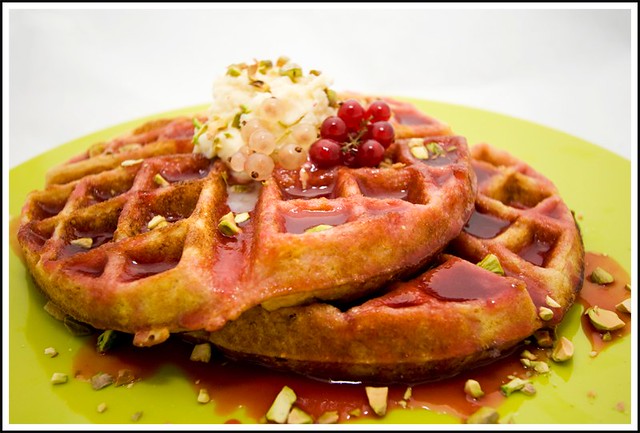
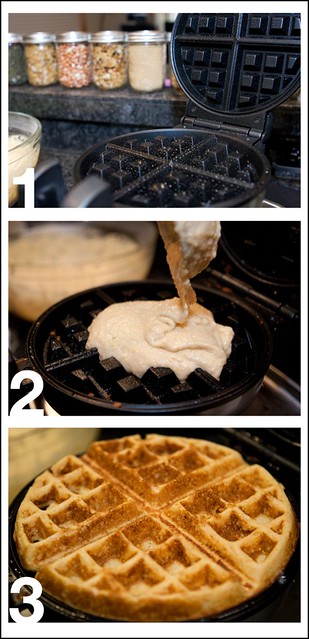
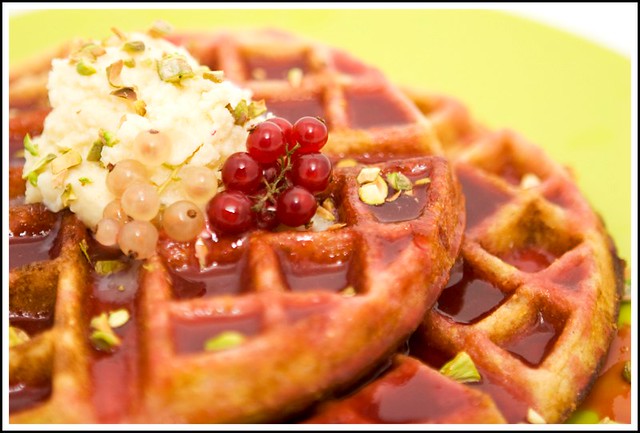
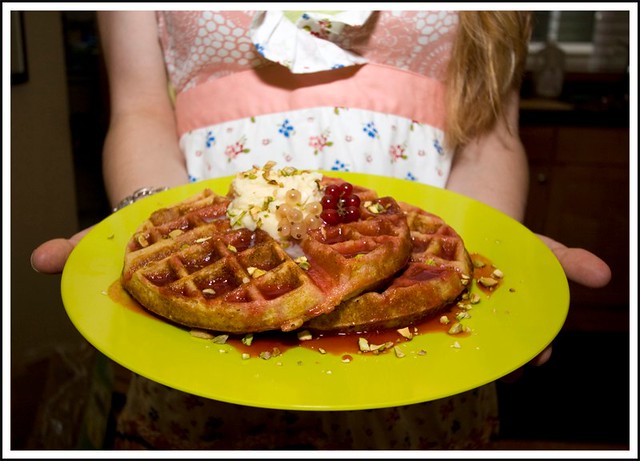
Cornmeal Waffles with Fresh Currant Syrup Topped with Honeyed Mascarpone and Pistachios

final1


A few days ago I entered an Iron Chef-style contest on an internet forum. The theme was "breakfast," and considering that is incredibly broad, I initially had absolutely no idea what I would choose to make. I thought about roasted asparagus with a poached egg and truffled breadcrumbs; I considered bacon pancakes or a breakfast pizza, but then I recalled the gorgeous fresh red and white currants that were sitting on my fridge and I knew exactly what I would make.


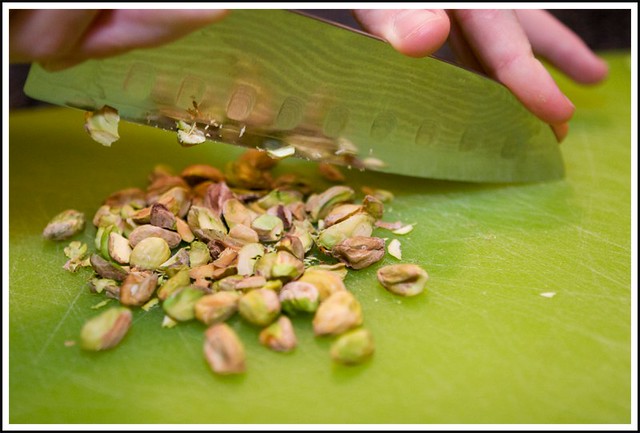
The cornmeal in these waffles gives them a really nice bite, and the fresh currant syrup is both refreshingly tart and sweet. The creamy honeyed mascarpone is a delicious alternative to whipped cream, and the pistachios add a satisfying crunch and saltiness that pairs with the currants remarkably well.


I have no idea if I placed (I think I'll know in a few days), but I'm proud of my entry, and I think it was pretty creative!


This post definitely has more pictures that my others simply because for the contest I had to take pictures of the process.


final3


Cornmeal Waffles with Fresh Currant Syrup Topped with Honeyed Mascarpone and Pistachios
recipe adapted from here

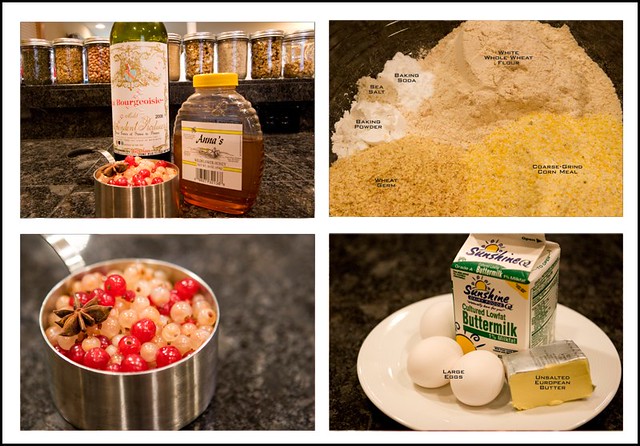
ingredients:

ingrediants
  • 1 cup white whole wheat flour
  • 3/4 cup coarse-grind cornmeal
  • 1/4 cup wheat germ
  • 2 tsp baking powder
  • 1 tsp baking soda
  • 1/4 tsp sea salt
  • 3 large eggs
  • 2 cups buttermilk, well-shaken
  • 6 tbsp unsalted butter, melted and cooled
  • Fresh Currant Syrup (recipe below)
  • mascarpone
  • honey
  • pistachios, toasted and chopped
batter
waffle
whipped
nuts
  1. Preheat your waffle iron, and also preheat your oven to 200 degrees.
  2. In a medium bowl, combine the flour, cornmeal, wheat germ, baking powder, baking soda, and salt. Set aside.
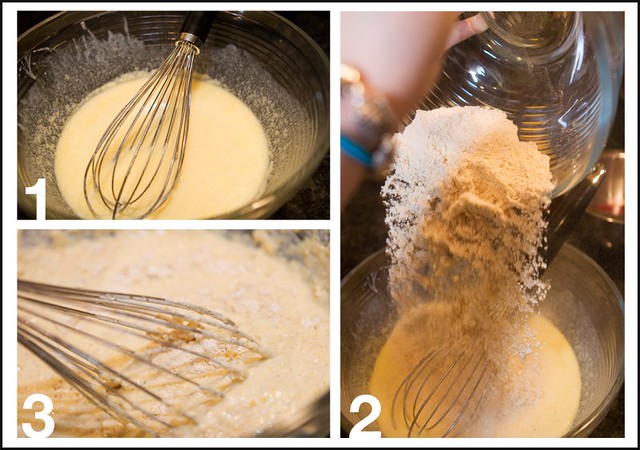
  3. In a large bowl, whisk together the melted butter, buttermilk, and eggs. Add in the flour mixture all at once and whisk to combine.
  4. Spray your waffle iron with nonstick spray and ladle the batter in. Cook according to your manufacturer's instructions. 
  5. Remove the cooked waffles and place on a baking sheet in the oven to keep warm until you're ready to serve.
  6. In a small bowl, combine a dollop of mascarpone with some honey and whip together with a spoon.
  7. Serve your waffles drizzled in the currant syrup with a dollop of the honeyed mascarpone and a sprinkled of pistachios.
Fresh Currant Syrup
recipe adapted from here

ingredients:
  • 1 cup fresh currants (I used a mixture of red and white)
  • 1/4 cup honey
  • 1/4 cup water
  • 2 tbsp red wine (I used a Merlot)
  • 1 whole star anise
currant
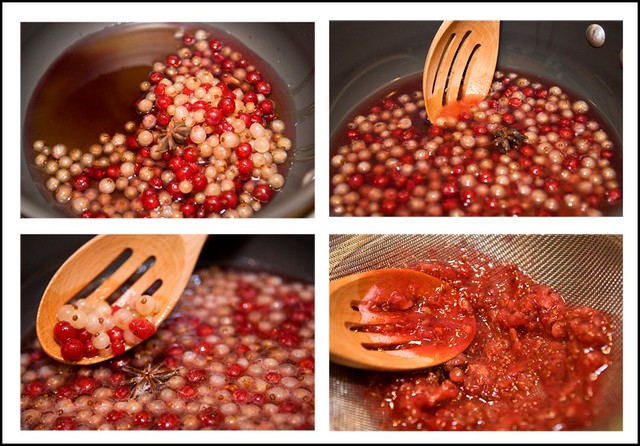
  1. Combine all of the ingredients in a saucepan and bring to a boil. Reduce the heat to low and simmer for 15-20 minutes, stirring fairly regularly, until the mixture has reduced by about half.
  2. Remove from heat and strain through a fine sieve, being sure to press all of the liquid out of the solids. Serve with Cornmeal Waffles!
final2
final4

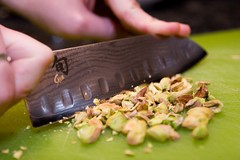
P.s.- This is the new GORGEOUS Shun knife that my wonderful boyfriend surprised me with for no reason at all that I use at any moment I possibly can because I still can't believe how awesome it is:

IMG_6749

Wednesday, July 28, 2010

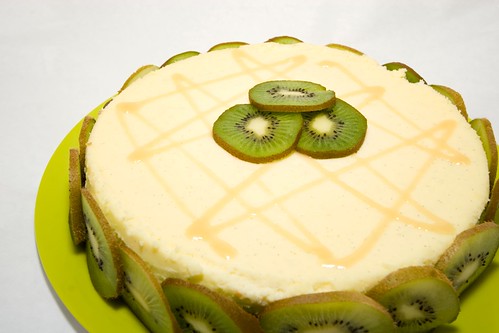
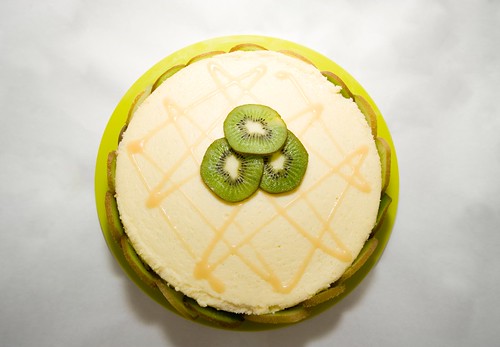
Vanilla Bean Mascarpone Cheesecake with Passion Fruit Caramel

IMG_6640


Let me start off by saying that this is possibly the best thing I have ever made.


A couple nights ago, we were invited to a grill-out at Mikey's parents' home, and Amy (his mom) asked if I could possibly bring a salad and dessert. You'll see the salad later, but this is the dessert I decided on- Vanilla Bean Mascarpone Cheesecake with Passion Fruit Caramel.
Now, I had never actually made cheesecake before, so it probably wasn't the best idea to try for the first time when I need to bring dessert to a dinner party with no back-up plan, but that's just how I roll :D. For never having made this, I can honestly say that it turned out next to perfect. It was that good.
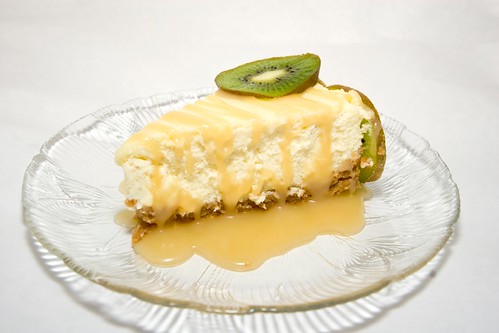
The cheesecake filling itself was creamy, yet light due to the mascarpone, and the salty cashew crust complimented it so gorgeously. The pinch of ginger in the crust shined through and added an intriguing aftertaste that had everybody asking, "What is that?" 


The real star of the show, in my opinion, was the caramel. Oh. My. Gosh. It was silky and sweet but not too sweet, and basically you could drizzle it on your shoe and I think it'd taste good. The original recipe had a separate recipe for a passionfruit caramel, but I didn't appreciate that it used passion fruit juice cocktail and corn syrup so I made my own from an adaptation of a random recipe for blood orange caramel (which I think would also be awesome and need to try ASAP).


This cheesecake was pretty much the ultimate ending to a great cook-out, and certainly had everyone talking. Mikey, who doesn't even like cheesecake mind you, went back for a second slice which should tell you something right there :). I highly recommend this recipe for your next gathering; trust me, you won't be disappointed.


IMG_6630
IMG_6636
IMG_6635


Vanilla Bean Mascarpone Cheesecake
recipe adapted from here

ingredients:
crust:
  • 3/4 cup salted roasted cashews
  • 1/4 cup brown sugar, packed
  • 3/4 cup all-purpose flour
  • 1/4 tsp salt
  • 1/8 tsp ground cinnamon
  • 1/8 tsp ground ginger
  • 6 tbsp unsalted butter, chilled and cut into 1/2-inch cubes
  • 1 large egg yolk
filling:
  • 2 8-ounce packages cream cheese, at room temperature (I used one package of regular and one of Neufchatel which just has 1/3 less fat)
  • 3/4 cup granulated sugar
  • pinch of salt
  • 1 vanilla bean split lengthwise
  • 2 8-ounce containers mascarpone cheese
  • 1/2-1/3 cup creme fraiche
  • 4 large eggs
other:
  • passion fruit caramel (recipe below)
  • tropical fruits, to decorate (I used 2-3 sliced kiwi)
  1. Preheat oven to 325 degrees. Wrap the outside of a 9-inch diameter springform pan with 2 3/4-ince sides with 2 layers of tin foil. Set aside.
  2. In a food processor, combine the cashews and brown sugar and finely grind. Add in the flour, salt, and spice and blend for about 5 seconds. Add in the butter, slowly, and blend until mixture is a coarse meal. Add in the egg yolk and pulse until moist clumps form.
  3. Press the dough into the bottom and 1/2-inch up the sides of the pan. Pierce the crust all over with a fork and bake for around 30 minutes, or until golden brown. Cool crust but maintain the oven temperature.
  4. In the bowl of an electric mixer fitted with the paddle attachment, combine the cream cheese, granulated sugar, and salt. Scrape in the seeds of the vanilla bean and beat until smooth and fluffy. Add in the mascarpone and creme fraiche and beat at low speed just until blended, scarping down the sides of the bowl. Add in the eggs, one at a time, beating to incorporate after each addition.
  5. Place the springform pan in a large roasting pan and fill with cheesecake filling. Place the roasting pan in the oven and fill the roasting pan with enough hot water to come about halfway up the sides of the springform pan (it's much easier to fill it with water when it's already in the oven). Cover the top of the springform pan with foil.
  6. Bake for about 30 minutes, and then check of the cheesecake, lifting the foil. Re-cover and bake for another 30 minutes and then check on it again. Continue to do this until cake is loosely set but jiggles all over when the pan is gently shaken. Mine cooked for about 2 hours total.
  7. When done, remove the springform pan from the water and set on a rack to cool for an hour. Refrigerate, uncovered until cold, at least 6 hours. (I made mine a day ahead and just kept it in the fridge.)
  8. To serve, cut around the sides of the pan with a knife and then remove sides of pan. Decorate with passion fruit caramel and sliced tropical fruit. Cut into wedges and serve with more caramel.
Passion Fruit Caramel
recipe adapted from here

ingredients:
  • 2 cups passion fruit juice (I used this one)
  • 1 cup heavy cream
  • 4 tbsp unsalted butter
  • 1 cup granulated sugar
  1. Bring the passionfruit juice to a simmer over medium-high heat in a small saucepan. Cook for about 20 minutes, until reduced to about a 1/4 cup. Strain the reduced juice through a fine sieve into a bowl. Add the cream, stir, and set aside.
  2. In a medium saucepan, melt the butter over medium heat. Add in the sugar and continue to cook, stirring almost constantly, until the sugar is lightly caramelized (about 5 minutes). Add in the juice/cream mixture and cook for about 5 minutes more, stirring frequently. Strain mixture through a fine sieve. Refrigerate until ready to use.
IMG_6639
IMG_6629

Monday, July 12, 2010

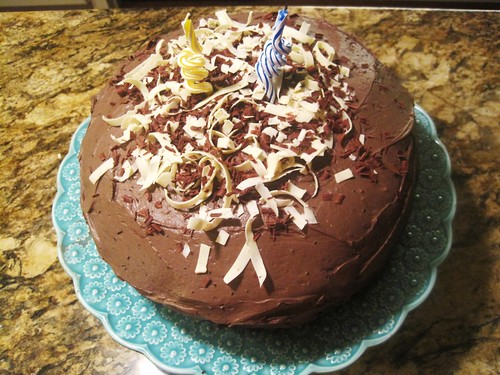
Coffee-Chocolate Layer Cake with Mocha-Mascarpone Frosting

IMG_3045


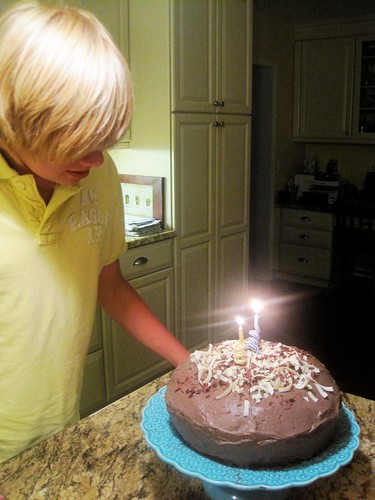
While I was home in Florida, my little brother, Thomas, had his thirteenth birthday. He's officially a teenager! That absolutely blows my mind; I seriously feel like it was just yesterday that I was thirteen, but that was nine years ago!
Anyways, I wanted to bake him a cake for this special day, and even though upon bringing up the idea to him I was met with "but I hate cake...", I refused to let it go, ha ha. You see, it is not very often that I have a *good* reason to bake something. Mostly, I just bake and bake and then I have no one to eat the results and they rot on the counter. So, when a *good* reason, like a birthday, comes around, you're getting a dang cake!


This cake was absolutely scrumptious, but the real star was the mocha-mascarpone frosting. Oh. My. Gosh. that stuff was freakin' delicious! I must have eaten 1/4 cup of it on its own while frosting the cake. And, though it looks nothing like the rich, dark color pictured in the original Bon Appetit recipe (as many other reviewers complained as well), the flavor was not at all lacking.
To be completely honest, the cake was nothing to jump for joy over. I mean, it was good- don't get me wrong- but not "what-is-this-glorious-creation-in-my-mouth-that-sends-my-taste-buds-into-a-production-of-Swan-Lake-on-my-tongue"-good. The frosting, on the other hand is; so my proposition for you is, either make this cake (as it is still quite delicious and moist), or make your own favorite chocolate cake recipe, but top it with this amazing frosting. Heck, you could just make the frosting and eat it straight from the bowl if you're not worried about appearing to be a complete lardy-lard to the rest of humanity- which I'm not... :D


p.s.- I totally *would* apologize for the appearance of my cake, but I think it looks pretty great considering both layers completely crumbled and I somehow managed to still stack 'em and frost 'em. They aren't kidding about that parchment paper you guys!
Also, once again I am going to have to ask you to look beyond the photo quality to the great recipe hidden by the harsh (or no) lighting and bizarre composition choices, hah.


IMG_3047
IMG_3048
IMG_3057


Coffee-Chocolate Layer Cake with Mocha-Mascarpone Frosting
recipe slightly adapted from here

ingredients:
cake:
  • 2 cups cake flour
  • 3/4 cup natural unsweetened cocoa powder (I used Hershey's Dark)
  • 1 1/2 tsp baking soda
  • 3/4 tsp salt
  • 1 1/2 sticks (3/4 cup) unsalted butter, at room temperature
  • 2 cups brown sugar, packed
  • 3 large eggs
  • 1 1/2 tsp pure vanilla extract
  • 1 cup buttermilk
  • 1 tbsp + 1 tsp instant espresso powder dissolved in 3/4 cup hot water
frosting:
  • 1/3 cup natural unsweetened cocoa powder
  • 1 tbsp instant espresso powder
  • 1 1/2 cups heavy whipping cream, divided
  • 1 1/3 cups granulated sugar
  • 2 8-ounce containers mascarpone cheese, chilled
  • chocolate curls for decoration (I just took a vegetable peeler to a white chocolate bar and a dark chocolate bar)
for cake:
  1. Preheat oven to 325 degrees. Butter and flour two 9-ince cake pans. Line the bottoms with parchment paper. Set aside.
  2. In a medium-sized bowl, combine the flour, cocoa powder, baking soda, and salt. Set aside.
  3. In the bowl of an electric mixer fitted with the paddle attachment, beat together the butter and brown sugar for about 4-5 minutes until creamy. Add in the eggs one at a time, beating well after each addition. Mix in the vanilla. Alternately add in the flour mixture and buttermilk, beginning and ending with the flour. Slowly add in the hot water/espresso and beat until just smooth.
  4. Divide the batter between the two prepared pans and smooth the tops. Bake cakes for 30-40 minutes, or until a toothpick inserted into the center comes out clean. Cool cakes in pans for 15 minutes before removing them from the pans to cool completely. *You can bake the cakes a day ahead; just store in plastic wrap at room temperature.
for frosting:
  1. In a large bowl, combine the cocoa powder and espresso powder. Set aside.
  2. Bring 1 cup of the cream to a boil in a small saucepan. Slowly pour the hot cream over the cocoa mixture and whisk to combine. Add in the remaining cream and the sugar and stir until sugar dissolves. Cover and chill for at least 2 hours.
  3. In the bowl of an electric mixer fitted with the whisk attachment, combine the chilled cocoa mixture and the mascarpone cheese. Beat on low speed until combined and smooth. Increase the mixer speed to medium-high and beat for about 2 minutes or until medium-firm peaks form when the whisk is lifted (don't overbeat or it will curdle).
  4. Place the first cake layer onto your cake platter or serving tray. Top it with about 1 3/4 cups of the frosting. Spread the frosting to the edges. Top with the second cake layer. Spread a thin layer of frosting over the entire cake (the crumb-coating), and refrigerate for about 10 minutes. Spread the remaining frosting over the cake and top with chocolate curls.
IMG_3054

Thursday, April 22, 2010

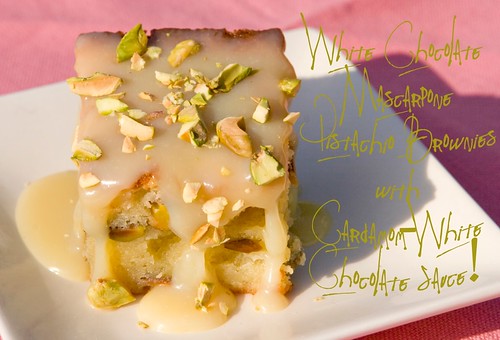
White Chocolate Mascarpone Pistachio Brownies with Cardamom-White Chocolate Sauce


IMG_5998 copy


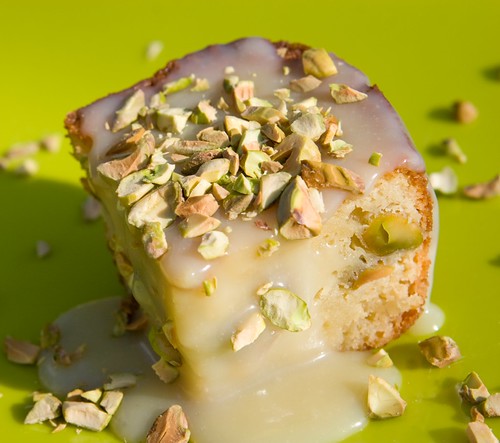
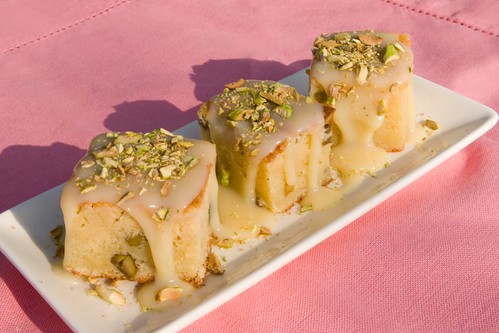
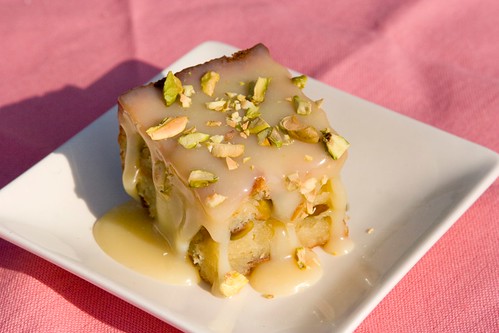
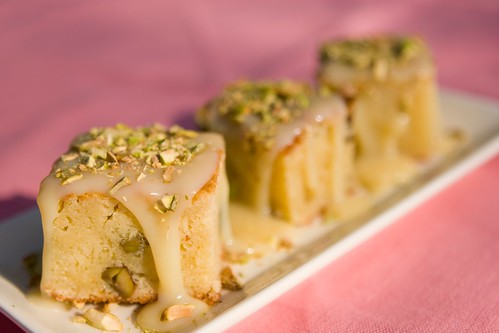
Okay, I am clearly having a brownie thing lately. It happens, you know? Anyways, I got the idea in my head a few days ago for a white chocolate brownie, and since then, I could not stop thinking about it! The thought intrigued me; I've never had, let alone seen a white chocolate brownie before, but I imagined that they would be elegant and unique.
I remembered how gorgeous my Mascarpone Brownies with a Honey-Chocolate Sauce turned out and I thought it would be interesting to adapt the recipe for a white chocolate brownie. Naturally, I had to change up the flavor profile, so I added in some pistachios. I also replaced honey in the sauce with cardamom which pairs magically with the pistachios. 
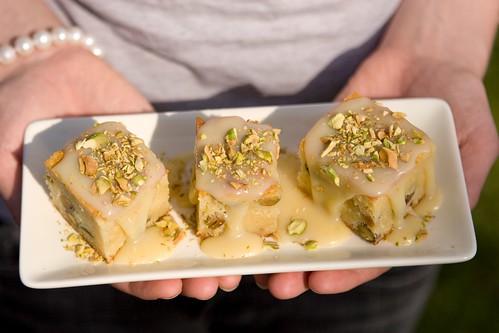
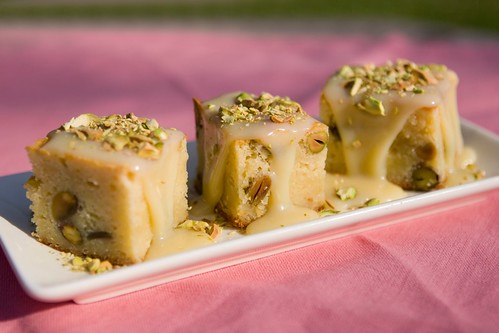
These white chocolate wonders turned out far better than I could have hoped for. Though, I'm not sure if I'm comfortable calling them brownies. They seem to be in a category all their own. They are soft, yet fudgy, and so unusual that they are sure to wow your friends and family. Plus, they are far easier to make then they appear (and sound, boy is that title a mouthful)!

IMG_6041
IMG_6017
IMG_6033


White Chocolate Mascarpone Pistachio Brownies
recipe generously adapted from here

ingredients:
  • 3/4 cup all purpose flour
  • 3/4 tsp baking powder
  • 1/2 tsp sea salt
  • 1/2 cup + 6 tbsp unsalted butter
  • 6 ounces white chocolate, chopped (or you can use chips; I used disks from Whole Foods)
  • 8 ounces mascarpone (my container had actually 8.8 ounces so I just threw it all in)
  • 1 cup granulated sugar
  • 4 large eggs
  • 2 tsp vanilla extract
  • 3/4 cup chopped, roasted pistachios (plus more for garnish)
  1. Preheat the oven to 350 degrees. Grease an 8x8-inch baking dish and set aside.
  2. Combine the flour, baking powder, and salt in a small bowl and set aside.
  3. Melt the white chocolate and 1/2 cup of butter together in microwave, checking and stirring every 30 seconds.
  4. In the bowl of an electric mixer fitted with the paddle attachment, beat the mascarpone, 6 tbsp butter, and sugar until combined. Add in the eggs one at a time, mixing thoroughly after each addition. Add in the vanilla and mix to combine. Pour in the melted chocolate mixture and beat until combined.
  5. Slowly add the dry ingredients to the wet ingredients and mix on low speed until just combined.
  6. Stir in the pistachios by hand.
  7. Pour the batter into the prepared baking dish. Bake for about 45 minutes or until the brownies are set and top is golden-brown.
  8. Remove from oven and allow them to cool to room temperature. Then, pop them in the fridge so they get nice and chilled. Trust me, they are FAR better cold and much easier to cut. Serve with warm Cardamom-White Chocolate Sauce and a garnish of chopped pistachios (the cold brownies with the warm sauce is totally where it's at.)

Cardamom-White Chocolate Sauce
  • 1/2 cup heavy cream
  • 8 cardamom pods, crushed
  • 5 ounces white chocolate
  1. Place the cardamom pods with seeds in a small sauce pan over medium-high heat. Stir until pods brown, about 5 minutes. Add the cream and bring the mixture to a light boil, then reduce heat to low and simmer for about 10 minutes.
  2. Turn the heat off and cover. Let steep at room temperature for about 30 minutes and then strain out the cardamom pods and seeds.
  3. Return the now cardamom infused cream to the stove and bring to a light boil. Turn off the heat and stir in the chocolate until fully melted and combined.
  4. Server warm over the brownies!
IMG_6011
IMG_6002
IMG_6012

Sunday, April 18, 2010

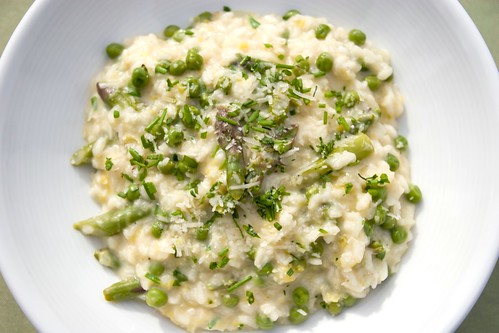
Ina's Spring Green Risotto


IMG_5921

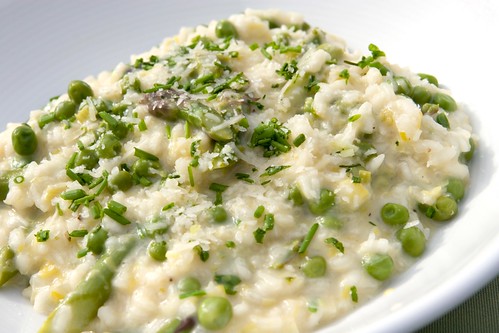
The arrival of spring has brought so many striking greens (especially the asparagus) to the produce section at the store! I wanted a recipe that I could use a bunch of them in and remembered that Ina had a risotto recipe- perfect!
Risotto is one of my very favorite dishes, and it had been quite a while since I last made any (see here and here); I decided that this Spring Green Risotto was the best way to let the greens I wanted to use shine at the peak of their season.
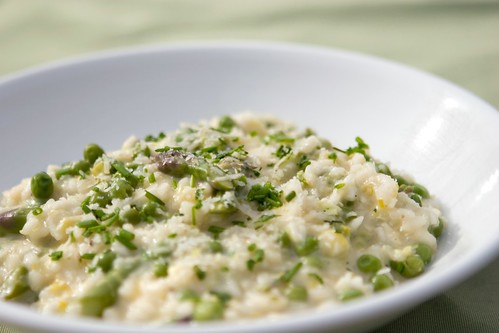
This risotto was pure heaven. In fact, it may just be the best risotto I have ever made! The mascarpone made it so creamy and rich, but with the abundance of asparagus, leeks, peas, and fennel, the dish was still fresh and vibrant. I loved the slight licorice flavor that the fennel brought in paired with the sweet peas, and the lemon added a wonderful brightness to the dish.
Also, I just want to stress that you absolutely must use a good parmesan cheese (parmigiano reggiano) in the risotto; it makes a night and day difference. 
I served my risotto as a main course, but I imagine that some Lemon Roasted Chicken would be sublime with it.

IMG_5942

Ina's Spring Green Risotto
recipe from here
serves 4 as a main dish or 6 as a side

ingredients:
  • 1 1/2 tbsp extra virgin olive oil
  • 1 1/2 tbsp butter
  • 2 leeks, chopped, white and light green parts only
  • 1 fennel bulb, chopped
  • 1 1/2 cups Arborio rice
  • 2/3 cups Sauvignon Blanc (or other dry white wine)
  • 4-6 cups chicken stock, simmering
  • 1 bunch thin asparagus, cut at a diagonal
  • 10 ounces fresh or frozen peas
  • freshly grated lemon zest, from 2 lemons
  • sea salt and freshly ground pepper
  • freshly squeezed lemon juice, from 1/2 a juicy lemon
  • 1/3 cup mascarpone cheese
  • 1/2 cup freshly grated parmigiano reggiano
  • 3 tbsp fresh chives, minced
  1. Heat the olive oil and butter in a medium saucepan or dutch oven over medium heat. Add the leeks and fennel and saute until tender, about 5 to 7 minutes.
  2. Add in the rice and stir for a minute to coat. Ad in the white wine and simmer over low heat, stirring constantly until most of the wine is absorbed.
  3. Add the chicken stock 2 ladles at a time, stirring constantly. Wait for the stock to be absorbed before adding more. This will take probably 25-35 minutes.
  4. While cooking the risotto, blanch the asparagus in boiling salted water for 4-5 minutes. Drain and immediately run under cold water.
  5. When the risotto has been cooking for about 15 minutes, add in the asparagus, peas, lemon zest, salt, and pepper. Continue cooking and adding stock until rice is tender but still has a bite to it.
  6. In a small bowl, combine the mascarpone and lemon juice.
  7. When the risotto is done, remove from heat and stir in the mascarpone mixture, parmigiano reggiano, and chives.
  8. Serve immediately and garnish with additional chives and parmigiano reggiano if desired.
IMG_5927
IMG_5936


    Sunday, February 7, 2010

    Decadent Chocolate Cupcakes with Mascarpone Frosting

    IMG_1410


    Being so close to Valentine's Day and all I've been nonstop craving something chocolatey and rich. If you haven't noticed I haven't really been baking lately since I've been so busy with school, but I took a break from typing up my lab report this evening to answer my cravings. 
    I borrowed from quite a few different recipes to make these decadent treats. For the cake portion, I wanted something really sumptuous so I added cocoa powder and two types of melted chocolates. But, I still wanted to keep it somewhat healthy (ha ha yeah right) so I used white whole wheat flour. I also subbed in skim milk to eliminate what fat I could.
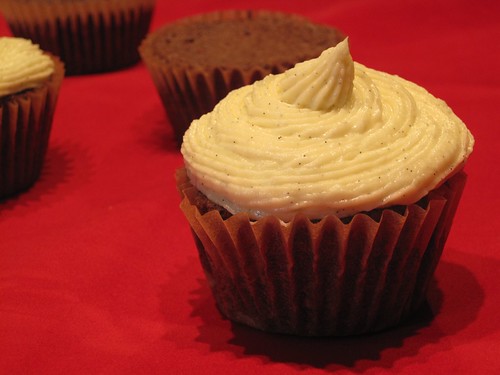
    I wanted the frosting to be a contrast to the sweet, rich cake portion so I opted for a mascarpone/cream cheese vanilla frosting that was heavenly. I used a full vanilla bean in this and you can definitely tell! It's wonderful!
    The cake part turned out almost brownie-like; the outside was a bit crisp, and then the inside was so soft. They're even good without the frosting, and actually not too bad for you- see bottom of post for nutritional info (but the frosting is really good).


    IMG_1384
    You can see the actual cupcakes are quite flat; that's apparently exactly how they are supposed to be as the original recipe I adapted noted that as well :)
    Also, you can see a little blue heart in the top photo. I had intended to make red ones, but my red gel food coloring was all dry :(! I thought blue would be cute too though. All it is is melted white chocolate dyed and then sprinkled with sugar and left to dry.


    Decadent Chocolate Cupcakes
    adapted from here
    makes 24 cupcakes

    ingredients:
    • 1/2 cup salted butter, at room temperature
    • 1 1/4 cups granulated sugar
    • 55g bittersweet chocolate
    • 55g semisweet chocolate
    • 2 large eggs, at room temperature
    • 3/4 cup unbleached white whole wheat flour
    • 1/2 cup unsweetened cocoa powder
    • 1/2 tsp baking powder
    • 1/4 tsp baking soda
    • 1/4 tsp salt
    • 1/2 cup fat free milk
    • 1 tsp vanilla paste
    1. Preheat the oven to 350 degrees. Line a muffin tin with paper liners and set aside.
    2. Combine the two chocolates in a microwave-safe bowl and microwave for 1 minute. Stir chocolate and if it's still not melted, microwave in 30 second intervals, stirring thoroughly after each. Let chocolate cool to about room temperature.
    3. In the bowl of an electric mixer fitted with a paddle attachment, cream together the butter and sugar for about 5 minutes until light and fluffy. Add in the melted chocolate and mix until combined. Add in the eggs, one at a time, mixing thoroughly after each (about 30 seconds).
    4. In a small bowl, combine the flour, cocoa powder, baking powder, baking soda, and salt. Set aside.
    5. In a measuring cup mix together the milk and vanilla paste. Set aside.
    6. Alternately add the flour mixture and milk to the chocolatey butter/sugar mixture, beginning and ending with the flour.
    7. Scoop into the lined muffin tins (I used a medium cookie scoop) about 1/2-2/3 full. Bake for 20-25 minutes or until a toothpick inserted into the center comes out clean. Allow to completely cool on a wire rack.
    Mascarpone Frosting
    slightly adapted from here


    This isn't enough frosting for all 24 cupcakes, so you may want to double or even triple the recipe.

    ingredients:
    • 3 ounces Neufchatel cream cheese, at room temperature
    • 1/3 cup mascarpone cheese, at room temperature
    • 6 tbsp unsalted butter, at room temperature
    • 2 tbsp raw honey
    • 1 vanilla bean, seeds scraped from inside (you can add the empty pod to your granulated sugar to infuse it with a vanilla-y taste!)
    1. Combine all ingredients in a bowl and beat until combined.
    2. Use to frost cooled cupcakes. You can either pipe the frosting on, or simply spread it.
    IMG_1460
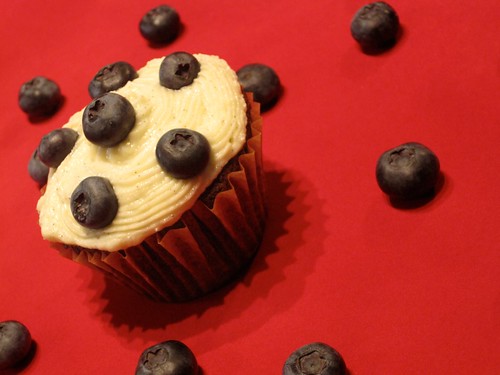
    I topped a few with blueberries because I think berries go great with both mascarpone and chocolate!


    Calories per cupcake WITHOUT frosting is 130 calories.
    For 1/12 of the frosting recipe there are 110 calories.
    Related Posts with Thumbnails