My blog has moved!

You should be automatically redirected in 6 seconds. If not, visit
http://www.spachethespatula.com/
and update your bookmarks.

Showing posts with label cajeta. Show all posts

Sunday, April 25, 2010

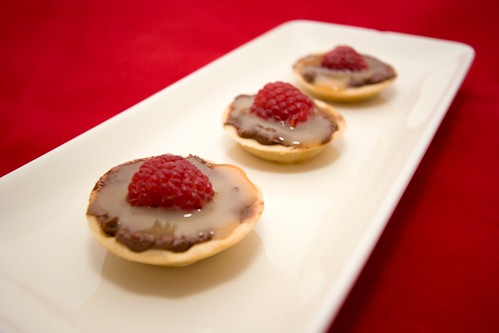
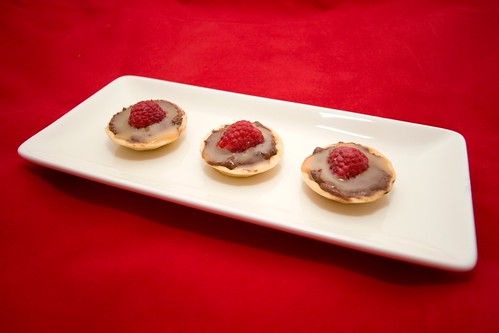
Teeny Tiny Dark Chocolate Cheesecakes with Cajeta and Raspberries

Teeny Tiny Dark Chocolate Cheesecakes with Cajeta and Raspberries

These are the adorable little cheesecakes that I made to go with my cute baby quiches for my boyfriend's curling team.
I used the exact same Sable & Rosenfeld Party Cups (by the way I bought them from Pasta & Co.) that I used for the quiches (they are quite versatile!). One of their suggestions for what to do with the little cups was mini chocolate cheesecakes. I thought that would be adorable but I wanted them to be a bit more special than that. I brainstormed a few ideas in my head- white chocolate drizzled on top? fruit? caramel? Then I thought, hey, how about cajeta instead of caramel? Cajeta is basically a goat's milk dulce de leche with a unique twang to it. It is ammmmaaazzing! I've made it multiple times since it's great drizzled over tart frozen yogurt, as well as a staple for these pretty Chocolate-Covered Peanut Cajeta Cups and my Chocolate Turtle Cookies.
A raspberry garnish finished off the little cakelettes. They turned out really well! These bite-sized desserts were a great alternative to the traditional rice krispie treats and box-mix brownies that littered the buffet table, and were second to go only to my Triple Chocolate Peanut Butter Brownies :)!

Teeny Tiny Dark Chocolate Cheesecakes with Cajeta and Raspberries

Teeny Tiny Dark Chocolate Cheesecakes with Cajeta and Raspberries
filling recipe adapted from here

ingredients:
  • as many little cups as your heart desires (I used about 2 dozen and had a ton of extra filling- which isn't a bad thing!)
  • 5 ounces dark chocolate
  • 2 (4 ounce) packages of cream cheese, at room temperature (I used Neufchatel)
  • 1/2 cup + 3 tbsp granulated sugar
  • 2 tbsp unsweetened cocoa powder (I used Dutch-processed)
  • 2 large eggs
  • cajeta, at room temperature (seriously, make the whole batch- you won't be sad about having extra!)
  • raspberries, sliced in half
  1. Preheat the oven to 325 degrees. Set the little cups out on baking sheets and set aside.
  2. Melt the chocolate in the microwave in 30 second increments, stirring after each to see if the chocolate is melted. Set aside.
  3. In an electric mixer fitted with the paddle attachment, cream together the cream cheese, sugar, and cocoa powder until smooth. Beat in the eggs, one at a time, until incorporated. Add in the melted chocolate and mix to combine.
  4. Spoon about a teaspoon of the cheesecake mixture into each cup. Bake for 12-15 minutes or until set.
  5. Refrigerate the cheesecake for at least 1/2 an hour and then top each with 1/4-1/2 teaspoon of cajeta and 1/2 a raspberry. Pop them back in the fridge until you're ready to serve.
Teeny Tiny Dark Chocolate Cheesecakes with Cajeta and Raspberries


By the way, I have NO idea why my links are a different color than usual. Does anyone else have this problem with Blogger/ do you know how to fix it? Thanks!

Monday, December 14, 2009

Chocolate Turtle Cookies

IMG_0916


I've been looking for another sweet recipe to bake after making the Salted Brown Butter Crispy Treats three times in the past two weeks at Mikey's request. As delicious as they are, it's a bit repetitive, hah.
As soon as I saw these turtle cookies over at Closet Cooking, I knew that they would be great with some home-made cajeta. I decided to make another batch of the gooey goodness especially for these cookies!
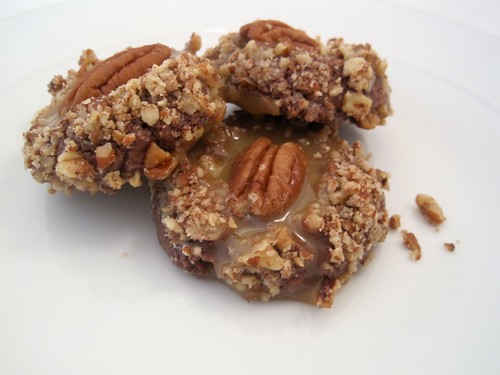
These cookies turned out amazing! The pecans and the cajeta marry so well together- I love the contrast between the crunch of the nuts and the creaminess of the cajeta.
I highly recommend them, whether you bake them for a holiday party, or just for you and yours to snack on .


IMG_0919


Chocolate Turtle Cookies
recipe slightly adapted from here

ingredients:
  • 1 cup all-purpose flour
  • 1/3 cup cocoa powder
  • 1/4 tsp coarse salt
  • 1/2 cup butter, softened
  • 2/3 cup granulated sugar
  • 1 large egg yolk
  • 2 tbsp milk (I used goat's milk to compliment the cajeta)
  • 1 tsp vanilla paste
  • 1 cup pecans, finely chopped
  • 2 large egg whites
  • 24 tsp cajeta
  • 24 pecan halves, toasted
  1. Mix the flour, cocoa, and salt in a medium-sized bowl. Set aside.
  2. In the bowl of an electric mixer fitted with a paddle attachment, cream together the butter and sugar until light and fluffy. Beat in the egg yolk, milk, and vanilla.
  3. Add the dry ingredients to the wet ingredients and mix until just combined. Lay plastic wrap directly over the dough and refrigerate for at least an hour.
  4. When ready to bake, preheat the oven to 350 degrees and line a baking sheet with parchment paper or a silicone baking mat.
  5. In a small bowl, whisk the egg whites until frothy.
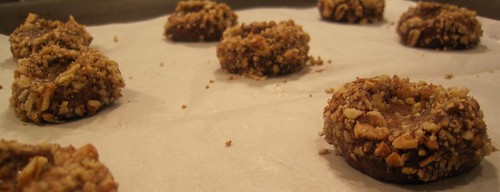
  6. Form the dough into 1 inch balls (I weighed each of mine out at 0.8 ounces). Dip the balls into the egg whites and then in the chopped pecans.
  7. Place the balls of dough onto the lined baking sheet, pecan side up. Indent the center of the balls with a spoon or finger. IMG_0904
  8. Bake the cookies for 10-12 minutes, rotating halfway through.
  9. Fill each cookie with about a teaspoon or so of the cajeta, and top with a toasted pecan half.
IMG_0915

Sunday, November 29, 2009

Chocolate-Covered Salted Peanut Cajeta Cups

IMG_0691


I first saw this basic recipe on David Lebovitz's blog a few months back and my initial thoughts were that I needed to make these little chocolate cups. Yet, somehow, months passed and I still hadn't made them. Well, when I saw the altered recipe over at Salty Seattle just a few days ago, the replacement of the caramel with the cajeta (basically a dulce de leche made with goat's milk instead of cow's) just sang to me and I immediately bought all of the ingredients.
These bitty cups are ah-mazing! The cajeta imparts a unique flavor that you can't quite obtain with simple caramel. It's so delicious that I'm sure you wont be disappointed by the fact that the cajeta recipe I'm giving you makes more cajeta than you'll need for the chocolate cups.


IMG_0686
Aren't they pretty?

IMG_0692


Chocolate-Covered Salted Peanut Cajeta Cups
recipe from here

ingredients:

filling:
  • 1/2 cup cajeta (recipe below)
  • 1/2 cup raw Spanish peanuts
  • 1 tbsp butter
  • 1 tsp fleur de sel
chocolate cups:
  • 20+ small baking cups
  • 6 ounces semisweet chocolate (I used Scharffen Berger)
  • 6 ounces bittersweet chocolate (I used Lindt)
  • Finishing salt (I used Cyprus flake salt and Hiwa Kai- black, charcoal-dusted, Hawaiin sea salt)
  1. Preheat oven to 350 degrees.
  2. Roast the peanuts, butter, and salt in the oven for about 15 minutes, stirring a couple times to ensure even coating (I roasted mine in a mini cast iron skillet because it happened to be the absolute perfect size!). Remove from the oven and stir the mixture into the cajeta. IMG_0599
  3. Melt the chocolate in a double boiler or in the microwave (checking every 30 seconds).
  4. Using a small spoon, dab a bit of the chocolate into the bottom of each baking cup. Spread it around so that it evenly coats the bottom and up the sides. IMG_0667 
  5. Now fill each cup with about 1 teaspoon of the cajeta/peanut mixture. IMG_0674 
  6. Finally, top each cup off with more of the chocolate and spread it around so the top is smooth and the chocolate drips down the sides of the baking cup just a bit. Sprinkle with some finishing salt before the chocolate dries.
  7. Place in the fridge to harden for at least 10 minutes and, voila!- Heaven in a cup!
IMG_0694

Cajeta
recipe from Rick Bayless (who I am absolutely obsessed with as of late)

ingredients:
  • 1 quart goat's milk
  • 1 cup granulated sugar
  • 1/2 cinnamon stick
  • 1/4 tsp of baking soda dissolved in 1 1/2 tsp water
  1. In a dutch oven, combine the milk, sugar and cinnamon stick over medium heat. Stir until the milk comes to a simmer and the sugar is dissolved. 
  2. Remove from the heat and stir in the baking soda/water. It should foam up, and after the bubbles subside, return to the heat.
  3. Maintain the mixture at a "brisk simmer" and stir regularly until the mixture becomes a pale golden color. This will probably take about an hour, and though it may seem like a while, the end product tastes more amazing than you will ever know.
  4. Begin stirring quite frequently, scraping down the sides, as the mixture turns a more caramel-y brownish color and thickens to a more syrup-like consistency. IMG_0645IMG_0648IMG_0647IMG_0646 Don't be alarmed when the mixture starts bubbling up like this. It wil do this many times during the cooking process and always goes back down (at least mine did).
  5. To test the cajeta, Rick suggests dropping a couple of drops on a cold plate. The caramel should be the consistency of a medium-thick caramel sauce when cool. He says that if your mixture is too thick, you should stir in a tablespoon of water and remove from the heat.
  6. When done, pour the cajeta through a fine-mesh strainer and, when cool, refrigerate until you are ready to use.
Related Posts with Thumbnails