My blog has moved!

You should be automatically redirected in 6 seconds. If not, visit
http://www.spachethespatula.com/
and update your bookmarks.

Showing posts with label cookies. Show all posts

Friday, April 8, 2011

Coconut Double-Chocolate Cookies (Vegan)


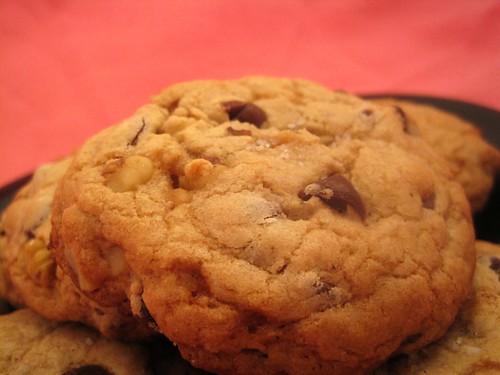
Cookies, specifically chocolate chip cookies, are my first, true baking love. They are the first treats I ever learned to bake myself, and they hold a special place near and dear to my heart. 

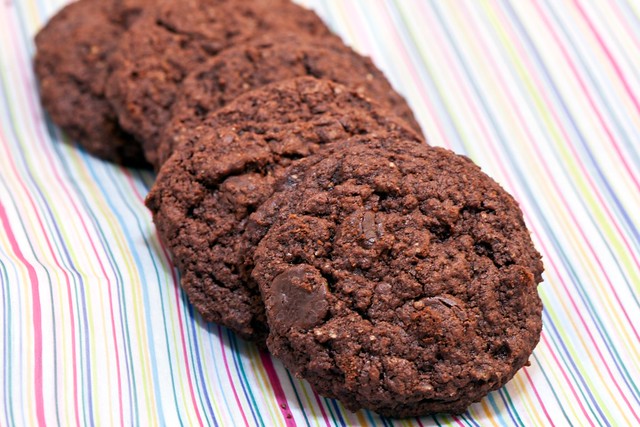
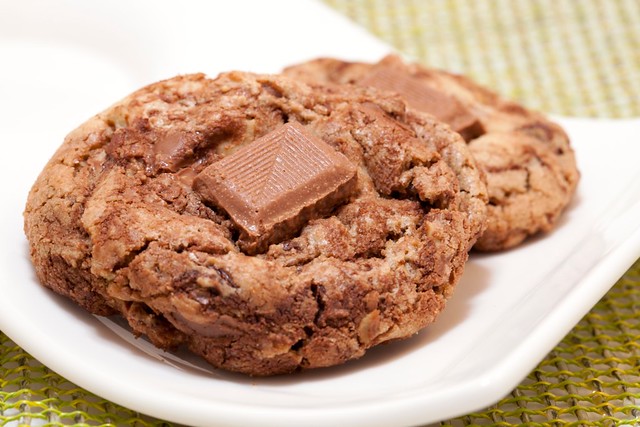
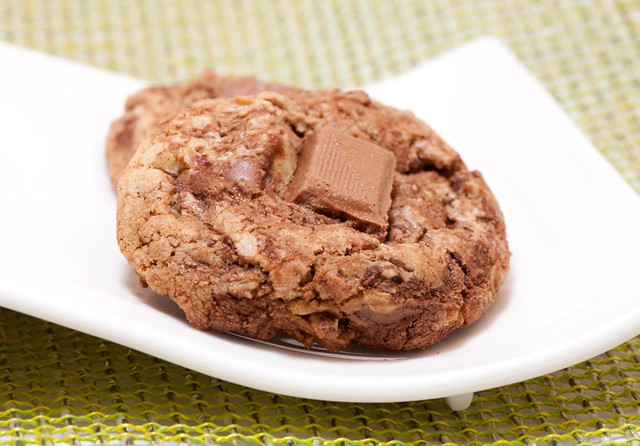
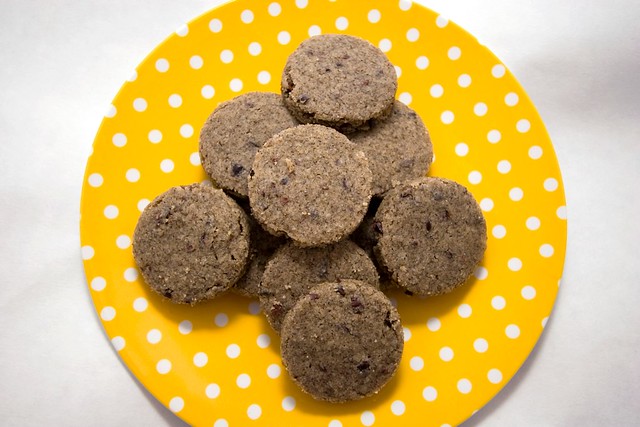
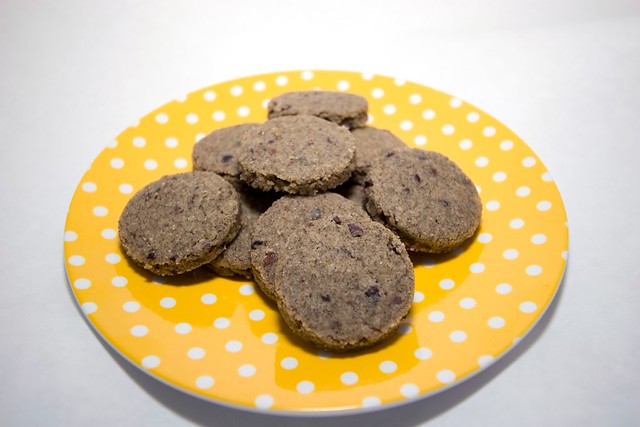
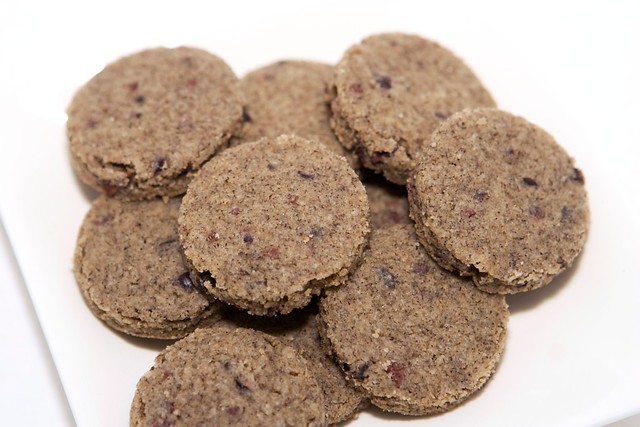
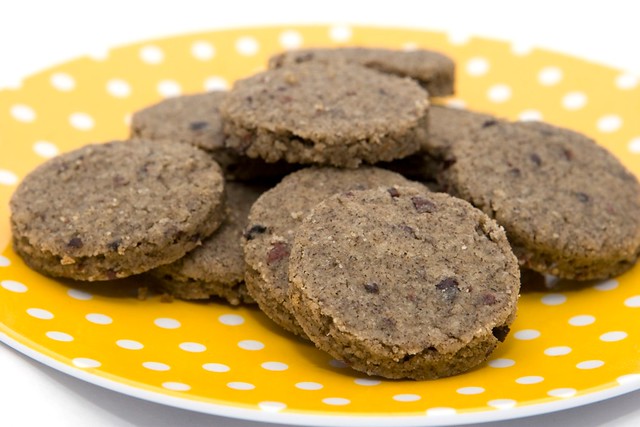
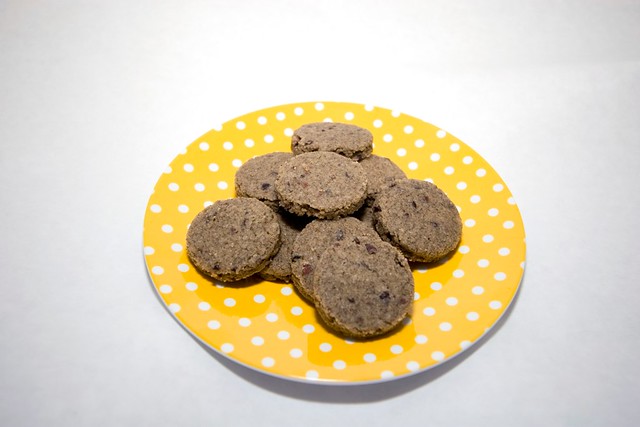
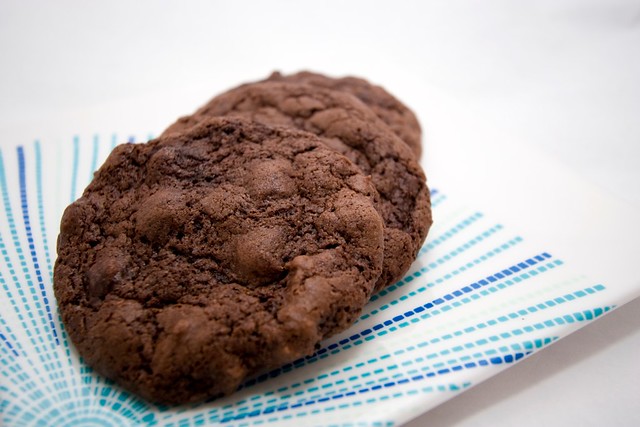
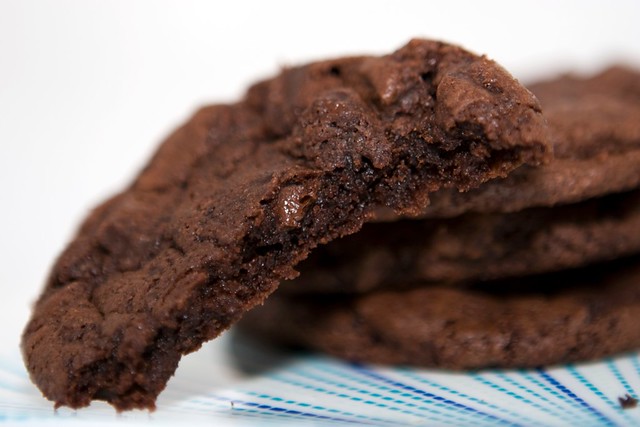
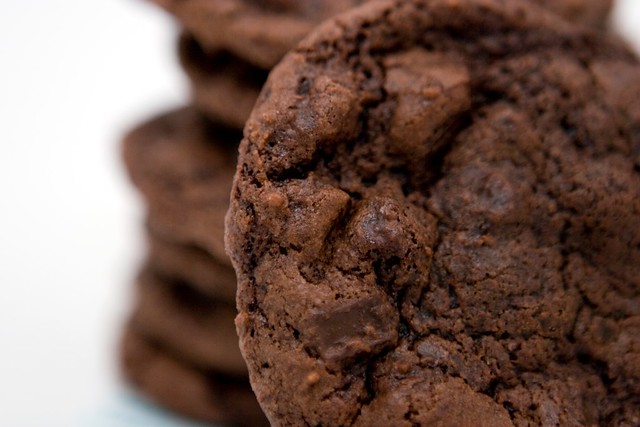
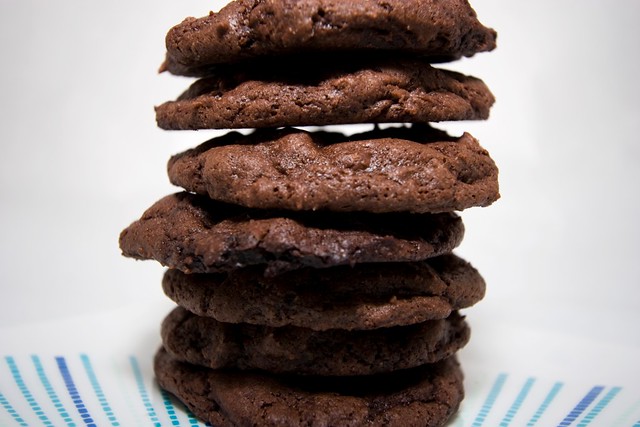
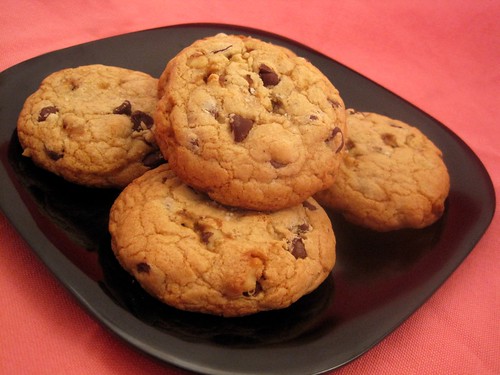
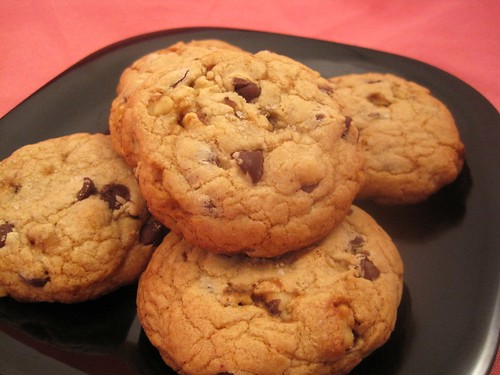
These particular cookies are by no means a traditional chocolate chip cookie (that recipe can be found HERE), but man are they addictively tasty! These cookies come together really quickly, and their chewy texture and rich flavor will leave you and your taste-testers questioning how on Earth these are vegan (seriously). 

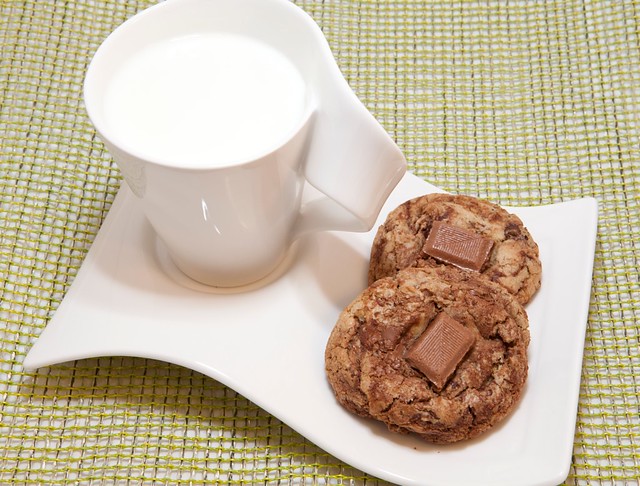
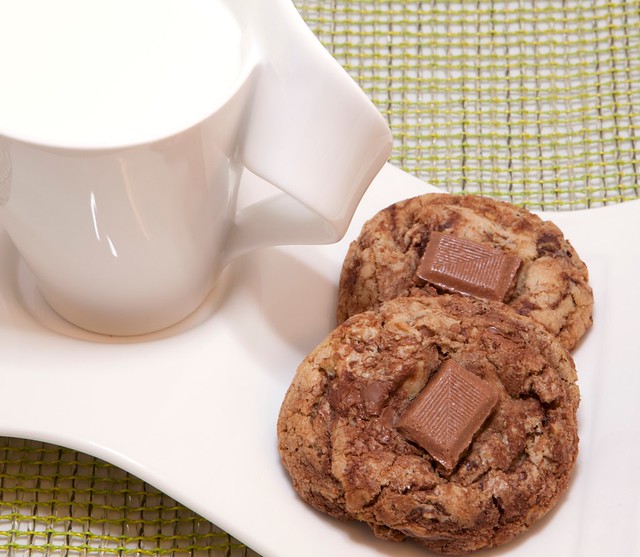
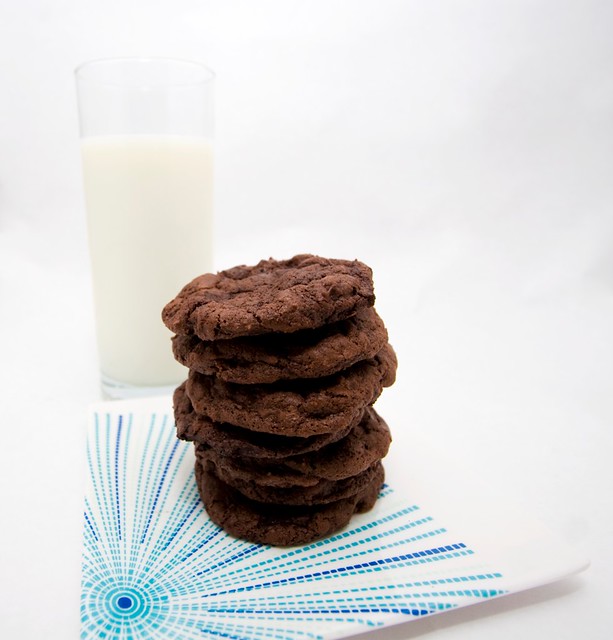
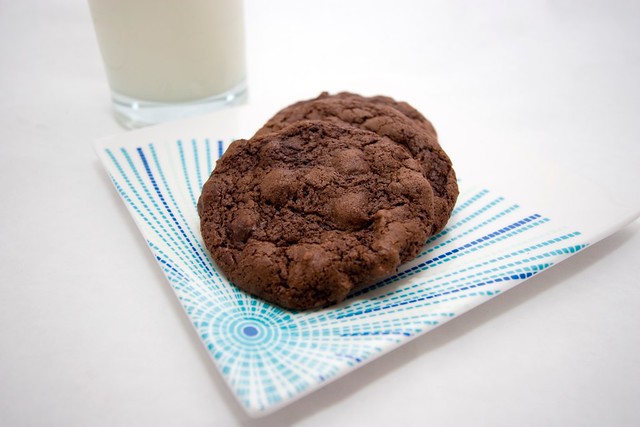
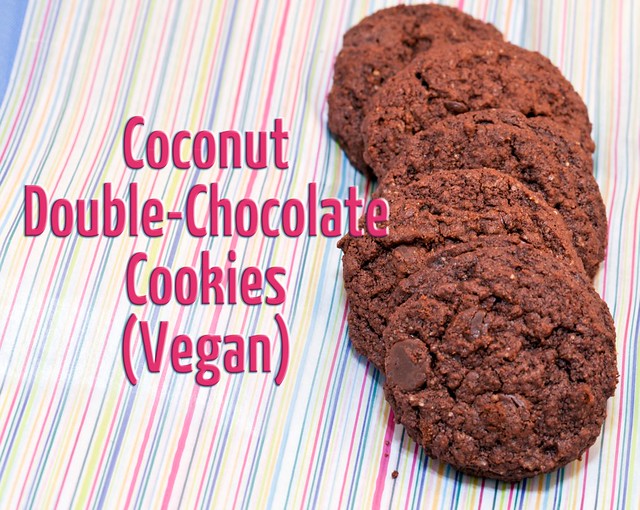
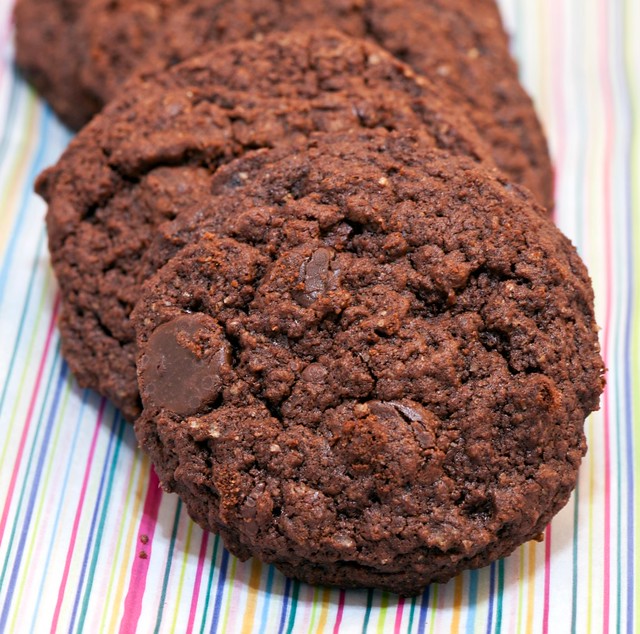
The coconut oil adds a coconut flavor that is subtle enough not to overpower the cookie, but deepens the overall taste of it in an intriguing manner. Make sure you have a glass on milk on hand (be it cow, soy, almond, etc.), because these babies are ULTRA chocolatey, in the best possible way.


Coconut Double-Chocolate Cookies (Vegan)
recipe from here

ingredients:
  • 1/2 cup unrefined coconut oil, not in liquid form
  • 2/3 cup dark brown sugar
  • 8 ounces semi-sweet (vegan) chocolate, chips or chopped
  • 3 tbsp ground flax
  • 6 tbsp warm water
  • 2 tsp pure vanilla extract
  • 1 cup whole wheat pastry flour
  • 1/2 cup cocoa powder
  • 1/2 tsp baking soda
  • 1/2 tsp sea salt
  1. Preheat oven to 325 degrees. Line baking sheet with a silicone baking mat or parchment paper; set aside.
  2. In a small bowl, combine the flour, cocoa powder, baking soda, and salt; set aside.
  3. In the bowl of an electric mixer fitted with the paddle attachment, combine the sugar and coconut oil and beat well.
  4. Combine the water and flax and set aside to gel.
  5. Put the chocolate in a microwave-safe bowl and heat in the microwave in 30-second-intervals until melted; allow to cool for a minute.
  6. Add the gelled flax and melted chocolate to the coconut oil/sugar and beat until incorporated.
  7. Slowly add in the flour mixture and beat on low speed until combined. Stir in the chocolate.
  8. Scoop 1-2 tablespoon-sized mounts onto your prepared baking sheet. Bake for 10-12 minutes. Allow to cool on the baking sheet for a bit before transferring to a wire baking rack to cool further.

Friday, February 4, 2011

Brown Butter Chocolate Walnut Cookies

IMG_0091

Is there anyone out there who doesn't enjoy a good chocolate chip cookie? If so, they should probably head to a doctor and get that checked out because I'm not sure that it's normal.

These cookies are truly something amazing. The brown butter gives them a distinctive nutty flavor that it further complemented by the crunchy walnuts. They are also incredibly chocolatey. I love the way the chocolate chips melt a bit in the warm dough to create scrumptious ribbons of chocolate throughout.

You certainly don't have to add the specialty chocolate squares on top of (or inside of!) the cookies, but it  really puts these delectable delights over the top. I used a milk chocolate bar that was mixed with bits of Christmas spice cookies that I found to really enhance all of the flavors, but I encourage you to play around with any chocolate bar that catches your eye! I think white chocolate would be heavenly, or you could even try a caramel-filled chocolate!

IMG_0090

I find these cookies (like all chocolate chip cookies :P) are best eaten warm, when the chocolate is all melty, with a big class of cold milk- total bliss!

IMG_0107
IMG_0105

I also went ahead and stuffed the specialty chocolate into the center of 1/4 of the cookies for an ooey-gooey treat. They turned out more round and sphere-like, almost like ice cream scoops of delectable cookie!

IMG_0126
IMG_0119
IMG_0128

Brown Butter Chocolate Walnut Cookies
makes roughly 3 dozen cookies

ingredients:
  • 1 cup (2 sticks) unsalted butter
  • 2 cups chopped walnuts
  • 1 cup dark brown sugar
  • 1/2 cup granulated sugar
  • 1 large egg + 1 large egg yolk
  • 1 tbsp pure vanilla extract
  • 2 cups all-purpose flour
  • 1/2 tsp baking soda
  • 1 tsp kosher salt
  • 2 cups chocolate chips (I used 1/2 dark chocolate and 1/2 milk chocolate)
  • optional: specialty candy bar separated into sections (I used a Milk Chocolate with Spiced Cookies Divine chocolate bar)
  1. Preheat oven to 350 degrees. Line a baking sheet with a silicone baking mat or parchment paper; set aside.
  2. In a small saucepan, brown the butter over medium heat. The melted butter should foam up and then subside. It will be a golden-brown color when done and smell nice and nutty. Remove from heat and set aside.
  3. In a medium bowl, combine the flour, baking soda, and salt. Set aside.
  4. In the same pan that you browned the butter, toast the walnuts over medium heat. You'll be able to smell them when they are done; set aside.
  5. In the bowl of an electric mixer fitted with the paddle attachment, combine the warm brown butter and sugars on medium-high speed. Slowly add in the egg, egg yolk, and vanilla and beat until combined. The mixture should look very silky and brown. Slowly add the flour mixture in and beat on low speed until just combined. Stir in the walnuts and chocolate chips. The warm mixture should melt the chocolate about half-way so that ribbons of chocolate form throughout the dough.
  6. Scoop 1-2 tablespoon sized balls onto prepared baking sheet. If using, press a square of the specialty chocolate onto the top of each dough ball. (Alternatively, you can press the square into the middle of the dough for a gooey surprise when you bite in!)
  7. Bake for 10-12 minutes until golden (they may appear doughy still but they will be perfect when they set up). Let cool on the baking sheet for 2 minutes before transferring to a rack to cool further.
IMG_0085
IMG_0110

Friday, November 5, 2010

Salted Honey Lavender Shortbread

IMG_7087


It's no secret that I love shortbread....


... but I also adore salty sweets and recently received a bunch of culinary lavender for my birthday (considering my birthday was at the end of September I guess it's not so recent but I just got around to using it haha), so when I came across these shortbread squares it's safe to say I was absolutely smitten.

These cookies are buttery, salty, perfectly crumbly but not overly messy, and infused with a wonderful lavender flavor without being too floral-y of perfume-y. They make a beautiful dessert with a dollop of freshly whipped cream, or a great afternoon snack with a cup of piping hot tea :).

As an avid shortbread fan, these cookies are some of the best I have ever had (and let me tell you I've had quite a few varieties)! Not to mention the fact that these cookies are extremely simple to make thanks to the fact that you just press all of the dough into a pan and then cut them after they are baked. It also makes for easy clean-up considering you only really dirty your mixing bowl and baking tin!

IMG_7092
IMG_7078
IMG_7079
IMG_7085

Salted Honey Lavender Shortbread
recipe from here
makes 16 cookie bars

ingredients:
  • 7 1/4 ounces (2 1/2 cups) all-purpose flour
  • 2 tbsp corn starch
  • 2 1/4 ounces (1/3 cup) granulated sugar
  • 1 tsp culinary lavender
  • 6 1/2 ounces (3/4 cup or 1 1/2 sticks) unsalted butter, cut into small pieces
  • 1 tsp sea salt + more to top the cookies (I used Cyprus Flake Sea Salt which is pyramid-shaped, but any flaky salt would work i.e. fleur de sel)
  • 3 tbsp honey
  1. Preheat oven to 350 degrees. Grease an 8"x8"baking tin with butter or non-stick spray. Line with parchment paper and grease the parchment paper as well (make sure there is enough overhang of the parchment paper so that you can easily lift the cookies out of the tin). Set aside.
  2. (This step is optional but I find it distributes the lavender better.) In a food processor whir together the sugar and lavender for about a minute until the lavender buds are chopped and distributed throughout the sugar and the sugar has a purple hue (careful, it gets quite powdery).
  3. In the bowl of an electric mixer fitted with the paddle attachment, combine all of the ingredients and mix in low speed until combined (it's fine if the dough is crumbly).
  4. Press the dough into the prepared tin. With a fork, poke the surface of the dough all over.
  5. Bake for 30-40 minutes, or until golden brown and the cookies feel firm when lightly pressed mine baked for 30 minutes).
  6. After you remove to cookies from the oven, sprinkle the tops with sea salt. Allow to fully cool in the pan before removing and slicing into 16 equal squares.
IMG_7075
IMG_7080

Saturday, October 30, 2010

Spooky Spider Cookies

Looking for a last minute Halloween treat? Try these super simple (super cute) cookies that I made last year! They take almost no effort at all and they are a huge hit with kids! Best of all, you probably have nearly all of the ingredients on hand!
[Post originally from 10/27/09] 

IMG_0206 

My little sister needed some Halloween themed goodies to bring to her high school dance this evening and these were quick and super easy.

They are a bit rich for my taste buds, but perfect for a bunch of kids trying to satisfy their holiday sweet-tooth at a school function! Plus, look how adorable they are!


IMG_0207 


Spooky Spider Cookies 
recipe from here 

ingredients: 
  • 2 cups all-purpose flour 
  • 1/2 tsp baking powder 
  • 1/2 tsp salt 
  • 1/8 tsp baking soda 
  • 2 tbsp unsweetened cocoa powder 
  • 10 tbsp unsalted butter, at room temperature 
  • 1/2 cup light brown sugar 
  • 1/4 cup granulated sugar 
  • 1 egg, at room temperature 
  • 1 tsp vanilla extract 
  • 1 bag thin pretzel sticks 
  • 11.5 ounce bag of dark chocolate chips (I used Ghirardelli 60% bittersweet) 
  • 2 tbsp vegetable oil 
  • 6+ ounces chocolate sprinkles 
  • small red candies (I used cinnamon hard candies) 
  1. Preheat oven to 350 degrees. 
  2. In a medium-sized bowl combine the flour, salt, baking soda, baking powder, and cocoa powder. Set aside. 
  3. In a large bowl cream together the butter and sugars. Add the egg and vanilla and beat until combined. 
  4. Gradually add in the flour mixture and beat until just combined. The dough should look slightly dry. 
  5. Form tablespoon sized balls with the dough and place on a cookie sheet. The dough will not really spread while baking so there is no need to place them too far from one another. 
  6. Break the pretzel sticks in half and and stick 8 halves into each ball (4 on each side). 
  7. Bake for 12 minutes. Remove from cookie sheet and cool on a wire rack. 
  8. Combine the chocolate chips and oil together in a bowl and melt in the microwave in 30 second intervals. 
  9. With a pastry or basting brush, paint the cookies completely, including the pretzels. Cover with sprinkles and push two red candies into each cookie for eyes. 
IMG_0209

Monday, October 18, 2010

Spiced Chocolate Pumpkin Whoopie Pies

IMG_7008


I am SO excited that it's fall: the cool weather, warm-colored leaves, sitting by the toasty fire, and LOTS AND LOTS of pumpkin! I cannot even begin to describe my love for the big orange squash, buuuut I can show you:


...and that's only the stuff I've actually posted. I think it's safe to say that I'm more than a little obsessed. Hence, when I saw these whoopie pies I absolutely HAD to try them. Plus, they are almost "too" perfect for Halloween; check out that black and orange combo (also note the adorable spooky cupcake liners :) ).

I had never made whoopie pies before, and though I was a bit nervous, I had always wanted to give them a try. Honestly, I don't know what I was worried about. They could not have been easier to make and I cannot wait to try my hand at some more fun flavor combinations (though it will, of course, be hard to top pumpkin).

These turned out absolutely fabulous! The cookies (cake?) turned out perfectly soft and pillowy, and the filling was all I had hoped it would be- spice-y (not spicy), pumpkin-y rich, and ultra creamy- a sweet, little package of fall in edible form!

I sent the whoopie pies to work with Mikey and he came home with empty tupperware- a definite good sign! Apparently they were quite a hit :D.

IMG_7009
IMG_7001
IMG_7013

Spiced Chocolate Pumpkin Whoopie Pies
recipe slightly adapted from here
makes roughly 35 (fairly large) whoopie pies

cookie ingredients:
  • 3 1/2 cups all-purpose flour
  • 1 1/2 cups unsweetened cocoa powder (I used Dutch-processed)
  • 1 tbsp baking soda
  • 1 tsp sea salt
  • 2 tbsp unsalted butter, at room temperature
  • 1/2 cup vegetable shortening
  • 1 cup granulated sugar
  • 1 cup packed dark-brown sugar
  • 2 lage eggs
  • 2 cups whole milk
  • 2 tsp pure vanilla extract (not so funny story: I thought the vanilla was my Diet Coke while baking and I took a MASSIVE swig. I DO NOT recommend it.)
filling ingredients:
  • 8 oz cream cheese, at room temperature (I used Neufchatel which has 1/3 less fat)
  • 2 sticks (1 cup) unsalted butter, at room temperature
  • 1 cup confectioners' sugar
  • 3/4 cup canned pure pumpkin
  • grated cinnamon, to taste
  • freshly grated nutmeg, to taste (I used close to maybe 3/4 tbsp of each- possibly more- I like mine quite fragrant.)
Cookies:
  1. Preheat oven to 375 degrees. Line baking sheets with silicone baking mats or parchment paper; set aside.
  2. In a medium bowl, combine the flour, cocoa powder, baking soda, and salt; set aside.
  3. In the bowl of an electric mixer fitted with the paddle attachment, mix together the butter, shortening, and sugars for about 3 minutes until creamy and smooth. Add in the eggs and vanilla and mix for around 2 more minutes.
  4. Alternately add in the flour mixture and milk on low speed, beginning and ending with the flour.
  5. Scoop dough 2-inches apart onto prepared baking sheet in about a tablespoon-sized mound (I used a small cookie scoop.). Bake for 12 minutes or until the cookies spring back when lightly touched.
  6. Allow cookies to cool on baking sheet for 5-10minutes before transferring to a wire rack to cool completely.
Filling:
  1. In a medium bowl, beat together the cream cheese, butter and confectioners' sugar until smooth.
  2. Add in the pumpkin and spices and mic until smooth, scraping down the bowl as necessary.
To assemble:
  1. Spoon a tablespoon-sized amount of filling onto the flat side of one of the cookies and top with another cookie. Repeat the sandwich-mking process with the rest of the cookies/filling.
IMG_7002
IMG_6993
IMG_7012

Tuesday, September 28, 2010

Nibby Buckwheat Butter Cookies

IMG_6931


Man, these past few of weeks have been insanely busy (which would explain the lack of posts). I just had my 22nd birthday about a week ago, and my two very best friends flew all the way up to Seattle from Florida to celebrate it with me!
On top of having my birthday, I've been trying to get all of my things in order for school to start TOMORROW (I'm seriously freaking out. It's my senior year!), and I managed to get myself sick for a whole freakin' week!


So, the point is, I do apologize for not updating in quite some time, but hopefully this peace offering of these buttery, sweet, hearty cookies will satisfy :).


These cookies are really something else. While they may not be the prettiest girl at the ball, they certainly are tasty! They're rich and crumbly like shortbread, but the buckwheat brings in a nuttiness that pairs so nicely with the crunchy tidbits of cocoa nibs. They are also incredibly easy to make, and only use six ingredients!


I decided to make my cookies bite-sized because I decided that you don't feel as bad eating seven tiny cookies as you do when you eat seven full-sized cookies :D. Plus, I mean come on, they are incredibly cute- like baby cookies!


I urge you to make these as I think you will find that they are a fun spin on the classic chocolate chip cookie that happens to be unbelievably addictive.


(Note: these cookies crumbled over ice cream = heaven!!)


IMG_6936
IMG_6949
IMG_6927


Nibby Buckwheat Butter Cookies
recipe from Pure Dessert by Alice Medrich (found here)

ingredients:
  • 1 1/4 cup (5.6 oz) all purpose flour
  • 3/4 cup (3 oz) buckwheat flour
  • 2 sticks (1 cup/ 8 oz) unsalted butter, softened
  • 2/3 cup granulated sugar
  • 1/4 tsp sea salt
  • 1/3 cup cocoa nibs
  • 1 1/2 tsp pure vanilla extract
  1. In a medium bowl, combine the flours sand salt. Set aside.
  2. In the bowl of an electric mixer fitted with the paddle attachment, mix together the butter and sugar for only about a minute. Add in the cocoa nibs and vanilla and mix. Add in the flour mixture and mix just until incorporated.
  3. Pour the dough out onto a clean surface and knead until it comes together. Roll the dough out into 2-4 flat patties (about the thickness you want your cookies- maybe 1/4 inch). Refrigerate for at least two hours.
  4. When ready to bake, preheat the oven to 350 degrees, and line your baking sheets with a silicone baking mat or parchment paper.
  5. Stamp out the cookies using a cookie cutter and place on the prepared baking sheets about an inch apart. Bake for 12-14 minutes.
  6. Remove the cookies from the oven. They will be incredibly soft and will have sort of melted down a bit in the oven. At this point i went ahead and stamped each cookie again with the cookie cutter so that they would look cleaner (plus it left me with a bunch of cookie crumbles that I promptly crumbles over ice cream). Let the cookies cool on the baking sheet for a few minutes before moving them to a rack to cool further.
IMG_6933

Monday, August 30, 2010

Ultra Chocolatey Buttermilk Cookies

[First and foremost: If you haven't entered my Goose Valley Giveaway yet, be sure to do so before midnight on the 2nd!]


IMG_6814


It had been quite some time since I last baked up a batch of cookies, and I find myself itching for that scoop and bake gratification. Is it so weird that the process of scooping dough onto a baking sheet gives me a rather strong sense of satisfaction? Probably. Anyways, I saw these cookies on Baking Bites and found the use of buttermilk extremely intriguing. Time to fire up the Kitchen Aid!


These cookies are super chocolatey, and awesomely chewy. They are more or less brownies in cookie form and if I could do so without any waist-widening repercussions, I would eat every. last. one. They are to-die-for with a nice, tall glass of cold milk. I think these cookies would also be amazing with some walnuts and/or dried cherries. But, if you're craving ooey gooey chocolate goodness, the basic recipe is juuuust right :).


I sent them to work with Mikey and he came back with an empty container that had all but been licked clean. Apparently they were quite a hit and his office became a popular hang-out spot for the day.


IMG_6826
IMG_6859
IMG_6831
IMG_6852


Ultra Chocolatey Buttermilk Cookies
recipe from here
makes 3 dozen

ingredients:
  • 2 cups all-purpose flour
  • 1/2 tsp baking soda
  • 1/2 tsp sea salt
  • 1/2 cup (1 stick) unsalted butter, melted
  • 3/4 cup Dutch-process cocoa powder
  • 2 cups granulated sugar
  • 1 tsp pure vanilla extract
  • 2/3 cup lowfat buttermilk
  • 2 cups chocolate chips (I used 1/2 semi-sweet chips and 1/2 dark chocolate chunks)
  1. Preheat oven to 350 degrees. Line your baking sheet with a silicone baking mat or parchment paper; set aside.
  2. In a medium bowl, combine the flour, baking soda, and salt.
  3. In the bowl of an electric mixer fitted with the whisk attachment, combine the cocoa powder and melted butter until very smooth. Add in the sugar, vanilla, and buttermilk. Slowly add in the flour mixture and mix until just combined. Stir in the chocolate.
  4. Scoop the dough onto the lined baking sheets about 1 1/2 inches apart (I used a medium-sized cookie scoop). Bake for 10-12 minutes. Cool the cookies on the baking sheet for a couple of minutes before transferring to a wire rack to cool further.
IMG_6811
IMG_6841

Monday, June 14, 2010

Best Ever Sugar Cookies

IMG_6584


When Mikey's mom, Amy, asked me if I wanted to make some sort of baked goods for a baby shower for one of her friends, I jumped at the opportunity. I LOVE baking (which is clearly apparent), but I love it even more when people can actually enjoy what I've made instead of it just rotting away on our kitchen countertops.
I wanted to make something that would make it obvious that they were made for a (little boy's) baby shower, but I didn't want to do the typical cupcakes, cake, or sugar cookies covered in icing. I decided on some wonderful sugar cookies rolled in blue sparkling sugar.
Besides looking cute, they tasted pretty darn good as well. In fact, to me they taste identical to those buttery cookies that you get in the black and red checkered tins; you know which I am referring to- the cookies come in all different shapes (rectangular, pretezel-shaped, etc.), but they all taste the same and are covered in coarse sugar. Yeah, THOSE!
Amy described them as "creamy" which I think is a testament to the caster sugar used in the cookies. They really are quite decadent and I highly recommend them. I myself will be making them again as soon as I get to Florida (I'm flying out today to go visit my family!). The best part is, they couldn't be simpler to make- they're slice-and-bake!
It should probably be noted that the cookies in these photos are the rejects. I (naturally) gave all of the good-looking cookies to Amy to deliver to her friend and these are the poor deformed ones that were left over, hah.


IMG_6592
IMG_6580


Best Ever Sugar Cookies
recipe slightly adapted from here

ingredients:
  • 3 cups all-purpose flour
  • 1 tsp baking powder
  • 1/2 tsp salt
  • 2 sticks (1 cup) unsalted butter (I use Irish butter which I think makes ALL the difference)
  • 1 cup Caster sugar (super-fine sugar, also called baker's sugar)
  • 1 large egg
  • 2 tbsp milk (I used some creamy almond milk)
  • sparkling sugar, for rolling (you could also use turbinado sugar if you didn't want a color)
  1. In a large bowl, combine the flour, baking powder, and salt. Set aside.
  2. In the bowl of an electric mixer fitted with the paddle attachment,, cream together the butter an sugar until light an fluffy, 3-5 minutes. Add in the egg and milk and beat for another few minutes until fully combined.
  3. Turn the dough out onto a clean workspace (a silicone baking mat works great), knead it a few times until it comes together, and then divide it into two equal pieces. Wrap each half in plastic wrap and store in the fridge overnight (or at least 2 hours, but I think longer is better).
  4. When ready to bake, preheat oven to 375 degrees.
  5. Remove the dough from the fridge and form each ball into a log 1 1/2-2 inches in diameter. They dough will be quite firm so you will have to work with it a bit.
  6. Roll the logs in the sugar until the outside is completely coated. Put the dough logs back in the fridge for about 10 minutes so they can firm up a bit.
  7. Slice 1/3 inch thick rounds off of the logs and place on a cookie sheet lined with a silicone baking mat about 1 inch apart.
  8. Bake for 8-9 minutes until the edges just start to turn golden. Cool on the cookie sheet for 2 minutes before transferring to a wire rack to cook further.
IMG_6581

Saturday, May 29, 2010

Brown Butter Chocolate Chip Toffee Walnut Cookies


IMG_2722

Yes, these cookies are just as good as they sound... maybe even more amazing.
These are basically a chocolate chip cookie-lover's ultimate indulgence. The nutty brown butter, the gooey chocolate chips, and the crunchy toffee walnuts (that you will have to physically restrain yourself from downing all of before they can make it into the cookie dough) all unite to form one of the most outrageous cookies I have ever encountered.
The texture is absolutely perfect; they are crisp, yet still chewy, and so addicting that you should probably bake them when you have guests over lest you eat the entire 3-4 dozen all by yourself!
Oh, and might I add, these cookies make GREAT ice cream cookie sandwiches with a bit of vanilla ice cream nestled in between!
p.s.- Please excuse these horrid photos. The cookies were a few days old when I took them (still absolutely incredible tasting though!), and I used my old, trusty point-and-shoot.

IMG_2706
IMG_2728
IMG_2707

Brown Butter Chocolate Chip Toffee Walnut Cookies
recipe slightly adapted from here
makes about 3-4 dozen

ingredients:

toffee walnuts:
  • 2 tbsp unsalted butter
  • 1/4 cup granulated sugar
  • 1/2 tsp sea salt
  • 1 1/2 cups chopped walnuts (toasted if you want)
cookie dough:
  • 1 cup unsalted butter (2 sticks)
  • 4 1/2 cups all-purpose flour
  • 2 1/2 tsp baking powder
  • 2 tsp sea salt plus more for sprinkling
  • 1/2 cup unsalted butter (1 stick), at room temperature
  • 2 cups firmly packed dark brown sugar
  • 1 cup granulated sugar
  • 4 large eggs
  • 1 tbsp + 1 tsp vanilla extract
  • 12 ounces semisweet chocolate chips
for the toffee walnuts:
  1. Melt the butter in a small saucepan over medium heat. Stir in the sugar and salt and bring to a boil. Boil for 1-2 minutes, stirring frequently, until golden brown. Add in the walnuts and stir until well-coated.
  2. Pour the mixture out onto a sheet pan and allow to dry.
for the dough:
  1. In a medium-sized bowl, mix together the flour, baking powder, and salt. Set aside.
  2. Melt 1 cup of butter in a small saucepan over medium heat. Continue to cook the butter for 5-7 minutes, until it begins to brown, foam, and smell nutty. Remove from heat and set aside.
  3. In the bowl of an electric mixer fitted with the paddle attachment, beat the 1/2 cup of softened butter with the sugars until well combined, about 2 minutes. Next, beat in the browned butter for an additional minute. Add in the eggs and vanilla and beat until well combined. Reduce the mixer speed to low and slowly add in the flour mixture and beat until just combined. Add in the chocolate and toffee walnuts and combine. Chill dough in the fridge for at least an hour.
  4. When ready to bake, preheat oven to 375 degrees. Line baking sheet with silicone baking mats or parchment paper.
  5. Roll the dough into 2-ounce balls and place on prepared baking sheets an inch or two apart; flatten slightly. Sprinkle a bit of sea salt on each dough ball.
  6. Bake for 12-14 minutes or until golden brown. Cool for about 2 minutes before transferring cookies to a wire rack to cool further.
IMG_2723
Related Posts with Thumbnails