My blog has moved!

You should be automatically redirected in 6 seconds. If not, visit
http://www.spachethespatula.com/
and update your bookmarks.

Showing posts with label vanilla. Show all posts

Tuesday, April 26, 2011

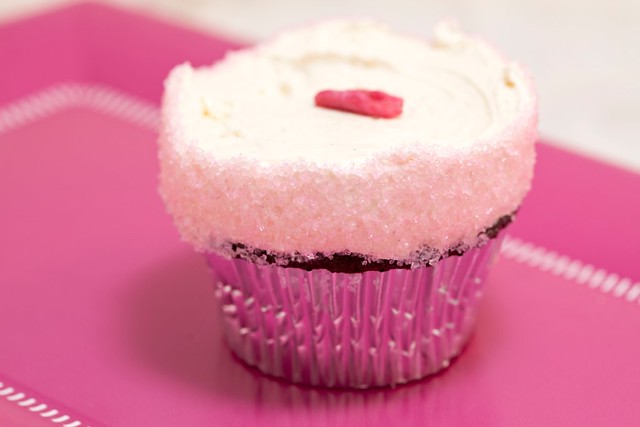
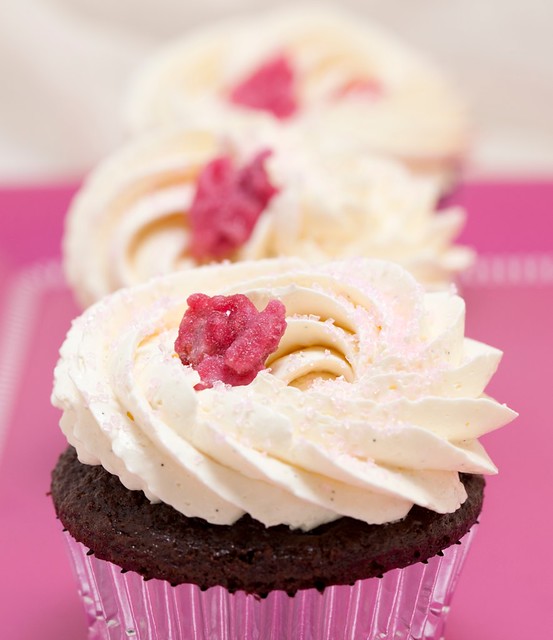
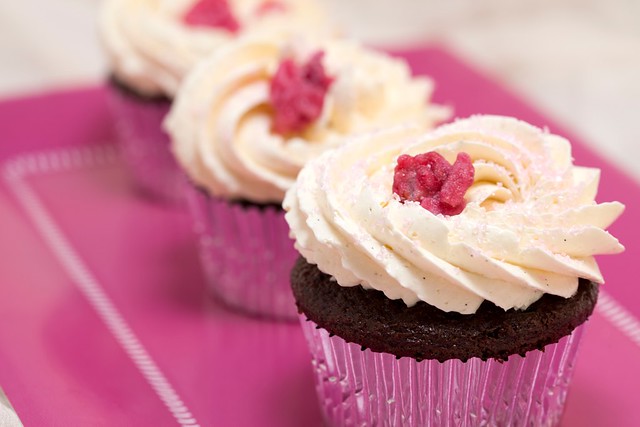
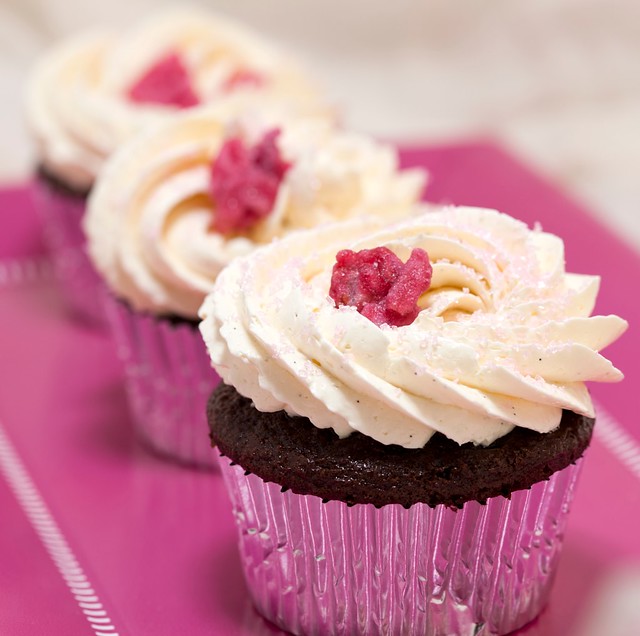
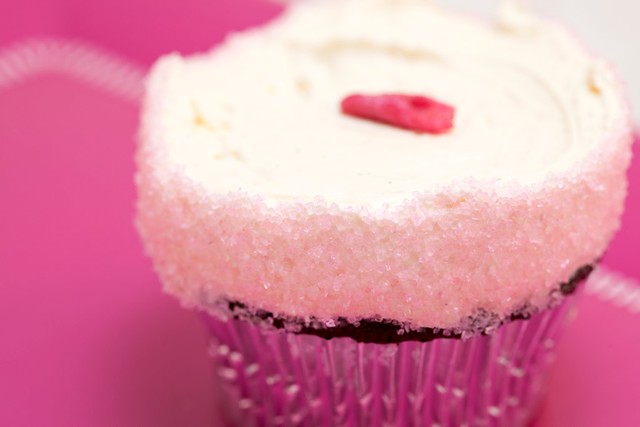
Chocolate Cupcakes with Vanilla Swiss Meringue Buttercream


For the longest time, I thought that I hated both cupcakes and cake. It was not until about 5 years ago that I discovered that what I really hate is boxed cake, packaged frosting, and the cupcakes sold at your local supermarket deli. In fact, it turns out, I LOVE real cake and cupcakes!

My absolute favorite cupcakes in the universe are the cupcakes sold at Trophy Cupcakes. They are seriously to-die-for! Seattle has more than its fair share of cupcakeries, and as a self-proclaimed cupcake connoisseur, I have tried nearly all of them and am here to tell you, Trophy's are the best of the best. That's why, my cake base in this recipe is based off of one of Trophy's chocolate cupcakes!

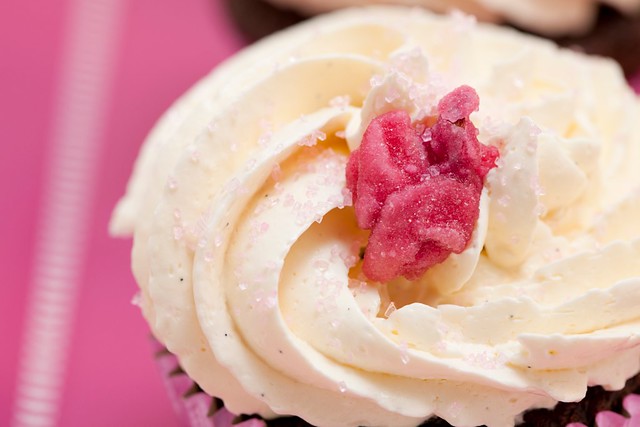
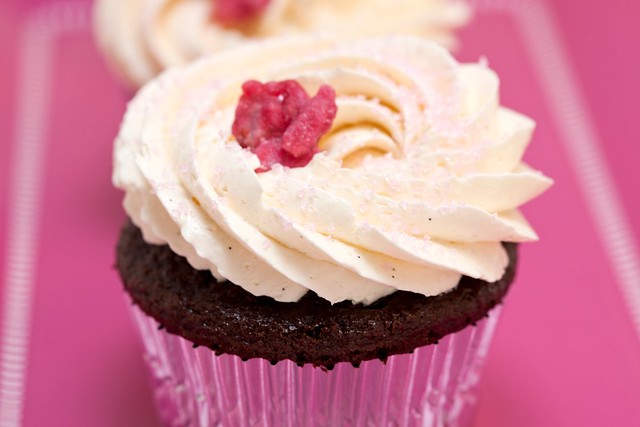
The cupcakes are unbelievably moist and chocolatey, but not overly rich. The frosting is creamy and buttery, yet still light thanks to the whipped egg whites. In fact, the buttercream is more than a little addictive and I think you'll find that the fact that the frosting recipe makes more than you need won't be at all an issue :).

I garnished my cupcakes with pink sparkling sugar and candied rose petals.


Chocolate Cupcakes
base recipe from here
makes 2 dozen cupcakes

ingredients:
  • 2 cups + 2 tbsp granulated sugar
  • 1 3/4 cup all-purpose flour
  • 3/4 cup + 1 tbsp cocoa powder (no Dutch-processed)
  • 1 1/2 tsp baking powder
  • 1 1/2 tsp baking soda
  • 1 tsp salt
  • 2 large eggs
  • 1 cup whole milk
  • 1/2 cup vegetable oil
  • 2 tsp pure vanilla extract
  • 1 cup boiling water
  1. Preheat oven to 350 degrees. Line cupcake tins and set aside.
  2. In a large bowl, whisk together the eggs, milk, oil, and vanilla extract; set aside.
  3. In the bowl of an electric mixer fitted with the paddle attachment, stir together the sugar, flour, cocoa powder, baking powder, baking soda, and salt.
  4. Add the wet mixture to the dry and mix on medium speed for 30 seconds. Scrape down the sides and add in the boiling water and stir to combine.
  5. Fill the cupcake liners 3/4 of the way up. Bake for 18-20 minutes until a toothpick inserted into the center comes out clean.
  6. Allow the cupcakes to cool 10 minutes in the tin before removing and allowing to cool completely.


Vanilla Swiss Meringue Buttercream
recipe slightly adapted from here

ingredients:
  • 1 1/3 cups caster sugar
  • 7 large egg whites
  • pinch of salt
  • 1 1/4 lbs (5 sticks) unsalted butter, softened
  • seeds scraped from 1 vanilla bean
  • 1 tsp pure vanilla extract
  1. In the (heatproof) bowl of an electric mixer, combine the sugar, salt, and egg whites. Set over a pot of simmering water (making a double boiler) and whisk constantly for about 5-10 minutes until the mixture reaches 160 degrees.
  2. Fit the mixer with the whisk attachment and beat (on medium-high) the heated mixture for 10 minutes until mixture is lukewarm and stiff, glossy peaks form.
  3. Switch to the paddle attachment and, with the mixer set to medium speed, mix in the vanilla bean and extract. Use immediately or transfer to an airtight container and refrigerate for up to 3 days.
Friday, April 1, 2011

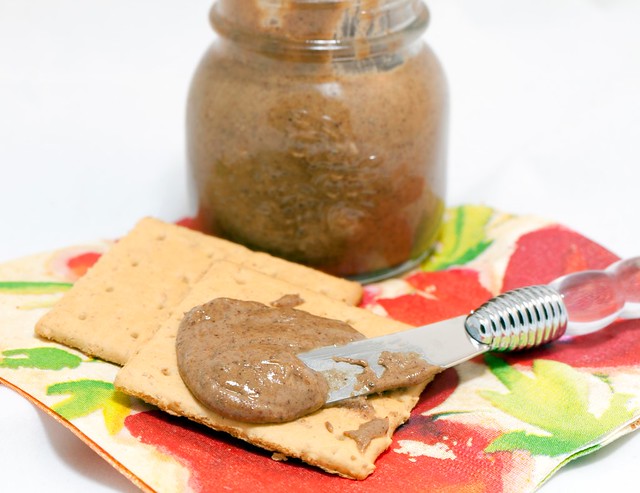
Maple, Vanilla Bean, Flax-Almond Butter


Growing up, I was one of very few children who despised peanut butter (what the heck, right?). When I hit middle school, I went from hating the stuff, to being full-blown obsessed. And I seriously mean obsessed. To the point that my best friend, Alana, and I would have competitions to see who could build the largest peanut butter and jelly sandwich, using as little jelly as possible, and as much peanut butter as possible. I'll say that things got a bit out of hand with quadruple deckers and the such with just a minute smear of jam and probably about 1/4 cup of peanut butter. Good thing we were growing kids or I could have easily weighed 800lbs!

Years later, I discovered that peanut butter wasn't the only nut butter out there, and almond butter was introduced to my life. Since then I have tried all of the nut butters that I can find, and have recently been trying my hand at making my own!

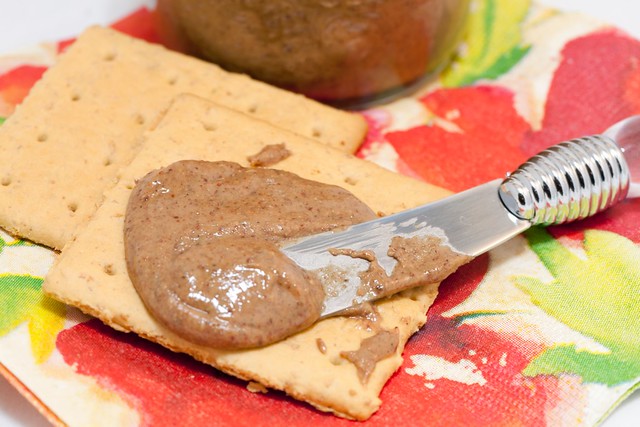
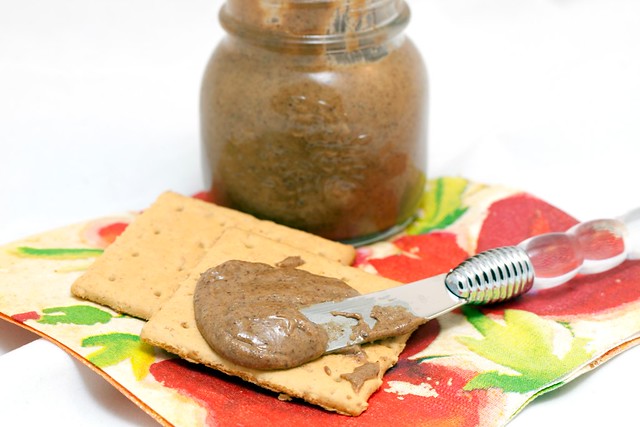
You won't believe how easy making your own nut butters is (and, most of the time, cheaper), and it allows for worlds more customization! This almond butter comes from Ashley at Edible Perspective, and my oh my, of the dozens of nut butters I have tried, I think this one holds top spot. It is positively AMAZING! It's ultra creamy, slightly sweet, and satisfyingly salty.
It is hard to get away from eating it by the finger-full, but if you can manage, it makes KILLER PB&Js (technically AB&Js) :). I cannot recommend this recipe any higher; really guys, try this one ASAP!


Maple, Vanilla Bean, Flax-Almond Butter
recipe adapted from here

ingredients:
  • 2 cups raw almonds
  • 1/3 cup whole flax seeds
  • 3 tbsp maple syrup, divided
  • 1/2 whole vanilla bean, seeds scraped
  • 1tsp pure vanilla extract
  • 1/2 tsp sea salt
  • 1 tbsp sunflower oil
  1. Preheat oven to 300 degrees and line a sheet pan with a silicone baking mat or parchment paper; set aside.
  2. In a medium bowl, toss together the almonds, flax, and 2 tablespoons maple syrup. Spread out on the sheet tray and bake for 30 minutes, stirring after 15.
  3. Pour the baked nuts into your food processor and process for around 10 minutes, until nice and creamy, scraping the sides about a dozen times.
  4. Add in the salt, vanilla bean, vanilla extract, and remaining maple syrup. Process for about 5 minutes longer, drizzling in the oil at the end.
  5. Store in an airtight jar.

Thursday, March 24, 2011

Vanilla Bean Marshmallows

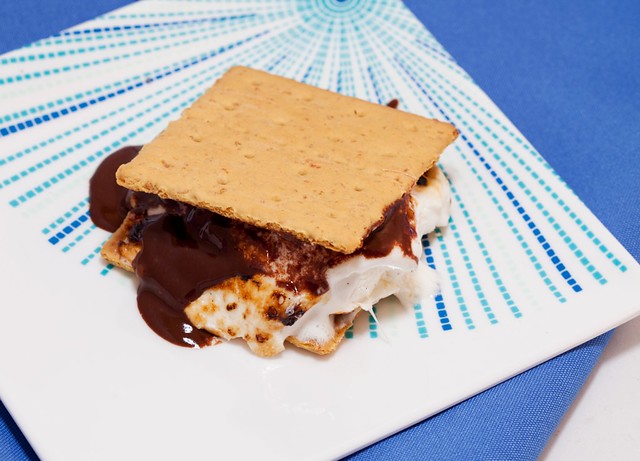
smoretext
So, apparently I have a thing for vanilla lately (please see: vanilla bean ice cream and vanilla bean macaroons)? I don't know what the deal-io is with that but all I can say is that I super love cooking/baking with whole vanilla beans :).

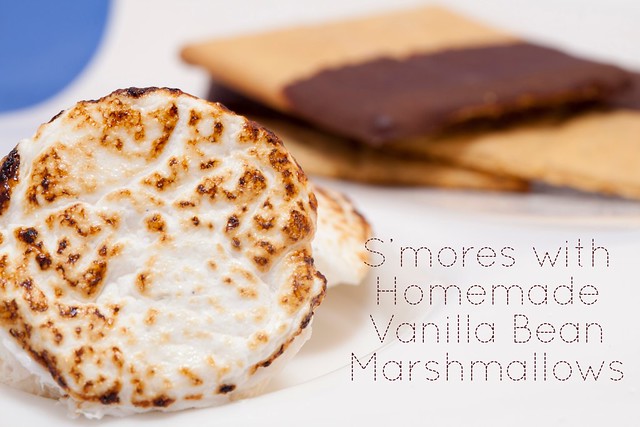
I think that homemade marshmallows are possibly one of the tastiest culinary novelties. No one expects you to actually make your very own, and I'm fairly certain that when most people think of marshmallows they just think of the jet-puffed cylinders in the clear plastic on the baking aisle. Let me just tell you right now, you have not truly enjoyed a s'more if you have been using marshmallows of the store-bought variety. S'mores with homemade marshmallows are on a whole different level (side note: I was about to write "whole nother level," which is something I often say but never thought about. What the heck is a "nother"? Is it short for another? In that case is it "whole another level"? How completely peculiar!!).

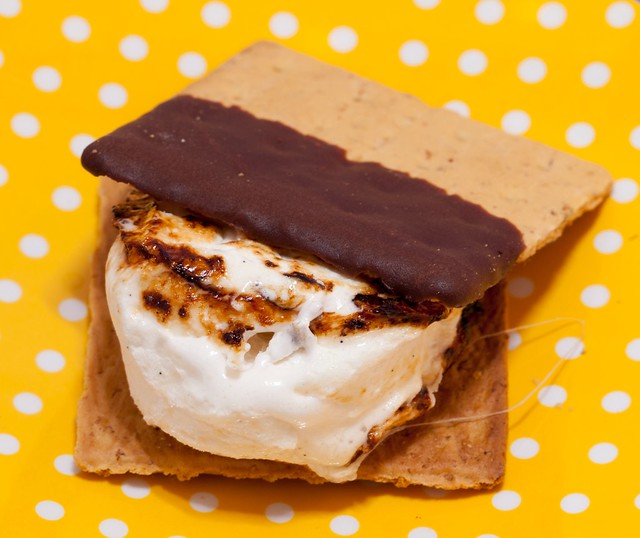
While these marshmallows are positively scrumptious in their un-s'more-ified state (and far better than any store-bought mallow), they are shockingly good when toasted and smashed between two graham crackers. The chocolate component in my s'mores is homemade chocolate ganache. I tried two different methods: 1) I just poured it on the melted mallow and smashed it all between two graham crackers, 2) I dipped half of the graham cracker in the ganache and let it dry. Why the latter version may appear neater, nothing beats a deliciously gooey marshmallow and chocolate mess :P!

IMG_0321
IMG_0322

Vanilla Bean Marshmallows
recipe slightly adapted from here

ingredients:
  • 1/4 cup confectioners' sugar
  • 1/4 cup cornstarch
  • nonstick spray
  • 3 packages unflavored gelatin
  • 1 cup ice cold water, divided
  • 1 1/2 cups (298g) granulated sugar
  • 1 cup light corn syrup
  • 1/4 tsp salt
  • seeds scraped from 1/2 vanilla bean
  • 1 tsp pure vanilla extract
  1. Combine the confectioners' sugar in corn starch in a small bowl and set aside.
  2. Spray a 9'' X 13" pan with nonstick spray. Pour in the sugar/cornstarch mixture and tip the pan to coat all sides. Reserve the excess in a small bowl.
  3. Place the gelatin in the bowl of an electric mixer fitted with the paddle attachment. Add in 1/2 cup of the water and let stand.
  4. In a small saucepan, combine the remaining 1/2 cup water, granulated sugar, corn syrup, and salt. Place over medium high heat, cover, and cook for 3-4 minutes until the sugar is dissolved. Do not stir the mixture! Simply swirl the saucepan to distribute. Uncover after the sugar has dissolved and place a candy thermometer into the saucepan. Continue to cook until the mixture reaches 240 degrees (F), 7-8 minutes. Immediately remove from heat.
  5. Turn the mixture on low and slowly and carefully pour the hot sugar syrup into the gelatin. Once it is all added, increase the speed to high and whip until the mixture is lukewarm and very thick, about 12-15 minutes. Add in the vanilla bean seeds and vanilla extract in the last couple of minutes of mixing.
  6. Scrape the mixture into the prepared pan, using a lightly oiled spatula to spread. Dust the top with enough of the reserved sugar/cornstarch mixture to lightly cover the top. Reserve the remainder. Allow the marshmallows to sit uncovered for at least 4 hours.
  7. Turn the marshmallows onto a cutting board and cut into desired shapes with either a knife or cookie cutter. Dust all of the sides with the sugar/cornstarch mixture. Store in tupperware.
IMG_0318

Monday, March 21, 2011

Vanilla Bean Ice Cream

IMG_0314

Sorry I've been MIA for a bit but I was struggling through finals! I am SO happy to be done and to be on Spring Break. This past quarter was by far the most stressful out of the entirety of my education. At times I didn't think I was going to make it, but I pulled through!

I have been craving ice cream and ice-cream related treats (i.e. milkshakes) practically nonstop for the past week. I completely attribute it to my body attempting to de-stress in the best way it knows how--filling it with delicious delights!

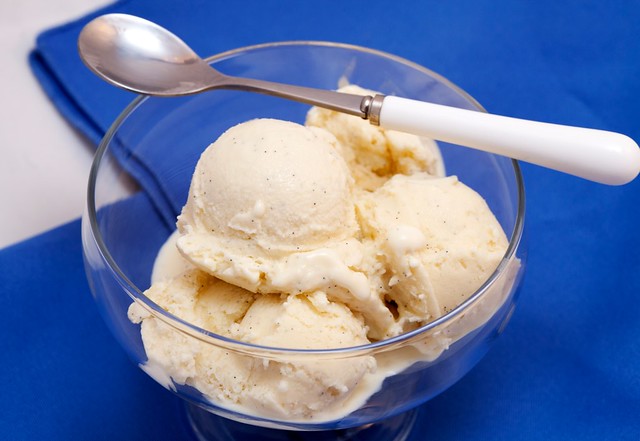
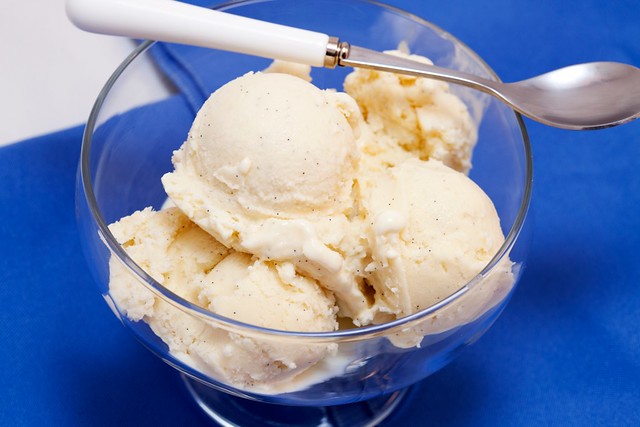
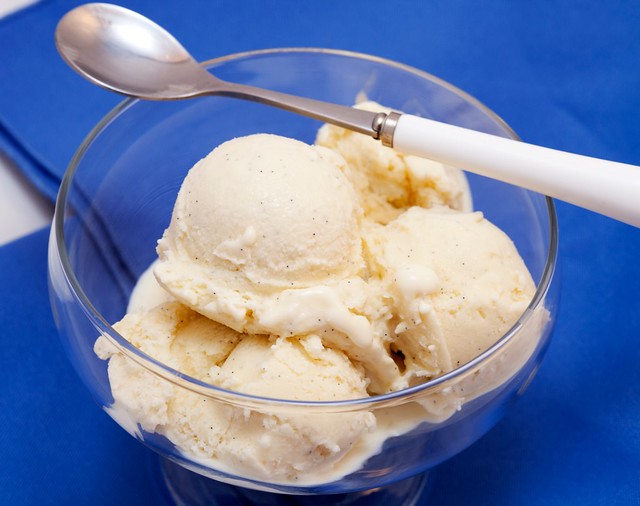
There is nothing out-of-the-ordinary about this recipe. After all, it's just vanilla ice cream. But, it is the creamiest, dreamiest vanilla ice cream that I have ever tried. And besides, in the scope of things, vanilla ice cream is quite possibly the most important and necessary dessert component. What goes better with a warm apple pie, a chocolatey brownie, homemade caramel, or a berry crumble quite like a scoop of vanilla? Nothing, that's what!

This ice cream is actually a custard because it calls for egg yolks which make it unimaginably smooth and luxurious. It is also quite rich in the most delicious way. This recipe comes from David Lebovitz who is the absolute master of ice cream!

IMG_0310

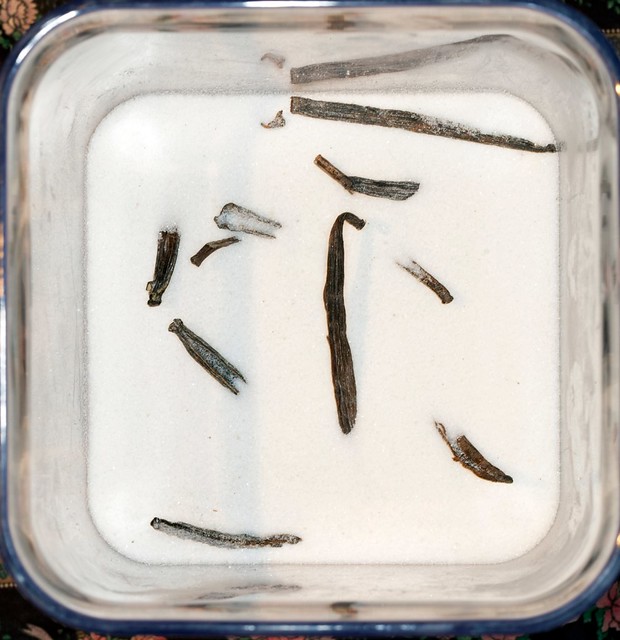
Here's a tip for what to do with your empty vanilla bean pods: toss them in your granulated sugar. It will infuse your sugar with a vanilla flavor that will amp up the flavor in all of your baked goods! As you can see I have about a dozen beans sticking out of and buried within mine:


Dried Vanilla Beans in Sugar

Vanilla Bean Ice Cream
recipe from here

ingredients:
  • 1 cup whole milk
  • pinch of sea salt
  • 3/4 cup granulated sugar
  • 1 vanilla bean, split lengthwise
  • 2 cups heavy cream
  • 5 large egg yolks
  • 1 tsp pure vanilla extract
  1. In a small saucepan, combine the milk, salt and sugar and bring to a simmer. Scrape the seeds of the vanilla bean into the mixture and toss in the empty pod. Cover and remove from heat. Allow the mixture to infuse for an hour.
  2. Set up an ice bath by placing a 2-quart bowl inside of a larger bowl that is filled with ice water. Set a mesh strainer over the top of the smaller bowl and pour in the cream.
  3. In a separate bowl, whisk together the egg yolks. Rewarm the milk mixture and remove the vanilla bean. Temper the yolks by whisking small amounts of the warm milk mixture into the yolks. Add the warmed yolks into the saucepan.
  4. Cook over low heat, stirring constantly, being sure to scrape the bottom and sides until the custard thickens enough to coat the back of a wooden spoon. When you run your finger down the back of the spoon, the trail left by your finger should stay put.
  5. Strain the custard into the small bowl in your ice bath. Stir in the vanilla extract and stir over the ice until cool and then refrigerate for at least 4 hours or overnight.
  6. Freeze in your ice cream maker according to your manufacturer's instructions.
IMG_0313

Friday, March 4, 2011

Vanilla Bean Macaroons (Vegan)

IMG_0285

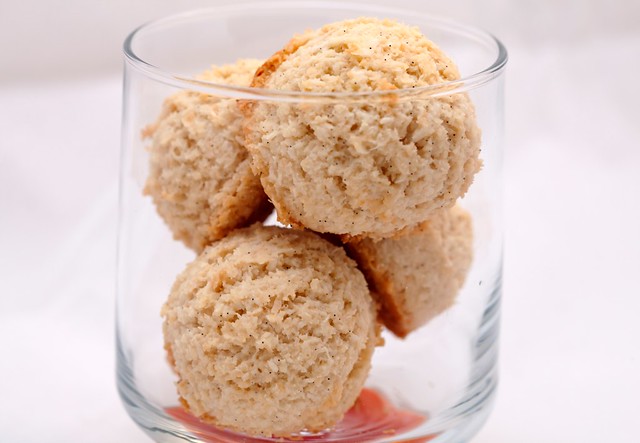
Coconut is one of my very favorite foods, and I am entirely boggled as to how some people so detest it. Not only is it delicious, but it is rich in fiber and healthy fats!

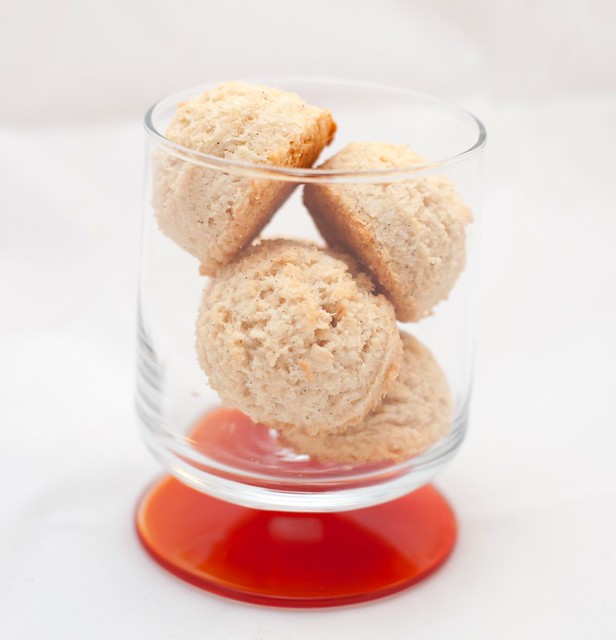
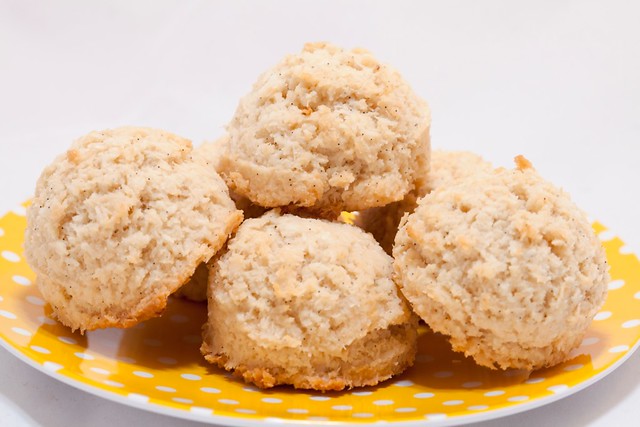
I am a huge fan of macaroons, and when I saw these over at Oh She Glows, I was immediately drawn to them. While I knew I would like them since I absolutely LOVE all things coconut, I did not expect them to completely blow me away as they have done.

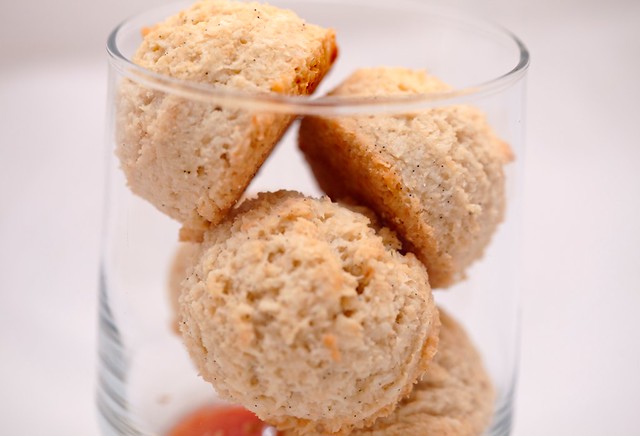
These macaroons are AMAZING! They are dense and chewy and absolutely addictive. The outside is perfectly crisp, and even after cooling, the inside is gooey and rich. The whole vanilla bean really pumps up the flavor and raises them above any macaroons you have tasted before. As Mikey bit into one, I heard an "Oh WOW!" Seconds later he was grabbing another :). 
Also, these babies are completely vegan and relatively healthy when eaten in moderation- something that is almost entirely impossible ;).


IMG_0305
IMG_0286


Vanilla Bean Macaroons
recipe slightly adapted from here
makes 20-24 macaroons

ingredients:
  • 2 2/3 cups shredded unsweetened coconut (to make the coconut butter OR 1 cup store-bought coconut butter)
  • 2 cups shredded unsweetened coconut (I used reduced fat here and regular in the coconut butter)
  • 3/4 cup pure maple syrup
  • 1 tsp vanilla extract
  • seeds scraped from 1 vanilla bean
  • 1 tsp sea salt
  1. Preheat oven to 300 degrees. Line baking sheets with a silicone mat or parchment paper; set aside.
  2. To make the coconut butter: Add the 2 2/3 cups shredded coconut to the bowl of a food processor and process for 8-12 minutes until creamy, scraping down the bowl as necessary.
  3. Combine all of the ingredients (including coconut butter) in the bowl of an electric mixer fitted with the paddle attachment and beat to combine.
  4. Scoop 1-2 tablespoon-sized mounds onto the baking sheet (they won't spread so you can place them fairly close to one another).
  5. Bake for about 25 minutes, or until the bottoms are golden. Let cool on baking sheet for a couple of minutes before transferring to a plate or rack to cool further.
IMG_0294

Sunday, November 28, 2010

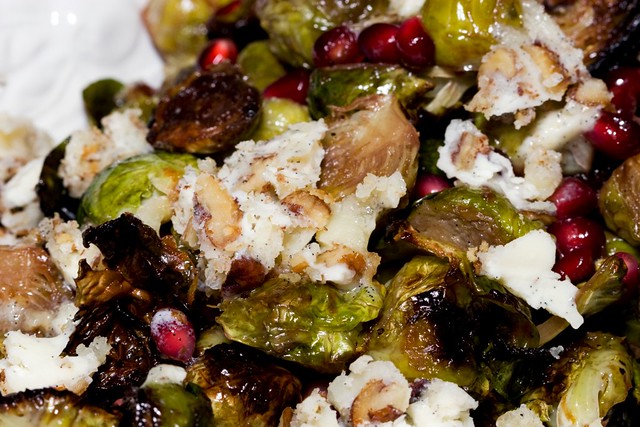
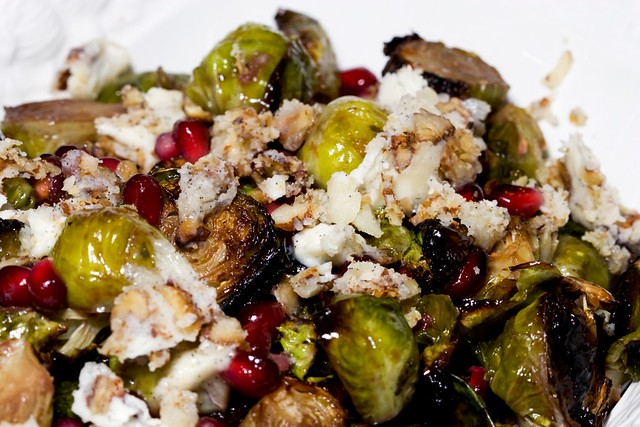
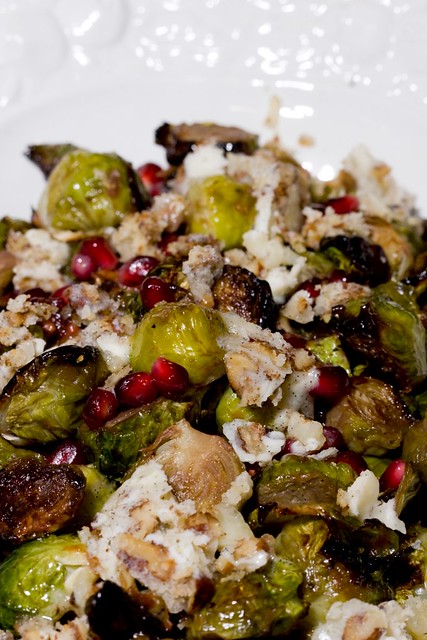
Roasted Brussel Sprouts with Pomegranates and Vanilla-Pecan Butter

IMG_7258

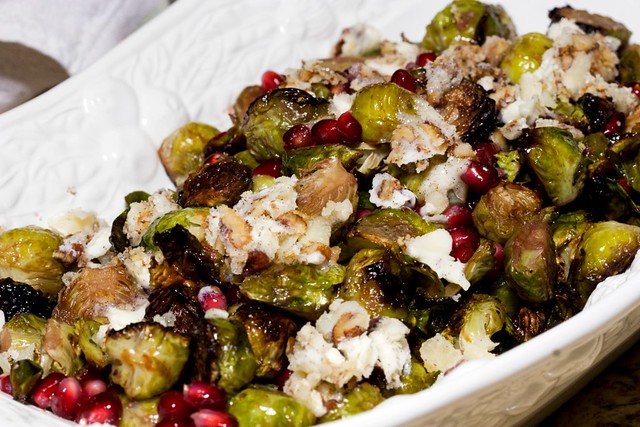
For this year's Thanksgiving I took on almost more than I could handle in terms of cooking (which you will clearly see in the next several posts as I share with you everything that I made), but it all certainly payed off because the food was great and everyone had a wonderful time!

I always think of brussel sprouts as a quintessential side dish for Thanksgiving. I'm not really sure why considering they were never around my Thanksgiving table growing up, but I just think they ought to be there. They are truly a great fall vegetable despite the bad rap they are disposed to.

This side dish is quite unique and extremely tasty. It's also very easy to make if you aren't trying to make 5 separate dishes at the same time like I was on Thanksgiving. Somehow I managed to forget about my poor sprouts in between the potato water catastrophe and vigilantly watching my rolls in the oven, and thought that I had burned them to a crisp, dooming them to the depths of the trash can. But, after being assured that they were quite tasty and not at all charred to death, it was smooth sailing!

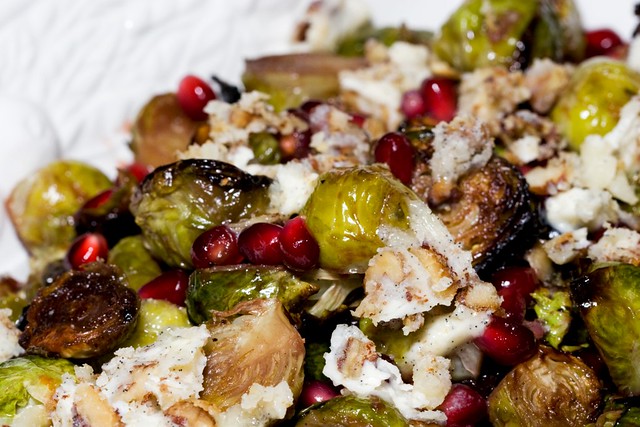
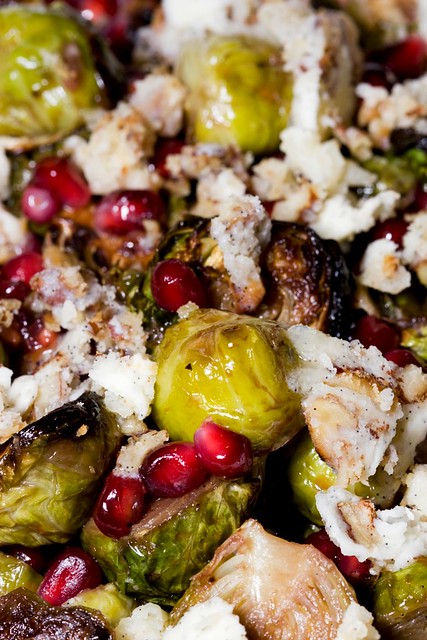
The pomegranates add a wonderful sweetness, but also a delightful crunch. The vanilla-pecan butter smells absolutely out-of-this-world, and I found that a little goes a long way. I found these brussel sprouts to be a great addition to the feast we devoured on Thursday, and I can't wait to make them again when I can devote my full attention to them.

By the way, yes, I am aware that the "correct" spelling is Brussels sprouts, but, you know, no one ever says BrusselS sprouts. Thus, I am inclined to drop the "s" and, as a consequence, the capitalization.

IMG_7253
IMG_7251
IMG_7255

Roasted Brussel Sprouts with Pomegranates and Vanilla-Pecan Butter
recipe adapted from here

  • 3 tbsp unsalted butter, slightly softened
  • 1/2 vanilla bean, seeds scraped
  • 2 tbsp toasted pecans, chopped
  • 2 lbs brussel sprouts, trimmed and halved
  • 3 tbsp canola oil
  • sea salt and freshly ground pepper
  • 2 tbsp pomegranate molasses (it's simple to make your own by boiling down pomegranate juice, sugar, and a touch of lemon juice)
  • seeds from 1 pomegranate
  • zest from 1 orange
  1. Combine the butter and vanilla bean in a bowl. Fold in the pecans. Refrigerate for at least 30 minutes before serving.
  2. Preheat oven to 375 degrees. Line a baking sheet with aluminum foil, set aside.
  3. In a medium bowl, toss together the brussel sprouts and canola oil; season with salt and pepper. Pour the brussel sprouts onto the prepared baking sheet. Roast in the oven for 15-20 minutes, until browned.
  4. Remove the brussel sprouts from the oven and toss with the pomegranate molasses. Return to the oven for 5-10 minutes longer.
  5. Transfer the sprouts to a large bowl and add in the pomegranate seeds. Top with as much of the vanilla-pecan butter as you desire.
IMG_7254
IMG_7260

Wednesday, July 28, 2010

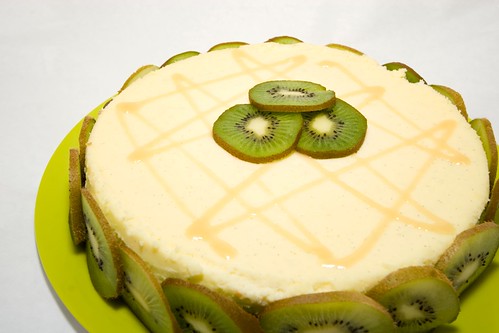
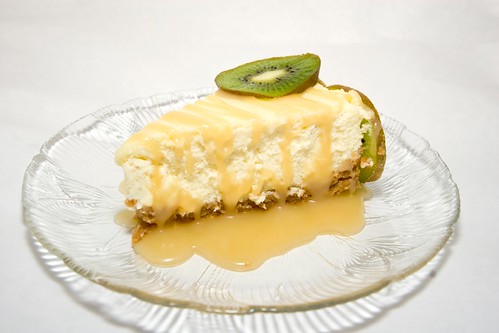
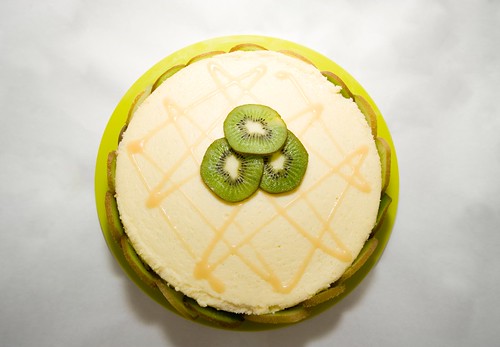
Vanilla Bean Mascarpone Cheesecake with Passion Fruit Caramel

IMG_6640


Let me start off by saying that this is possibly the best thing I have ever made.


A couple nights ago, we were invited to a grill-out at Mikey's parents' home, and Amy (his mom) asked if I could possibly bring a salad and dessert. You'll see the salad later, but this is the dessert I decided on- Vanilla Bean Mascarpone Cheesecake with Passion Fruit Caramel.
Now, I had never actually made cheesecake before, so it probably wasn't the best idea to try for the first time when I need to bring dessert to a dinner party with no back-up plan, but that's just how I roll :D. For never having made this, I can honestly say that it turned out next to perfect. It was that good.
The cheesecake filling itself was creamy, yet light due to the mascarpone, and the salty cashew crust complimented it so gorgeously. The pinch of ginger in the crust shined through and added an intriguing aftertaste that had everybody asking, "What is that?" 


The real star of the show, in my opinion, was the caramel. Oh. My. Gosh. It was silky and sweet but not too sweet, and basically you could drizzle it on your shoe and I think it'd taste good. The original recipe had a separate recipe for a passionfruit caramel, but I didn't appreciate that it used passion fruit juice cocktail and corn syrup so I made my own from an adaptation of a random recipe for blood orange caramel (which I think would also be awesome and need to try ASAP).


This cheesecake was pretty much the ultimate ending to a great cook-out, and certainly had everyone talking. Mikey, who doesn't even like cheesecake mind you, went back for a second slice which should tell you something right there :). I highly recommend this recipe for your next gathering; trust me, you won't be disappointed.


IMG_6630
IMG_6636
IMG_6635


Vanilla Bean Mascarpone Cheesecake
recipe adapted from here

ingredients:

crust:
  • 3/4 cup salted roasted cashews
  • 1/4 cup brown sugar, packed
  • 3/4 cup all-purpose flour
  • 1/4 tsp salt
  • 1/8 tsp ground cinnamon
  • 1/8 tsp ground ginger
  • 6 tbsp unsalted butter, chilled and cut into 1/2-inch cubes
  • 1 large egg yolk
filling:
  • 2 8-ounce packages cream cheese, at room temperature (I used one package of regular and one of Neufchatel which just has 1/3 less fat)
  • 3/4 cup granulated sugar
  • pinch of salt
  • 1 vanilla bean split lengthwise
  • 2 8-ounce containers mascarpone cheese
  • 1/2-1/3 cup creme fraiche
  • 4 large eggs
other:
  • passion fruit caramel (recipe below)
  • tropical fruits, to decorate (I used 2-3 sliced kiwi)
  1. Preheat oven to 325 degrees. Wrap the outside of a 9-inch diameter springform pan with 2 3/4-ince sides with 2 layers of tin foil. Set aside.
  2. In a food processor, combine the cashews and brown sugar and finely grind. Add in the flour, salt, and spice and blend for about 5 seconds. Add in the butter, slowly, and blend until mixture is a coarse meal. Add in the egg yolk and pulse until moist clumps form.
  3. Press the dough into the bottom and 1/2-inch up the sides of the pan. Pierce the crust all over with a fork and bake for around 30 minutes, or until golden brown. Cool crust but maintain the oven temperature.
  4. In the bowl of an electric mixer fitted with the paddle attachment, combine the cream cheese, granulated sugar, and salt. Scrape in the seeds of the vanilla bean and beat until smooth and fluffy. Add in the mascarpone and creme fraiche and beat at low speed just until blended, scarping down the sides of the bowl. Add in the eggs, one at a time, beating to incorporate after each addition.
  5. Place the springform pan in a large roasting pan and fill with cheesecake filling. Place the roasting pan in the oven and fill the roasting pan with enough hot water to come about halfway up the sides of the springform pan (it's much easier to fill it with water when it's already in the oven). Cover the top of the springform pan with foil.
  6. Bake for about 30 minutes, and then check of the cheesecake, lifting the foil. Re-cover and bake for another 30 minutes and then check on it again. Continue to do this until cake is loosely set but jiggles all over when the pan is gently shaken. Mine cooked for about 2 hours total.
  7. When done, remove the springform pan from the water and set on a rack to cool for an hour. Refrigerate, uncovered until cold, at least 6 hours. (I made mine a day ahead and just kept it in the fridge.)
  8. To serve, cut around the sides of the pan with a knife and then remove sides of pan. Decorate with passion fruit caramel and sliced tropical fruit. Cut into wedges and serve with more caramel.
Passion Fruit Caramel
recipe adapted from here

ingredients:
  • 2 cups passion fruit juice (I used this one)
  • 1 cup heavy cream
  • 4 tbsp unsalted butter
  • 1 cup granulated sugar
  1. Bring the passionfruit juice to a simmer over medium-high heat in a small saucepan. Cook for about 20 minutes, until reduced to about a 1/4 cup. Strain the reduced juice through a fine sieve into a bowl. Add the cream, stir, and set aside.
  2. In a medium saucepan, melt the butter over medium heat. Add in the sugar and continue to cook, stirring almost constantly, until the sugar is lightly caramelized (about 5 minutes). Add in the juice/cream mixture and cook for about 5 minutes more, stirring frequently. Strain mixture through a fine sieve. Refrigerate until ready to use.
IMG_6639
IMG_6629

Friday, November 20, 2009

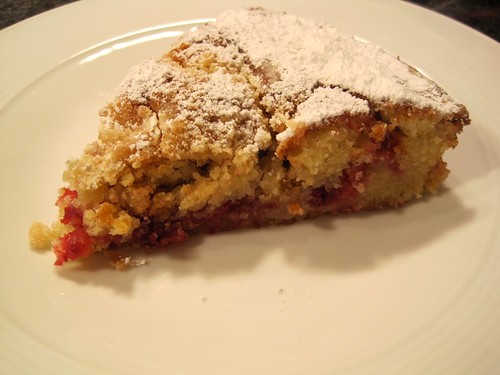
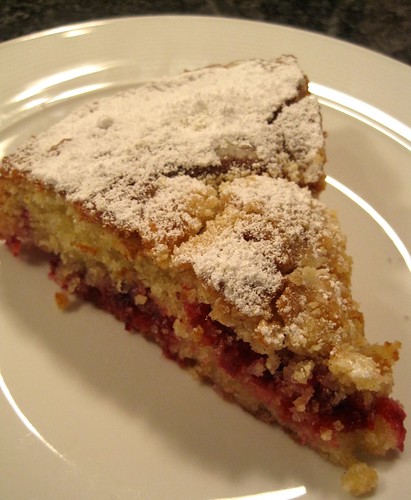
Cranberry Vanilla Coffee Cake

IMG_0397

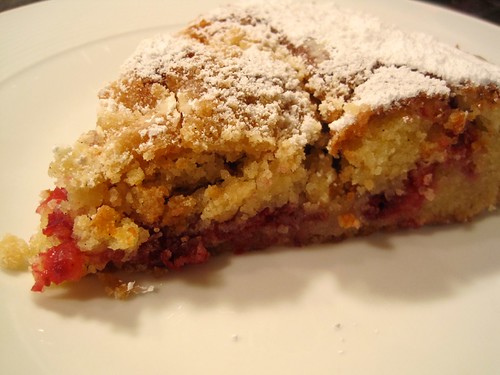
While shopping at Whole Foods the other day, I noticed a delicious looking bag of fresh cranberries and I couldn't resist; I just had to have them. Not that I knew at all what I was going to do with them, mind you, but they were calling out to me. Well, they have been sitting in the fridge for around two days now, and I finally decided something needed to be made with them. I scoured the internet for scrumptious-sounding recipes that utilized fresh cranberries and, let me tell you, I found a ton! It was actually rather difficult to make a final decisions\ when I had to choose between tarts and scones and other delectable delights, but alas, this one had my name all over it. When I cam across a coffee cake that included fresh cranberries I knew I had found "the one." You see, I have a very soft spot for coffee cakes .
I originally found the recipe on Smitten Kitchen where it was taken from the December 2008 issue of Gourmet Magazine.
The cake turned out simply delightful! It's sweet and yet tart, crumbly and yet creamy. Basically, this coffee cake rocks! (And for the record, the batter is so freaking delicious that I would eat it all day long until I got sick and still not regret it... as bad as that sounds hah.)


IMG_0404


Cranberry Vanilla Coffee Cake
recipe adapted slightly from here

ingredients:
  • 1/2 vanilla bean, split lengthwise (yes, you absolutely need to use a vanilla bean and not vanilla extract)
  • 1 3/4 cups granulated sugar
  • 2 cups (6 ounces) frozen or fresh cranberries
  • 2 cups + 1 tbsp all-purpose flour
  • 2 tsp baking powder
  • 3/4 tsp salt
  • 1/2 cup + 1 tbsp unsalted butter, at room temperature
  • 2 large eggs
  • 1/2 cup heavy cream
  • Confectioner's sugar, to garnish
  1. Preheat oven to 375 degrees. Line the bottom of a 9 inch circular cake pan with parchment paper and grease pan sides and paper.
  2. Scrape the seeds of the vanilla bean into a food processor, add sugar, and pulse to combine. Transfer to a bowl and set aside. (I like to save the scarped out vanilla bean pod and leave it on the counter. When it's dry, I put it in with my granulated sugar to give it a vanilla-y taste!)
  3. Pulse the cranberries and 1/2 cup of the vanilla sugar in the food processor until finely chopped- you are not making a puree.
  4. In a medium-sized bowl, mix together 1 cup of flour, the baking powder, and the salt and set aside.
  5. In the bowl of an electric mixer fitted with a paddle attachment, cream 1/2 cup of butter with 1 cup of the vanilla sugar. When pale and fluffy, add in the eggs, one at a time, mixing well after each addition. Reduce the speed to low and mix in the flour mixture and heavy cream, alternating between the two, beginning and finishing with the flour.
  6. Spread 2/3 of the batter into the lined pan and then spread the cranberry mixture over it, making sure to leave a 1/2 inch border around the sides. Top with the remaining batter and smooth the top.
  7. With the fingers, mix together the remaining 1/4 cup of vanilla sugar with 1 tablespoon of butter and 1 tablespoon of flour. Crumble the mixture over the top of the cake.
  8. Bake for 45-50 minutes, or until a toothpick inserted into the cake (not the cranberries!) comes out clean; mine baked for 42 minutes.  Let cool in pan for 30 minutes then remove from pan to slice and serve!
IMG_0398
Related Posts with Thumbnails