My blog has moved!

You should be automatically redirected in 6 seconds. If not, visit
http://www.spachethespatula.com/
and update your bookmarks.

Showing posts with label nuts. Show all posts

Sunday, January 23, 2011

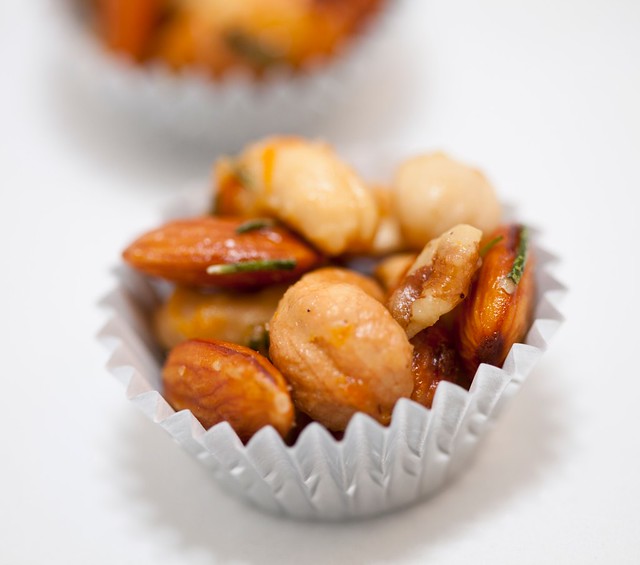
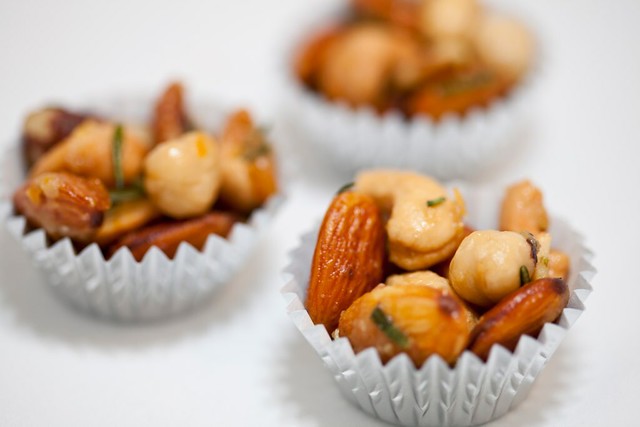
Orange-Rosemary Buttered Mixed Nuts

IMG_0035


Oh, hey guys! Remember me? I used to hang out here a whole lot more often than I have been the past month and a half? I post recipes from time to time? It's me, Rachael.


Look guys, I'm super sorry about my utter negligence of this blog since early December. The truth is, I just had way too much going on. Let's start from the beginning: first I had finals, then my little sister flew out to visit me for a week, then I flew home to Florida for Christmas, then I flew back to Seattle to celebrate my boyfriend's birthday, our anniversary, and New Year's with him, and then school started. WHEW! See? Plus school has been more than a little stressful this quarter as I have to write an average of two papers each week.


Well, now that we've got that out of the way, let's talk about these super tasty mixed nuts. I made them for Mikey's parents' dinner party they had a few nights ago as an extra little surprise as I was only asked to make dessert (which I will be sharing here in the near future).


These make a great snack, or an easy, delicious appetizer. They are salty and sweet and smell uh-mazing. Orange and rosemary make a wonderful combination that ends up being positively addictive.
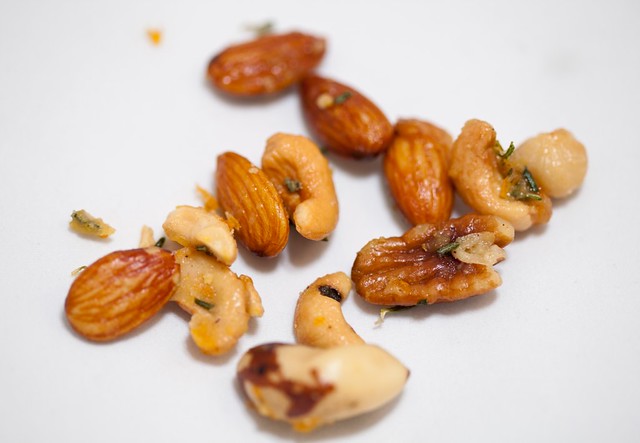
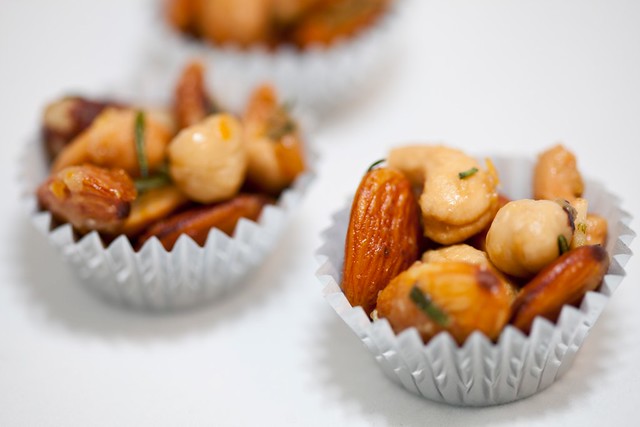
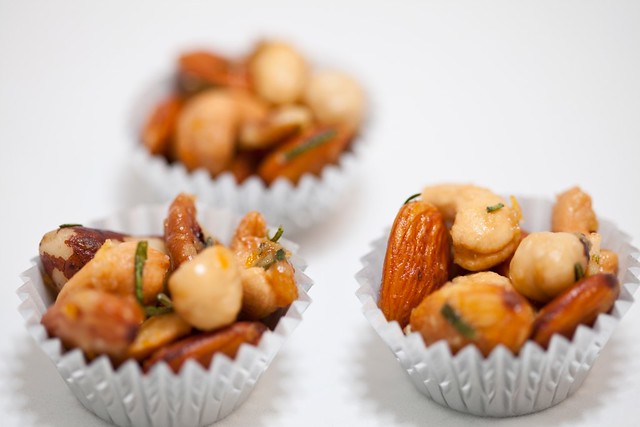
I highly recommend these nuts because not only are they scrumptious, little morsels, but they take less than ten minutes to whip up!


IMG_0051
IMG_0034

Orange-Rosemary Buttered Mixed Nuts
recipe adapted from here
These should keep for about a week in a sealed tupperware

ingredients:
  • 3-4 cups salted mixed nuts (a 17-ounce can)
  • 2 tbsp unsalted butter
  • 3-4 tbsp granulated sugar (depending on how sweet you want them)
  • 2 tbsp fresh rosemary, coarsely chopped
  • zest of one orange
  1. Melt the butter in a large skillet over medium-high heat. Add in the remainder of the ingredients and cook, stirring, until the sugar is melted and the mixture is fragrant (no more than 5 minutes).
  2. Pour the mixture on a baking sheet and allow to cool.
IMG_0029
IMG_0024

Tuesday, April 13, 2010

Cinnamon Hazelnut Brownies


IMG_5894


I have been having the most incurable chocolate cravings lately! I don't even know why because normally, I'm not so much of a dessert person (odd considering how much I love to bake, but usually I only try one or two of whatever I make, and then offload the rest onto others). But, these past couple of weeks the cravings have been unrelenting and nothing, not even dark chocolate M&M's or Chocolate Peanut Butter Cake, could cure them!
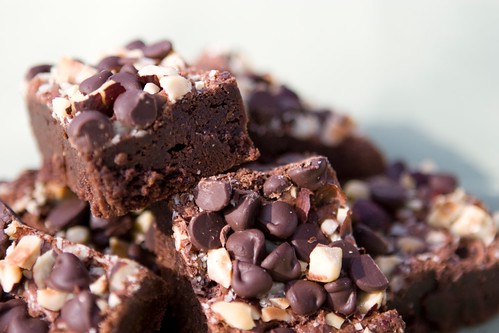
Alas, my search continued. But then, then I found these. These glorious, wonderful, amazing squares of rich, fudgy goodness and the incessant lust for chocolate was finally quashed!
I have Sugar Plum to thank for this; her spectacular Cinnamon Hazelnut Brownie recipe combines two of my very favorite chocolatey things: brownies and Nutella. Need I say more? No, probably not, but I will.
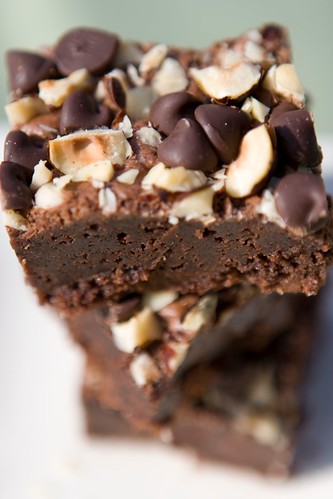
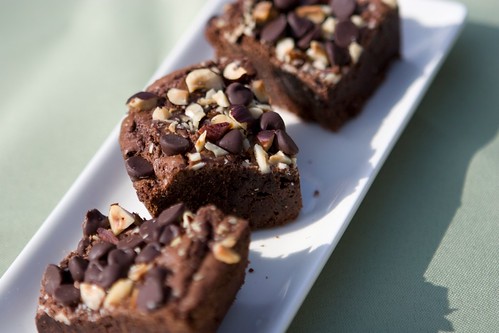
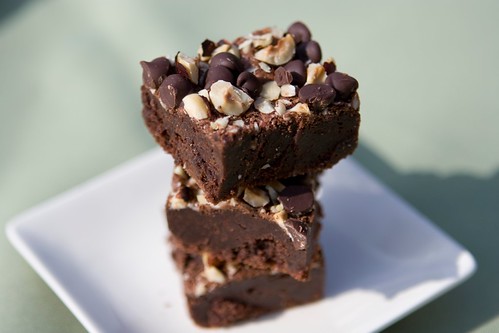
These brownies are chewy and dense with a slight spice from the cinnamon and a whole lotta crunch from the hazelnuts. They're pretty close to the best brownies around, in my humble opinion (and I have made some pretty magnificent brownies like these Mascarpone Brownies with a Chocolate Honey Sauce or these Cheesecake Brownies). I implore you, run to your kitchen and bake these immediately!


IMG_5883
IMG_5884
IMG_5896


Cinnamon Hazelnut Brownies
recipe slightly adapted from here
makes 16 amazing brownies

ingredients:
  • 1 cup all-purpose flour
  • 3 tbsp unsweetened cocoa powder (I used Dutch-processed)
  • 1 1/4 tsp cinnamon
  • 1/2 tsp baking powder
  • 1/2 tsp sea salt
  • 1/2 cup (1 stick) unsalted butter
  • 4 ounces semisweet chocolate chips, plus more for sprinkling on top
  • 1 cup granulated sugar
  • 1/3 cup Nutella (I actually used a different brand, Loacker, because that was what was at my grocery store, but the taste is the same)
  • 2 large eggs, at room temperature
  • 1 tsp vanilla paste (or extract)
  • 1/4 cup finely chopped hazelnuts
  1. Preheat oven to 375 degrees. Grease an 8x8 inch square baking dish and line with parchment paper; grease paper. Set aside.
  2. In a medium-sized bowl, combine the flour, cocoa powder, cinnamon, baking powder, and salt. Set aside.
  3. In a small sauce pan, melt the butter over medium heat. Remove from heat and stir in the chocolate until melted.
  4. In the bowl of an electric mixer fitted with a paddle attachment, beat together the melted chocolate and sugar for a few minutes. Add in the Nutella, eggs, and vanilla and beat for a couple more minutes until fully combined. Reduce the mixer speed to low and add in the flour mixture. Beat until just combined.
  5. Scrape the batter into the prepared baking dish. Sprinkle the hazelnuts and chocolate chips over the top (I used a heavy hand when "sprinkling").
  6. Bake for about 30 minutes, or until the edges are puffed and the center is set (mine baked 33 minutes). Don't overbake or they won't have that wonderful fudgy texture; it's honestly better to underbake them by a bit than overbake them!
  7. Cool completely before slicing. It's easiest to refrigerate them before slicing and removing from the baking dish- plus they taste awesome nice and cold!
IMG_5885
IMG_5908

Saturday, April 10, 2010

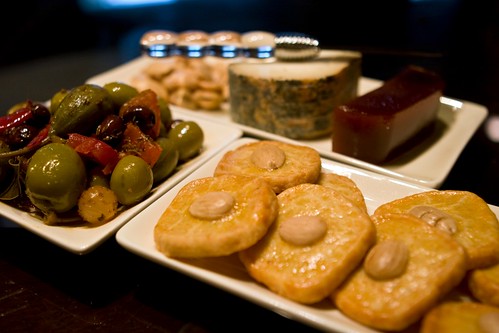
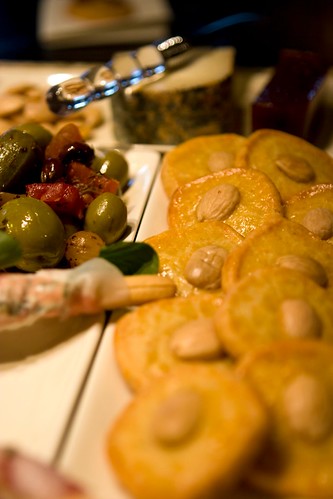
Manchego Crackers with Marcona Almonds- Tapas Night Part 1 of 3

IMG_5855
IMG_5872
Lately I have been craving all sorts of Spanish food, and to satiate these desires, I decided to have a Tapas Date Night for Mikey and myself!
This is just the first recipe of the three in total I will be posting in the coming days, but it just might be the best! I originally saw the recipe here, but it had no recipe attached so I had to search a bit.
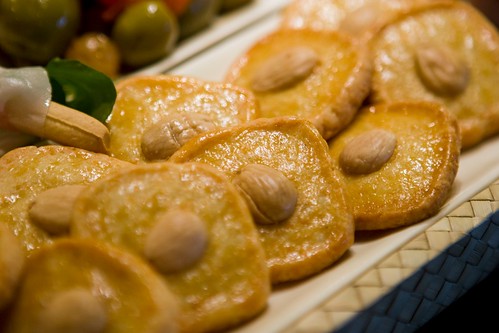
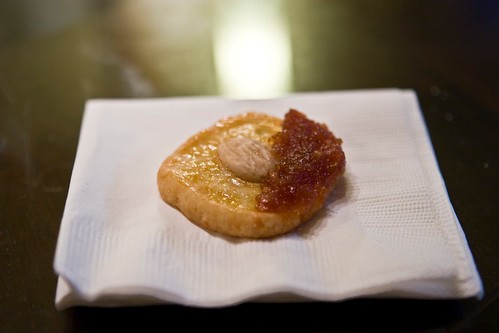
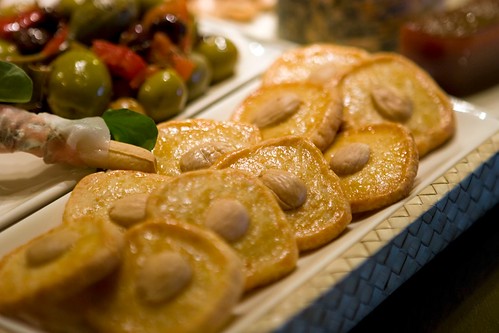
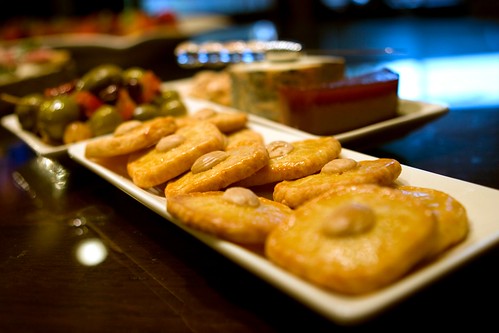
These little crackers turned out awesome- super crunchy, tons of vibrant flavor, and a perfect vessel for dulce de membrillo, also known as quince paste! 
IMG_5861
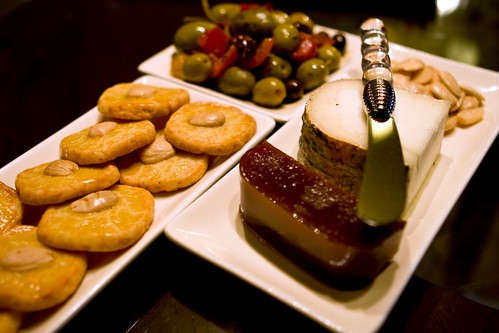
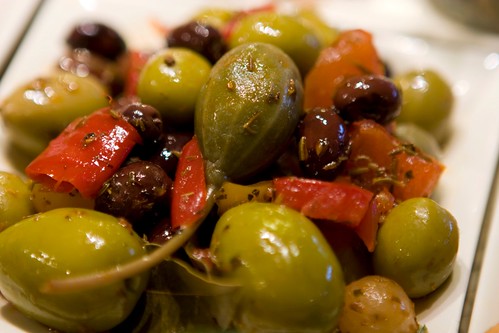
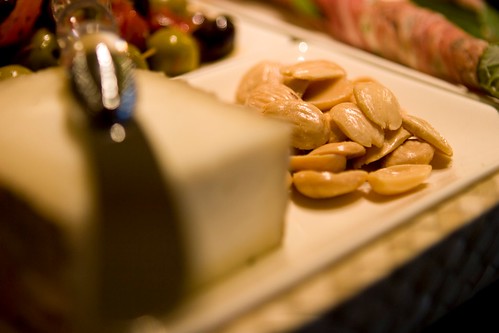
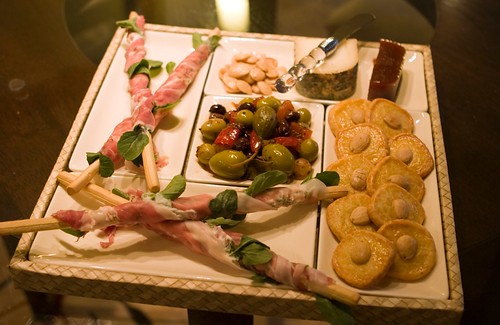
Membrillo is commonly served with Manchego cheese in Spain, and thus I knew it would be a match made in heaven! Each of the components (Manchego cheese, Marcona almonds, and quince) all fit flawlessly together is this super easy appetizer. The bite of the Manchego paired with the sweetness of the quince, and then the crunch of the Marcona almonds is a true delight for the taste buds! I also served a Spanish olive medley, extra Marcona almonds, and a Goat Patacabra (cheese) on the side.
I think these crunchy, little crackers would also be wonderful topped with some very lightly dressed arugula or something. The great thing about the recipe is that it's really versatile- it's a base that you can add any number of flavorings to, maybe a bit of honey or a tiny pinch of saffron- the possibilities are endless.

IMG_5868
Spanish Olive Medley:
IMG_5857
The gloriousness that is Marcona almonds:
IMG_5863
IMG_5867


Manchego Crackers with Marcona Almonds
recipe very slightly adapted from The New Spanish Table, but it can also be found online here
makes 30-40 crackers

ingredients:
  • 4 tbsp unsalted butter, at room temperature
  • 1 cup (about 1/4 lb) grated Manchego cheese (I used one that was aged for 12 months)
  • 1 1/4 cups all-purpose flour
  • 1/2 tsp sea salt, plus more for the egg wash
  • 2-5 tbsp water, as needed
  • 1 large egg
  • about 40 Marcona almonds
  1. In the bowl of an electric mixer fitted with a paddle attachment, mix together the butter and cheese until well combined. Scrape down the sides of the bowl and then add in the flour and salt. Mix on low speed until the dough just comes together. If the dough isn't coming together, drizzle in the water until it's workable.
  2. Turn the dough out onto a piece of plastic wrap, knead a few time to bring it together,  and form it into a log about 1 1/2 inches in diameter (you can make them round or square- it's your call). Wrap the log in the plastic wrap and refrigerate for at least an hour or up to 4 days.
  3. Preheat oven to 350 degrees. Line two baking sheets with parchment paper or silicone baking mats and set aside.
  4. Slice the dough into 1/4 inch rounds and place them on the prepared baking sheets 1 inch apart.
  5. Mix the egg and a pinch of salt together and then brush the egg wash onto the tops of the crackers. Press an almond onto the top of each.
  6. Bake until golden, about 15 minutes. Transfer to a wire baking rack to cool.
IMG_5856
IMG_5869
And I'll leave you with a little preview of the next recipe to be posted- those crazy looking things on the left side:
IMG_5852

Thursday, March 18, 2010

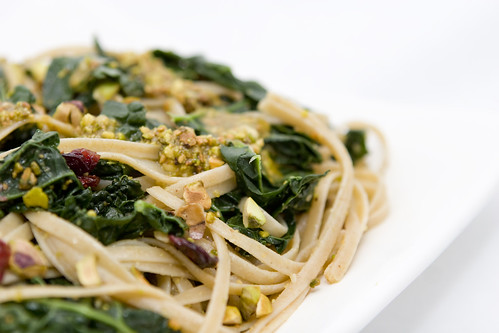
Whole Grain Linguine with Kale, Dried Cranberries, and Pistachio Sauce

Whole Grain Linguine with Kale, Dried Cranberries, and Pistachio Sauce

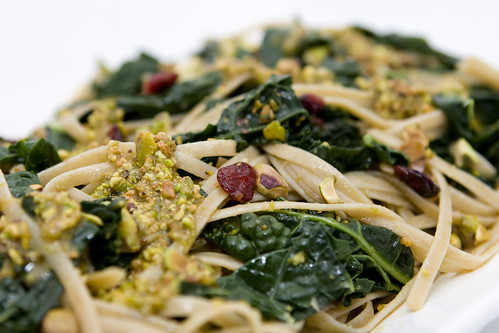
This is another recipe that I have had on the back-burner for quite a while, and finally just got around to it. Unfortunately, the original recipe called for pomegranate arils which are now out of season, so I decided to make some alterations! I substituted dried cranberries for the pomegranate; they worked beautifully!
The dish turned out phenomenal! Pistachios are one of my favorite nuts, and I think they really shine in this pasta. The cranberries impart just enough sweetness to counteract the hearty kale.
Try this pasta. Not only is it super easy, but the flavors and textures mingle in your mouth in a glorious fusion of sweet, hearty, salty, and  crunchy (plus it's pretty darn healthy). I don't think you'll be disappointed :).


Whole Grain Linguine with Kale, Dried Cranberries, and Pistachio Sauce

Whole Grain Linguine with Kale, Dried Cranberries, and Pistachio Sauce
recipe adapted from 101 Cookbooks
serves 4
ingredients:
  • 8 ounces whole grain linguine
  • 2/3 cup pistachios, toasted
  • 1 garlic clove, minced
  • 1/4 tsp sea salt
  • 1/4 cup extra virgin olive oil
  • 1 bunch of lacinato kale, washed, de-stemmed, and chopped
  • 1/4 cup dried cranberries
  1. Bring a large pot of salted water to a boil.
  2. While the water is heating, make the pistachio sauce by pureeing half of the pistachios, garlic, salt, and olive oil in the bowl of a food processor. Set aside.
  3. When the water is boiling, cook the pasta per the package instructions. At the last second, add in the kale and then drain right away and rinse under cold water. Spin in a salad spinner to fully dry the pasta/kale.
  4. Toss the pasta and kale with the pistachio sauce and 1/2 of the dried cranberries. Season with salt and pepper if necessary. Top with the remaining dried cranberries and pistachios and serve!
4 servings at about 495 calories each 


Whole Grain Linguine with Kale, Dried Cranberries, and Pistachio Sauce

Monday, February 22, 2010

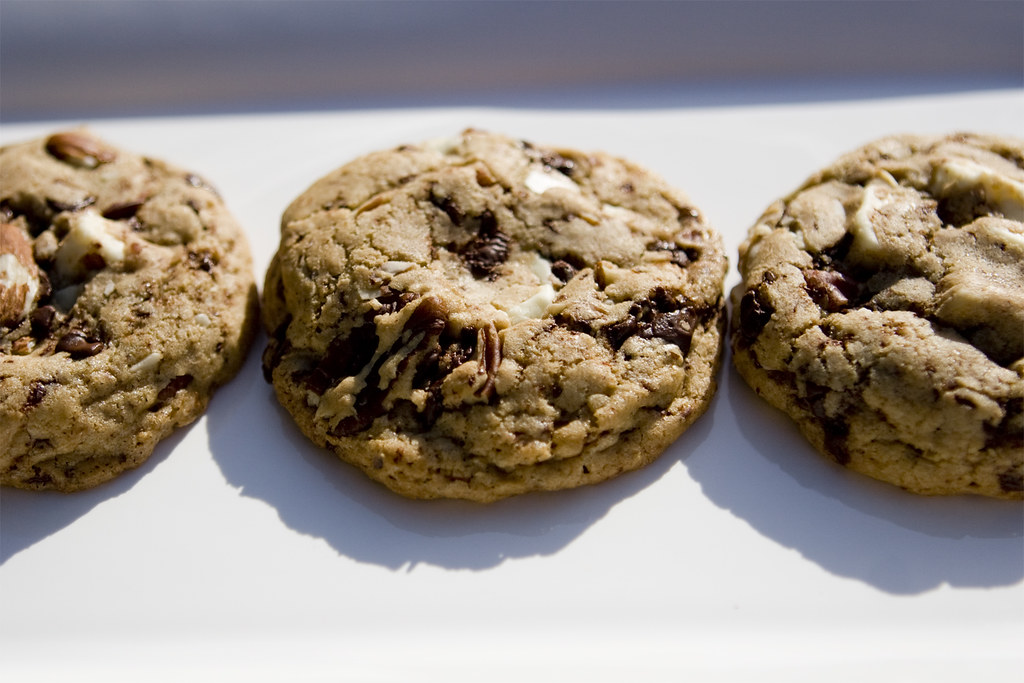
Everything (But the Kitchen Sink) Cookies

IMG_5619


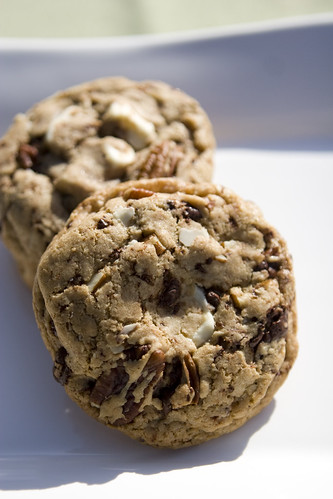
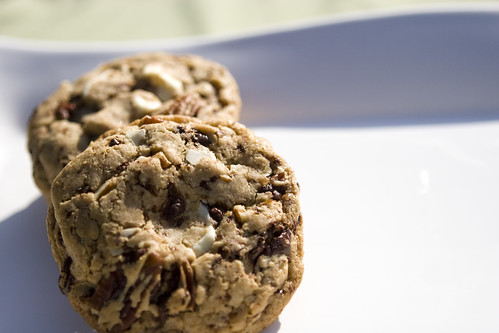
I have been having some serious cravings for a cookie loaded with chocolate and nuts, but I have quite the mish-mosh of ingredients on hand. After the cravings didn't subside, and Mikey started getting them too, I just decided to throw whatever I had into the batter and the results were outstanding!
These cookies are not for the faint of heart as the ingredients list (at least of my own mix-ins!) is overwhelming, to say the least, but the flavor! Oh the flavor is stupendous! So many textures and tastes! Every bite is something new! Enjoy these with a big mug of milk.


IMG_5621

Everything (But the Kitchen Sink) Cookies
makes 2 dozen cookies

ingredients:
  • 1 cup whole wheat pastry flour
  • 1 cup all-purpose flour
  • 1/2 tsp baking soda
  • 1/2 tsp sea salt
  • 3/4 cup salted butter, melted
  • 1 cup packed dark brown sugar
  • 1/2 cup granulated sugar
  • 1 large egg
  • 1 large egg yolk
  • 1 tbsp vanilla extract
  • 1 tsp vanilla paste
  • 4 cups of mix-ins (I used chopped semisweet chocolate, chopped bittersweet chocolate, chopped white chocolate, chopped pecans, and sliced almonds)
  1. Preheat oven to 325 degrees. Line baking sheets with silicone baking mats or parchment paper. Set aside.
  2. In a medium bowl, combine the flours, baking soda, and salt. Set aside.
  3. In the bowl of an electric mixer fitted with a paddle attachment, beat the butter and sugars for a couple of minutes until thoroughly combined. Add in the whole egg, yolk, vanilla extract, and vanilla paste and beat until combined. Slowly add in the flour mixture and mix on low speed until combined. Stir in your desired mix-ins.
  4. Scoop 2-3 tablespoon sized onto the prepared baking sheets about an inch apart. Bake for 15 minutes or until golden. Cool on baking sheet for 5 minutes before transferring to a wire rack to cool further.
IMG_5622

Monday, February 1, 2010

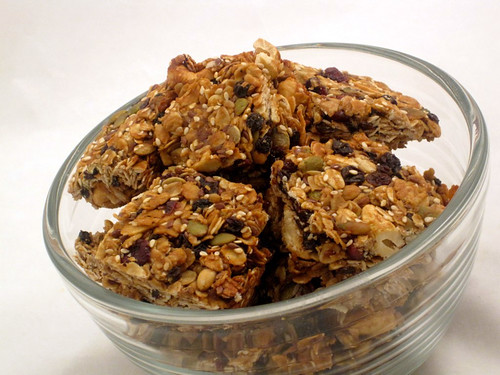
Salty-Sweet Granola "Clusters"

IMG_1307
Tastespotting didn't like the "composition" of this photo :(


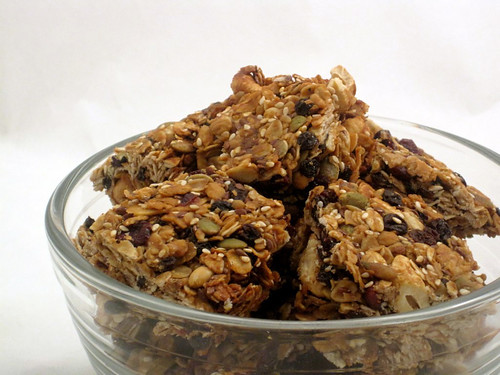
Yes, I had originally set out to make granola bars. Some tasty, easily portable, better-than-the-store-bought snack bars (by the way I just mistakenly typed "bras" which is definitely not the same, ha ha). Well, things didn't go exactly to plan, though, to be fair, I don't think it was the recipes fault (although many others who tried the recipe complained of the same thing). You see, I was supposed to wait until the baked bars were completely cooled before cutting them. I assumed, like the others who had this little mishap I'm sure, that cooled for 45 minutes to slightly warmed was equivalent to "completely cooled." -Sigh- And so I am sure this was my mistake, and had I waited longer these would have cut without shattering.
Well anyways, despite my "issues," this granola was soooo good! I LOVED the honey/peanut butter binding mixture. These bars were also pretty salty which complemented the naturally sweet dried fruit extremely well.
I highly recommend making these bars, only, unlike me, be sure to wait until they are COMPLETELY cooled. I would wait a couple of hours at least; it's better to be safe than sorry.


IMG_1309
IMG_1299


As you can see, they are somewhat bar shaped, but there was a lot of crumbling.


Salty-Sweet Granola Bars... or "Clusters"
recipe adapted from here

ingredients:
  • 2 1/2 cups rolled oats
  • 1/2 cup desiccated coconut, unsweetened
  • 1/2 cup pepitas
  • 1/4 cup flax seeds
  • 1/4 cup sesame seeds
  • 1 cup whole cashews
  • 1 tsp sea salt
  • 1 tsp cinnamon
  • 1 tsp vanilla extract
  • 1/4 cup raw honey
  • 1/4 cup natural peanut butter
  • 1/4 cup brown sugar
  • 1/2 cup dried cranberries
  • 1/2 cup dried currants


IMG_1282IMG_1287
Before and after roasting!

    1. Preheat oven to 325 degrees. Line both a baking sheet and an 8 or 9 inch square baking dish with parchment paper.
    2. Combine the oats, coconut, seeds, and nuts and spread out evenly on the baking sheet. Bake for 15 minutes, stirring halfway through. 
    3. In a small sauce pan, combine the sugar, salt, honey and peanut butter over medium-low heat. Stir until the sugar is dissolved and then reduce the heat to low until the nuts/seeds are done toasting.
    4. In a large bowl, mix together the toasted nuts/seeds/coconut, the dried fruit, and the honey/peanut butter mixture with a wooden spoon.
    5. Spread the mixture into the square baking dish. With a piece of wax paper, press down on the granola to create a smooth, even surface.
    6. Bake the granola for 30 minutes. Remove from oven and let cool COMPLETELY. Cut with a very sharp knife and store in an airtight container.


    IMG_1298

     Makes 16 bars at 195 calories each.

    Monday, December 14, 2009

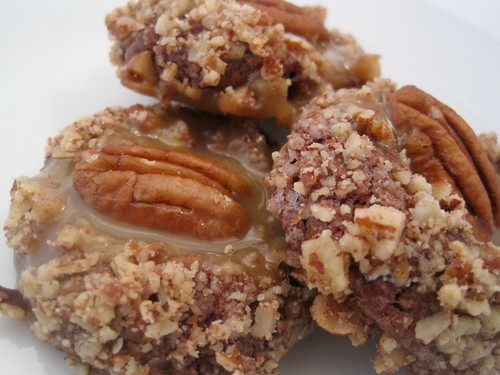
    Chocolate Turtle Cookies

    IMG_0916


    I've been looking for another sweet recipe to bake after making the Salted Brown Butter Crispy Treats three times in the past two weeks at Mikey's request. As delicious as they are, it's a bit repetitive, hah.
    As soon as I saw these turtle cookies over at Closet Cooking, I knew that they would be great with some home-made cajeta. I decided to make another batch of the gooey goodness especially for these cookies!
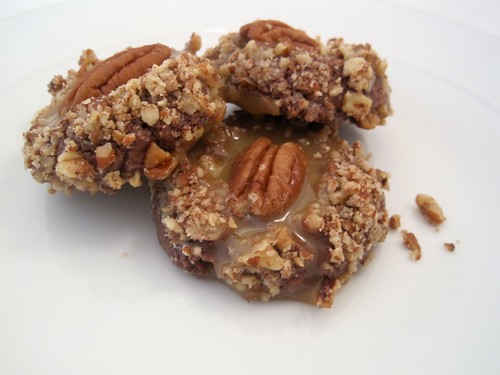
    These cookies turned out amazing! The pecans and the cajeta marry so well together- I love the contrast between the crunch of the nuts and the creaminess of the cajeta.
    I highly recommend them, whether you bake them for a holiday party, or just for you and yours to snack on .


    IMG_0919


    Chocolate Turtle Cookies
    recipe slightly adapted from here

    ingredients:
    • 1 cup all-purpose flour
    • 1/3 cup cocoa powder
    • 1/4 tsp coarse salt
    • 1/2 cup butter, softened
    • 2/3 cup granulated sugar
    • 1 large egg yolk
    • 2 tbsp milk (I used goat's milk to compliment the cajeta)
    • 1 tsp vanilla paste
    • 1 cup pecans, finely chopped
    • 2 large egg whites
    • 24 tsp cajeta
    • 24 pecan halves, toasted
    1. Mix the flour, cocoa, and salt in a medium-sized bowl. Set aside.
    2. In the bowl of an electric mixer fitted with a paddle attachment, cream together the butter and sugar until light and fluffy. Beat in the egg yolk, milk, and vanilla.
    3. Add the dry ingredients to the wet ingredients and mix until just combined. Lay plastic wrap directly over the dough and refrigerate for at least an hour.
    4. When ready to bake, preheat the oven to 350 degrees and line a baking sheet with parchment paper or a silicone baking mat.
    5. In a small bowl, whisk the egg whites until frothy.
    6. Form the dough into 1 inch balls (I weighed each of mine out at 0.8 ounces). Dip the balls into the egg whites and then in the chopped pecans.
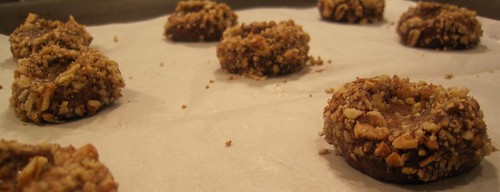
    7. Place the balls of dough onto the lined baking sheet, pecan side up. Indent the center of the balls with a spoon or finger. IMG_0904
    8. Bake the cookies for 10-12 minutes, rotating halfway through.
    9. Fill each cookie with about a teaspoon or so of the cajeta, and top with a toasted pecan half.
    IMG_0915

    Monday, November 30, 2009

    Thow-It-Together Pumpkin Soup

    IMG_0709

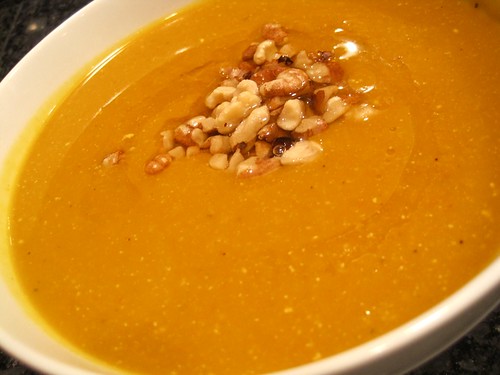
    I have been unnaturally obsessed with pumpkin this fall and was really craving a meal featuring the fine squash. I looked in the pantry and saw 2 cans of pumpkin puree. I walked to the fridge, another half can, "Pumpkin soup!" I said aloud. For the first time in like EVER, I didn't feel like looking up a recipe and just decided to completely wing it. 
    The soup turned out surprisingly yummy, especially when served with a nice buttered hunk of crusty bread! It seems to me, however, that it would make a much better appetizer rather than a meal. A nice small bowl would be perfect before lunch or dinner. A huge bowl of it kind of gets hard to eat towards the end- not because it doesn't taste great- my taste buds just tend to get sick of the pumpkin-y flavor after so many bites.

    IMG_0707

    Throw-It-Together Pumpkin Soup

    All amounts are approximations as I literally just tossed whatever I had into the pot.

    ingredients:
    • 2 1/2 cans (15 ounce) of pure pumpkin puree
    • 1 tbsp butter
    • 1/2 medium onion, chopped
    • 1/2 large carrot, chopped
    • 2 garlic cloves, minced
    • 2 sprigs of fresh thyme
    • 1/2 tsp fresh oregano leaves
    • 2 tsp salt
    • 1 tsp freshly ground pepper
    • 1/2 cup chicken broth
    • 2 1/2 cups vegetable stock
    • 1/2 cup water
    • 2 tbsp half-and-half (all I had, haha)
    • 1/4 cup 2% milk
    • 2 tbsp sherry vinegar
    • walnut oil, to garnish
    • toasted walnuts, chopped to garnish
    1. In a dutch oven, melt the butter over medium-high heat. Add in the onions, carrot, garlic, salt, pepper, thyme, and oregano, Cook for about 4 minutes, stirring often, until the onions are translucent and the carrots begin to soften.
    2. Add the chicken broth and vegetable stock to the pot and raise the heat to high. Bring to a boil and continue to cook for about 15 minutes. Remove from heat. Using a large ladle, add the soup to a blender (or simply use an immersion blender if you have one!) and puree. Return the soup back to the pot.
    3. Add the pumpkin to the soup and stir to combine. Turn the heat to medium-high and bring the soup to a simmer. When thoroughly heated through, stir in the sherry vinegar, milk, and half-and-half.
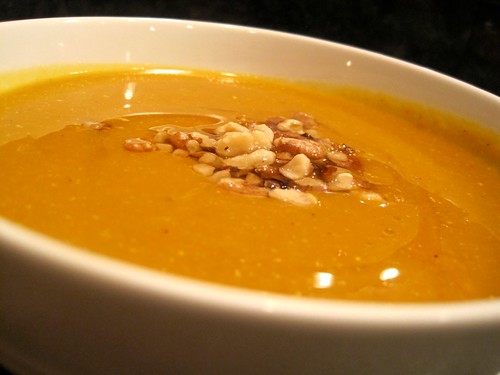
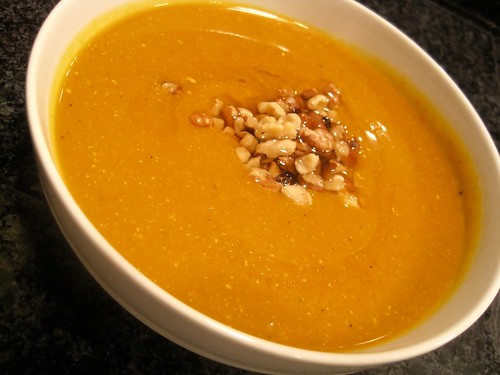
    4. Ladle into bowls and drizzle with walnut oil; sprinkle with toasted walnut pieces and serve!
    IMG_0703

    Sunday, November 29, 2009

    Chocolate-Covered Salted Peanut Cajeta Cups

    IMG_0691


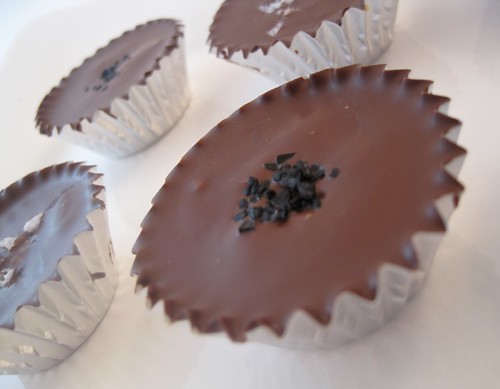
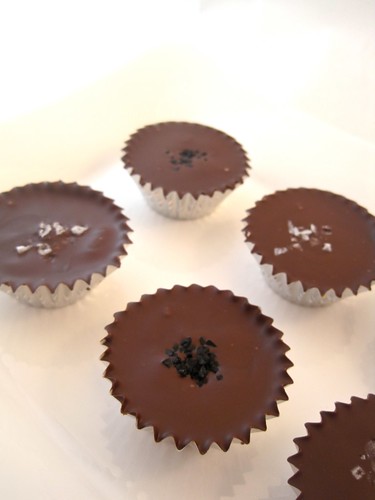
    I first saw this basic recipe on David Lebovitz's blog a few months back and my initial thoughts were that I needed to make these little chocolate cups. Yet, somehow, months passed and I still hadn't made them. Well, when I saw the altered recipe over at Salty Seattle just a few days ago, the replacement of the caramel with the cajeta (basically a dulce de leche made with goat's milk instead of cow's) just sang to me and I immediately bought all of the ingredients.
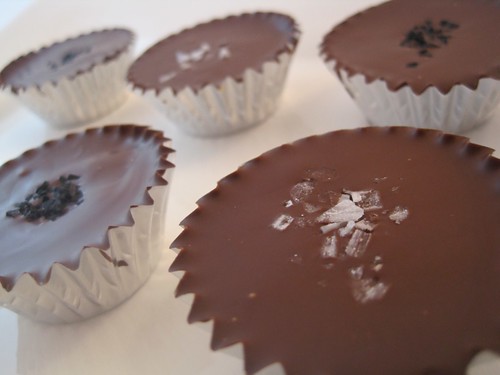
    These bitty cups are ah-mazing! The cajeta imparts a unique flavor that you can't quite obtain with simple caramel. It's so delicious that I'm sure you wont be disappointed by the fact that the cajeta recipe I'm giving you makes more cajeta than you'll need for the chocolate cups.


    IMG_0686
    Aren't they pretty?

    IMG_0692


    Chocolate-Covered Salted Peanut Cajeta Cups
    recipe from here

    ingredients:

    filling:
    • 1/2 cup cajeta (recipe below)
    • 1/2 cup raw Spanish peanuts
    • 1 tbsp butter
    • 1 tsp fleur de sel
    chocolate cups:
    • 20+ small baking cups
    • 6 ounces semisweet chocolate (I used Scharffen Berger)
    • 6 ounces bittersweet chocolate (I used Lindt)
    • Finishing salt (I used Cyprus flake salt and Hiwa Kai- black, charcoal-dusted, Hawaiin sea salt)
    1. Preheat oven to 350 degrees.
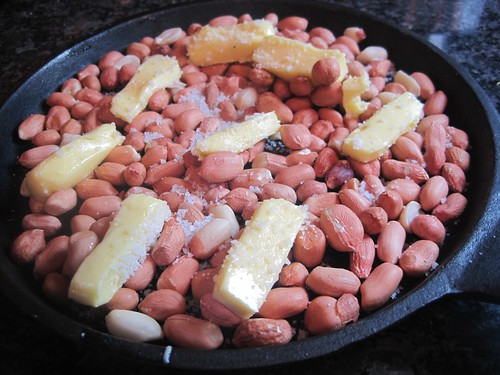
    2. Roast the peanuts, butter, and salt in the oven for about 15 minutes, stirring a couple times to ensure even coating (I roasted mine in a mini cast iron skillet because it happened to be the absolute perfect size!). Remove from the oven and stir the mixture into the cajeta. IMG_0599
    3. Melt the chocolate in a double boiler or in the microwave (checking every 30 seconds).
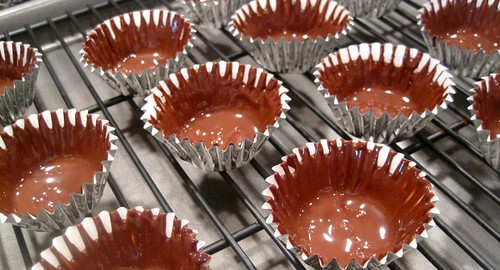
    4. Using a small spoon, dab a bit of the chocolate into the bottom of each baking cup. Spread it around so that it evenly coats the bottom and up the sides. IMG_0667 
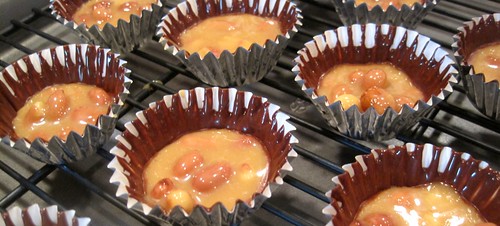
    5. Now fill each cup with about 1 teaspoon of the cajeta/peanut mixture. IMG_0674 
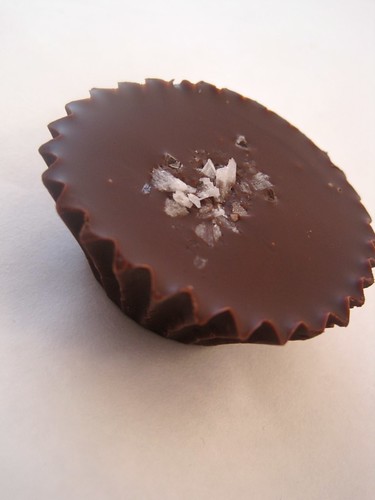
    6. Finally, top each cup off with more of the chocolate and spread it around so the top is smooth and the chocolate drips down the sides of the baking cup just a bit. Sprinkle with some finishing salt before the chocolate dries.
    7. Place in the fridge to harden for at least 10 minutes and, voila!- Heaven in a cup!
    IMG_0694

    Cajeta
    recipe from Rick Bayless (who I am absolutely obsessed with as of late)

    ingredients:
    • 1 quart goat's milk
    • 1 cup granulated sugar
    • 1/2 cinnamon stick
    • 1/4 tsp of baking soda dissolved in 1 1/2 tsp water
    1. In a dutch oven, combine the milk, sugar and cinnamon stick over medium heat. Stir until the milk comes to a simmer and the sugar is dissolved. 
    2. Remove from the heat and stir in the baking soda/water. It should foam up, and after the bubbles subside, return to the heat.
    3. Maintain the mixture at a "brisk simmer" and stir regularly until the mixture becomes a pale golden color. This will probably take about an hour, and though it may seem like a while, the end product tastes more amazing than you will ever know.
    4. Begin stirring quite frequently, scraping down the sides, as the mixture turns a more caramel-y brownish color and thickens to a more syrup-like consistency. IMG_0645IMG_0648IMG_0647IMG_0646 Don't be alarmed when the mixture starts bubbling up like this. It wil do this many times during the cooking process and always goes back down (at least mine did).
    5. To test the cajeta, Rick suggests dropping a couple of drops on a cold plate. The caramel should be the consistency of a medium-thick caramel sauce when cool. He says that if your mixture is too thick, you should stir in a tablespoon of water and remove from the heat.
    6. When done, pour the cajeta through a fine-mesh strainer and, when cool, refrigerate until you are ready to use.
    Related Posts with Thumbnails