My blog has moved!

You should be automatically redirected in 6 seconds. If not, visit
http://www.spachethespatula.com/
and update your bookmarks.

Showing posts with label sandwich. Show all posts

Wednesday, May 19, 2010

Slow-Cooker BBQ Beef with Sweet Cole Slaw

IMG_6410TEXT


Mikey and I have owned a slow-cooker for quite some time now but have actually never used it (shame on us!). It's not that I never wanted to, it's just that I'm so used to preparing such labor-intensive meals when I do cook, that the prospect of throwing something in the pot and then turning it on only to touch it again hours later was completely foreign to me. How terrible is it that I'm intimidated by something being too easy to cook?
Anyways, we both had been craving BBQ lately and I have always wanted to make some myself, so I thought it would be the perfect occasion to try out the slow-cooker. 
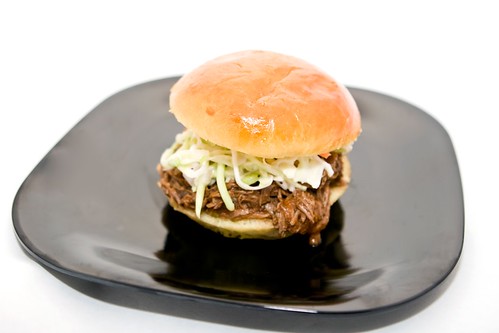
I found this great recipe for BBQ beef and it could not have been easier. Seriously, what was I thinking waiting this long to toss something in the crock pot?! I literally put it in in the morning, added the sauce when I got back from class, whipped up the coleslaw a couple hours later, and then viola! Dinner in a flash (well it technically took like 10 hours... but my personal input was minimal)!
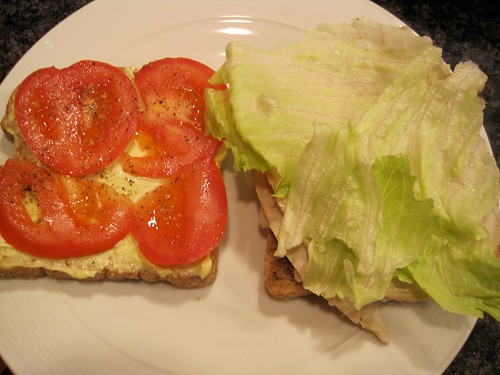
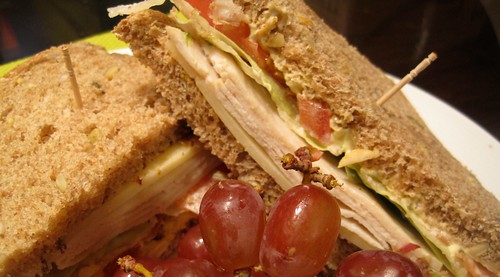
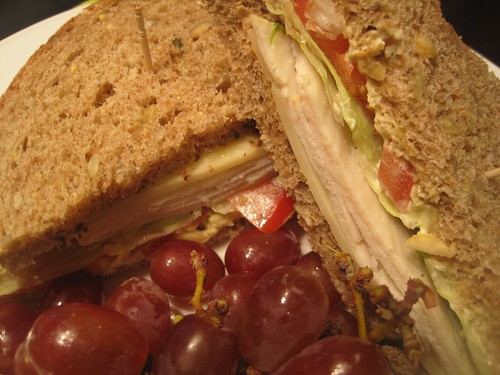
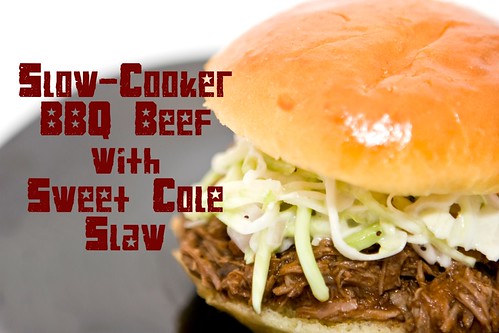
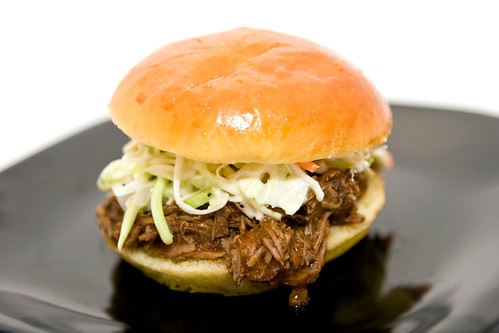
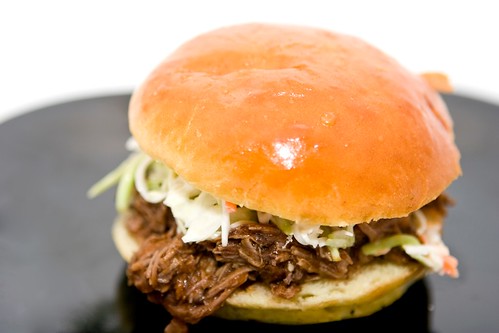
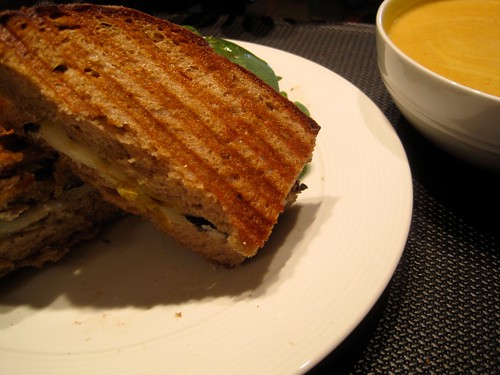
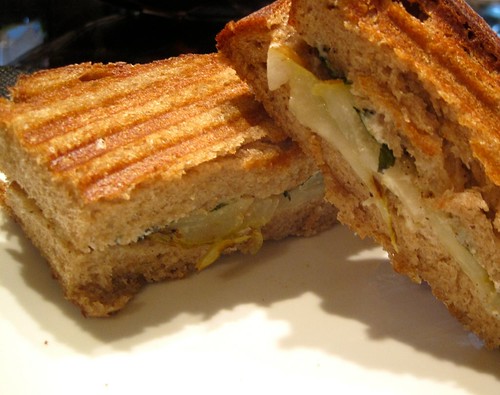
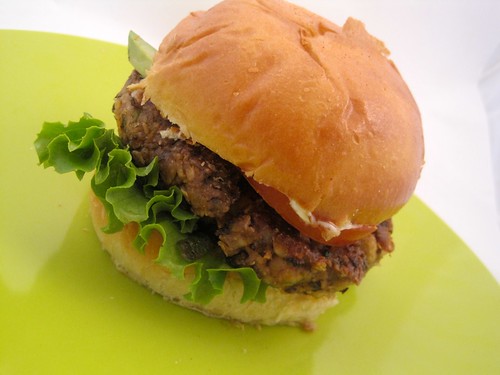
This BBQ beef is absolutely sublime, you guys! It's sweet, tangy, and oh-so-comforting. And, paired with the cool slaw it is the perfect entree for a dinner outside on a summer evening. I served mine up on cute little Brioche buns, but they would also be great on Hawaiian rolls (any slightly sweet roll really).
Oh, and just so you know, this makes AWESOME leftovers :).


IMG_6417
IMG_6413
IMG_6408


Slow-Cooker BBQ Beef
recipe adapted from here

ingredients:
  • 3 1/2 lb beef chuck roast
  • 1 cup water
  • 1 tbsp + 1 1/2 tsp apple cider vinegar
  • 2 tbsp dark brown sugar
  • 2 tbsp honey
  • 1 tsp dry mustard
  • 2 tbsp Worcestershire sauce
  • 1 1/2 cups ketchup
  • 1 tsp sea salt
  • 1/4 tsp freshly ground pepper
  • 1/8 tsp cayenne pepper
  • 1/4 tsp red pepper flakes
  • 2 cloves garlic, minced
  1. Place the roast in the slow-cooker along with the water. Cover and cook on low for 4 hours.
  2. Remove 1/2 cup of the broth from the slow-cooker and discard.
  3. In a medium-sized bowl, mix together all of the remaining ingredients. Pour over the meat; cover and continue to cook for 3 more hours on low.
  4. Remove the meat from the slow cooker (try to shake off the excess juices/sauce) and shred on a cutting board using 2 forks. Try to remove the fat from the meat now as well. Place back in the slow-cooker, mix around with t he sauce/juices, and cook for 3 more hours on low.
  5. Serve on buns topped with Sweet Cole Slaw (recipe below).
Sweet Cole Slaw
recipe adapted from here

ingredients:
  • 1 10-ounce bag of shredded cabbage for cole slaw
  • 6 ounces broccoli slaw mix
  • 1 shallot bulb, diced (2-3 tbsp)
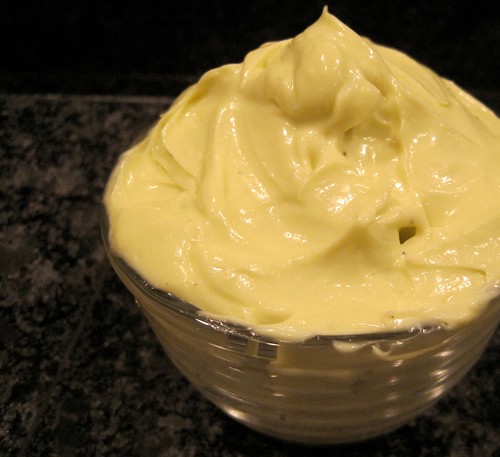
  • 2/3 cup Miracle Whip (it's sweeter than mayo)
  • 2 tbsp vegetable oil
  • 2 tbsp granulated sugar
  • 1 tbsp apple cider vinegar
  • 1/4 tsp sea salt
  • 1/2 tsp poppy seeds
  1. Combine the slaw mixes and shallot in a large bowl.
  2. In a medium-sized bowl, whisk together the remaining ingredients. Pour over slaw and toss to coat.
  3. Chill at least 2 hours prior to serving
IMG_6412

Wednesday, March 3, 2010

Moroccan Carrot and Goat Cheese Sandwich with Green Olive Tapenade

IMG_5642


Spring is in the air! Out here in Seattle it's warming up (or rather trying to), the cherry blossoms are blooming, daffodils are sprouting up everywhere you look, and and in the past couple of weeks I think I've seen the sun more times than not. I'm getting excited!


Cherry Blossoms

In honor of the approaching spring, I decided to make a great picnic-y sandwich that is even better when enjoyed out in the warm(ish) rays of the sun.
I've been holding onto the recipe for quite a while; ever since I saw it on Love and Olive Oil I knew it was a sandwich for me. I'm happy to report that I was oh-so-right. This sandwich is certainly unique, with a flavor combo that is out-of-this-world! I love the way the sweet-yet-spicy kick of the carrots blends with the tangy, creamy goat cheese. Then, you get this wonderful saltiness imparted by the olive tapenade that really just brings everything over-the-top!
So, go grab a blanket, spread it on the lawn outside, and whip up a few of these sandwiches to share with a few good friends in the nice weather... or at least open a window or something :).


IMG_5633
IMG_5629


Moroccan Carrot and Goat Cheese Sandwiches with Green Olive Tapenade
recipe slightly adapted from here

I, of course, cheated and used some pre-made tapenade in my version as many reviewers said to do and I'm quite glad I saved myself the extra work. I am certain there was no flavor-loss (and hey, you have less to screw up, right?). I made up the entire batch of carrots and just kept the extras in a tupperware in the fridge to pull out and eat at my leisure.

ingredients:
  • 2 tbsp honey
  • 1 1/2 tbsp freshly squeezed lemon juice
  • 2 tsp sweet paprika
  • 1 tsp ground cumin
  • 1/2 tsp cinnamon
  • 1/4 tsp cayenne
  • 1 tsp sea salt
  • 1/4 cup extra virgin olive oil
  • 1 to 1 1/2 lbs carrots, sliced
  • green olive tapenade
  • soft goat cheese
  • pumpernickel bread
  1. Whisk together the honey, lemon juice, spices, salt, and olive oil in a large bowl.
  2. Cook the carrot slices in a pot of boiling, salted water for approximately 45 seconds, until crisp-tender. Drain well and then immediately toss with the dressing. Cool to room temperature, stirring occasionally, then cover and pop in the fridge to marinate for at least 4 hours.
  3. To assemble the sandwich(es), spread one slice of bread with tapenade, and smear the other slice with some goat cheese. Layer the carrot slices onto the goat cheese and put the two slices together. Enjoy!  Simple. Easy. Delicious.
IMG_5636

Each sandwich is about 580 calories when you use 1/8 of the carrot mixture and 1 oz. each of the goat cheese and olive tapenade on two slices of pumpernickel bread.

Sunday, January 24, 2010

Grilled Pear, Humboldt Fog, and Mint Panini

IMG_1223


This year, Mikey got a panini press for Christmas and, to be honest, I think I was more excited about his gift than he was, ha ha. A few weeks ago, we tried it out for the first time and it was a overwhelmingly successful venture! I made Mikey a panini with grilled chicken, sharp cheddar, bacon, homemade chipotle mayonnaise, and spinach, served up with some creamy tomato soup. And for myself, a panini with dry coppa, arugula, and fontina cheese. I also had to sneak a tiny bowl of the tomato soup because man, this boxed stuff is incredible! It was Pacific Natural Foods Creamy Tomato and I seriously thought it was out-of-this-world good. It has this amazing subtle sweetness to it. I immediately went out and bought 3 more boxes of the stuff along with a box of nearly every variety they make. I might be a bit obsessive...
Anyways, the paninis were scrum-diddly-umptious and I basically couldn't wait to use the press again.
I found this wonderful blog called Panini Happy while looking for flavor combinations and came across a Grilled Peaches and Humboldt Fog Panini that sounded really tasty. Since peaches aren't in season at the moment, I decided to switch it up and use pears! The sandwich turned out SO good! The creaminess and pronounced taste of the Humboldt Fog paired with the sweet, grilled pears was simply delightful- another success for the panini maker!
I served my panini up with a handful of baby spinach dressed in a simple vinaigrette, and some creamy pumpkin soup. The recipe for the soup can be found here!


IMG_1231


Grilled Pear, Humboldt Fog, and Mint Panini
recipe adapted from here
serves 1

ingredients:
  • 1 large pear (I used Bosc), sliced into 1/2 inch slices
  • 1 ounce Humboldt Fog goat cheese
  • fresh mint
  • 2 slices of bread (thicker works better, I just used what I had on hand which was Pain du George- a whole wheat bread)
  • a small amount of butter
  1. Preheat the panini grill to 375 degrees.
  2. Place the pear slices on the grill and grill for around 2 minutes, until they are caramelized. Remove from the grill and set aside.
  3. Butter one side of each of the bread slices with a bit of butter.
  4. Layer the pear slices onto a slice of the bread (not the butter side) and top with some mint leaves and then the cheese. Top with the remaining slice of bread and press for around 3 to 4 minutes (make sure the butter sides of the bread are facing the panini press), or until the cheese is melted. Serve!
IMG_1216

Wednesday, December 9, 2009

Veggie Burgers & Super Simple Garlic Aioli

IMG_0896


Every few weeks or months I go through a food faze where I just cannot get enough of a certain food. In the past it has been avocados, big juicy meat burgers, hot dogs, sweet potato fries, cottage cheese, pickles, and peanut butter. My cravings have absolutely no rhyme or reason and come on fairly suddenly. Right now, it's veggie burgers. These days, nearly each time I go out to eat I order one and still haven't satiated my hankering. I decided it was high time I made my own.
Despite the fact that I generally have a strong aversion to Guy Fieri and his bowling shirts and "bling,"I had heard that his sister's veggie burger recipe was up there with the best. Thus, I conceded my disfavor of the man for a small moment and gave it a try.
These veggie burgers turned out surprisingly delectable and I am very glad that I made quite a few to freeze for whenever I need one .
I served mine up on a big brioche bun with a simple aioli (recipe below), avocado, green leaf lettuce, and tomato.


IMG_0888
IMG_0900

Veggie Burgers
recipe adapted from here
ingredients:
IMG_0865
  • 4 ounces olive oil
  • 1/4 cup + 2 tbsp diced red onion
  • 1/4 cup diced black olives
  • 1/4 cup diced red bell pepper
  • 1 tbsp diced jalapeno
  • 3 tbsp minced garlic
  • 2 tbsp diced artichoke
  • 8 ounces black beans, drained if canned
  • 8 ounces chickpeas, drained if canned
  • 8 ounces white kidney beans, drained if canned
  • 2 tbsp minced fresh parsley
  • 6 ounces rolled oats
  • 3.5 ounces oat bran
  • 1/2 tsp Sweet Hungarian paprika
  • 1/2 tsp hot paprika
  • 2 tsp dried oregano
  • 1 tsp red pepper flakes
  • 1 tsp ground cumin
  • 1 tsp celery salt
  • 1 tsp cayenne pepper
  • 1 tsp garlic powder
  • 1/2 tsp ground sage
  • 1/4 cup bread crumbs
  • 2 eggs
  • 1 tbsp worcestershire sauce
  1. Heat 2 ounces of the olive oil (half of it) in a saute pan over medium-high heat. Add in the first seven ingredients (all until the beans) and saute until the veggies become translucent (about 5 minutes or so). Put the veggies into a bowl to cool and set aside. IMG_0862
  2. Slightly mash the beans and the parsley in a bowl with a fork or potato masher. Add in the veggies and mix thoroughly.  IMG_0851
  3. Add in the remainder of the dry ingredients. Also add in the eggs and worcestershire sauce, and form into eight patties (I got seven, but I made mine fairly large). Cover and refrigerate for at least half an hour (or freeze any you don't want to use right away). I used a little circular tupperware container lined with plastic wrap to help me shape the patties. Then, I just lifted each out by the plastic, and wrapped 'em up- super easy! IMG_0873IMG_0878
  4. Heat the other 2 ounces of olive oil in the saute pan and cook the patties for 2 to 3 minutes per side.

Super Simple Garlic Aioli

ingredients:
  • 1/2 cup mayonnaise
  • 1/4 cup lemon juice
  • 1 1/2 tsp dijon mustard
  • 2 tbsp minced garlic
  1. Whisk together all of the ingredients in a bowl.
  2. Chill the aioli, covered, for at least 2 hours prior to serving so flavors can meld.

Tuesday, October 6, 2009

Homemade Mayonnaise

I have to work at 5:30 today so I knew I had to get in a late lunch before heading out. At around 3:30 I decided I should start thinking of something to eat. I wanted a sandwich but I wanted to do something to give it a little flair. I decided I would whip up a little homemade mayo!

IMG_0074

Homemade Mayonnaise

IMG_0067

ingredients:
  • 2 egg yolks
  • 1 whole egg
  • 1 tbsp Dijon mustard
  • pinch of salt
  • freshly ground black pepper
  • 2 to 4 tbsp fresh lemon juice
  • 2 cups olive oil
  1. Combine egg yolks, whole egg, mustard, salt, pepper, and 2 tbsp of lemon juice in a food processor and process for 1 minute.
  2. With the motor running, gradually add the olive oil in a slow, steady stream.
  3. When thoroughly blended, turn of the processor and scrape down the sides. Taste and correct the seasonings if necessary (here you can add the remaining lemon juice if you desire).
The mayonnaise will keep covered in the refrigerator for 5 days. Let it return to room temperature and stir before using.

IMG_0069

I spread my mayo on a slice of Dakota Great Harvest bread and topped it with some salt and pepper. Then I added couple slices of deli-sliced Jennie-O turkey breast meat, some tomato, lettuce, and a bit of grainy mustard on the other bread slice.

IMG_0071
IMG_0072

I ate my sandwich with yummy, juicy grapes and lots of water. It was so good. Homemade mayo and store-bought aren't even in the same category of food, I swear! I have to say though, mine was quite olive oil-y tasting and I think that's because I used Extra Virgin Olive Oil; it was still delicious nonetheless!

IMG_0073

Sunday, October 4, 2009

Veggie and Hummus Sandwich

I had a wonderful day yesterday . I went to the Toy Story/Toy Story 2 double feature in 3-D with my boyfriend, Mikey. As I watched, I munched on some delectable Swedish Fish. It was long! It started at 3:45 and didn't end until around 7pm! Afterwards, we went to P.F. Chang's as I had a $50 gift certificate from my birthday. We ordered almost half the menu! We started with the amazingly delicious crab rangoons and the wanton soup, and then proceeded to order four entrees and a side of garlic sauteed spinach! We were full before the entrees even arrived and ended up only having a couple of bites of each before asking for everything to be boxed up, ha ha. Needless to say, we have enough P.F. Chang's in the fridge for the entire week.

Since I was still full from my Chinese feast last night, I didn't feel like eating until around 12:45. I opened the fridge and looked around, trying to decide what to eat but noticed the P.F. Chang's leftovers staring back menacingly at me... I knew those would not be on the immediate menu. I decided on something fresh, a nice hummus sandwich.

IMG_5122

I slathered some hummus on one slice of bread (mine is Dakota bread from Great Harvest), and then topped it with a small handful of sprouts, some slices of raw zucchini, and roasted red peppers. I smeared some avocado (about 1/4 of a small one) on the other slice of bread and placed a slice of Tillamook Swiss atop it and then some tomatoes. I finished with some salt and pepper and put the two pieces together.

IMG_5116

I then popped it in a 350 degree oven until the cheese got all gooey and the bread toasted, about ten minutes (It's times like these when I wish I had a panini press or grill pan).

IMG_5121
IMG_5119

It was just what I wanted. Oh my gosh, the hummus gets nice and warm in the oven and mixes a bit with the gooey Swiss and the roasted red peppers added a subtle sweetness... It was awesome! I ate my sandwich with a sliced plum on the side and a glass of ice cold Diet Lime Pepsi (diet cola is my ultimate weakness).

IMG_5128

Next time I think I might try roasting the zucchini first and adding some spinach!

IMG_5126
Related Posts with Thumbnails