My blog has moved!

You should be automatically redirected in 6 seconds. If not, visit
http://www.spachethespatula.com/
and update your bookmarks.

Monday, October 26, 2009

Creamy, Dreamy Risotto

IMG_0226

Ree from The Pioneer Woman and I seem to hold the same belief that a bit of heavy cream can go a long way in some dishes. As soon as I saw her risotto recipe I knew that I would have to make it.
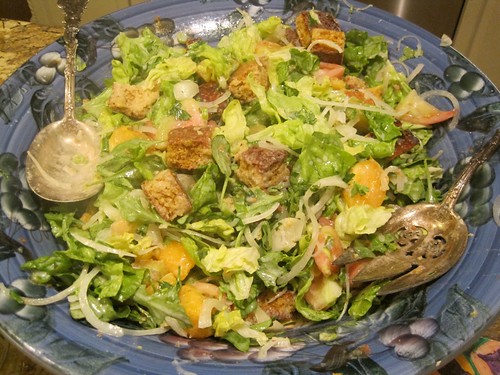
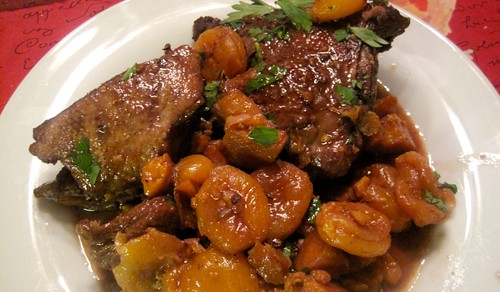
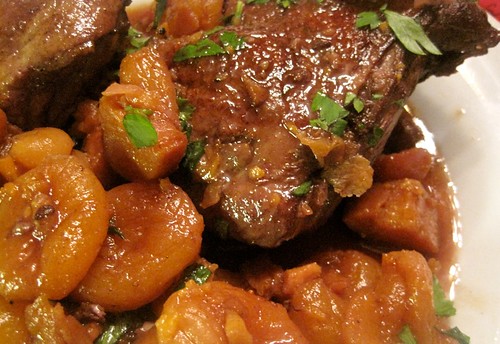
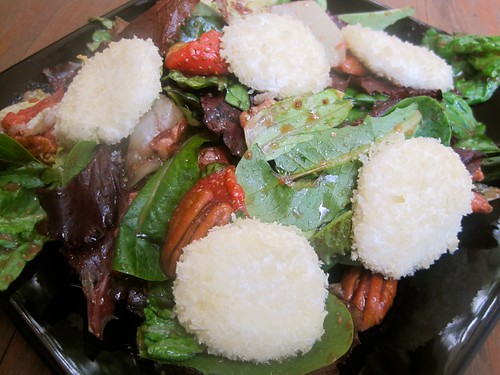
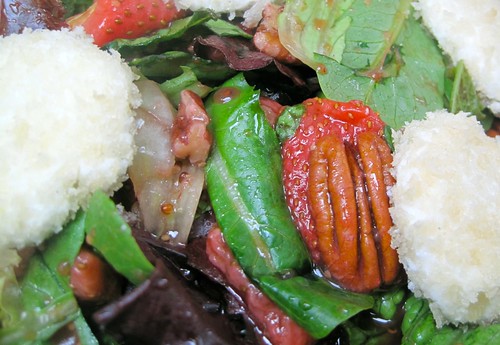
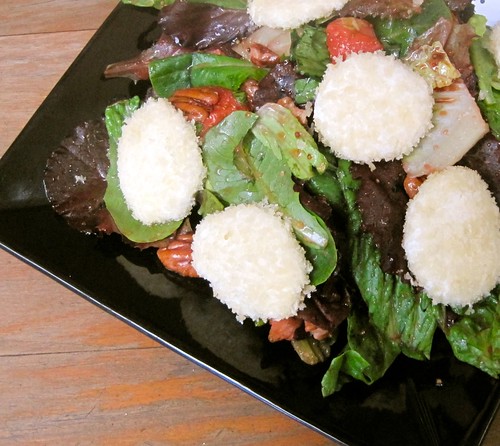
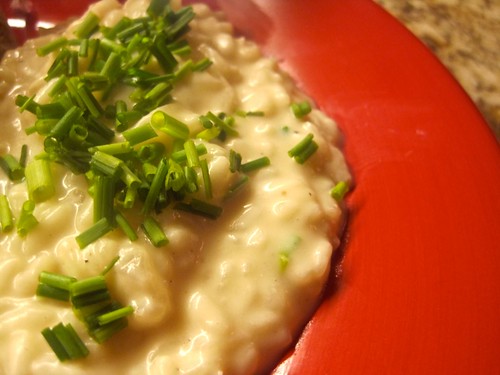
It was creamy, and rich, and oh-so-satisfying. A small dollop of this stuff is PLENTY and the richness paired so nicely with the salad and fish I served along side it. Also, it should be mentioned that this risotto got quite a few compliments .

Creamy, Dreamy Risotto
adapted from here

ingredients:
  • 1/2 tbsp olive oil
  • 1/2 tbsp butter
  • 1 very small sweet onion, diced
  • 2 big cloves of garlic, minced
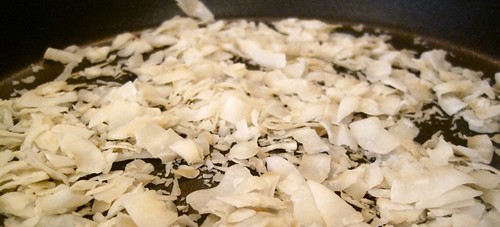
  • 12 ounces Arborio rice
  • 3 1/2 to 5 cups chicken stock (low sodium is best)
  • 1/2 to 3/4 cup heavy cream
  • 1/2 cup grated Asiago cheese
  • 1/2 cup grated Pecorino Romano cheese
  • salt and freshly ground pepper to taste
  • chives to garnish
  1. Heat olive oil in a large skillet over medium heat. Add the onion and garlic and saute until the onion is translucent.
  2. Add in the rice on top of the onion and garlic and stir to coat.
  3. Add in the chicken stock in 1/2 cup increments, stirring after each addition until the liquid is absorbed. Continue to repeat this step until the rice no longer has a hard bite to it. IMG_0220
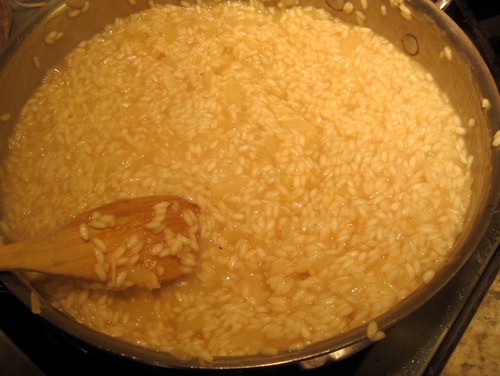
  4. At this point you want to add the cream, cheese, and salt and pepper to taste. Stir to combine.
  5. Stir in chives and sprinkle a bit on top. Serve!
IMG_0225

Grouper en Papillote

IMG_0229

Grouper is one of my favorite fish, most likely because I grew up eating fried grouper sandwiches as they are kind of the staple meal of coastal-Florida living. I knew this simple Greek recipe would be perfect for my stay back home.
The fish was delicate and moist and the vegetables got nice in soft and imparted their flavors into the grouper. The best part is, this recipe is actually pretty dang healthy! I loved dipping my crusty baguette into the sauce as Peter Minakis from Kalofagas suggests!

Grouper en Papillote
recipe from here

ingredients:
  • 1 medium red onion, sliced
  • 1 green bell pepper, sliced
  • 1/4 cup extra-virgin olive oil
  • 2 pints cherry tomatoes
  • 2 cloves of garlic, minced
  • 1/4 cup dry white wine (I used a Sauvignon Blanc)
  • 2 smallish (very precise I know) zucchini, sliced
  • 4 grouper fillets (7-8 ounces each)
  • 1/4 cup fresh basil leaves
  • 1 tsp dry oregano
  • sea salt
  • freshly ground black pepper
  • parchment paper
  • butcher's twine (I just asked my butcher and he cut me off a nice long piece gratis!)
  1. Preheat oven to 400 degrees.
  2. Roast the tomatoes in the oven in a medium-sized casserole dish for around 15-20 minutes or until they burst. Remove from oven and set aside.
  3. Rinse and pat dry the grouper fillets and then season all sides lightly with salt and pepper; set aside.
  4. In a large skillet, over medium-high heat, add the olive oil and then reduce heat to medium. Add in the onion and pepper and saute for around 6 minutes until softened. Add the tomatoes, garlic, and wine and saute for another minute. Stir in the zucchini and season with salt and pepper to taste.
  5. Set each fillet in the center of a piece of parchment paper around three times the size of the fillet. Spoon some sauce mixture over each fillet and top with a few basil leaves and some dried oregano. Carefully fold the sides of the paper up towards the middle, fold the two pieces around each other to form a seal, and twist the ends of the paper. Secure each end with butcher's twine.
  6. Place the packages on a large baking sheet and bake in the 400 degree oven for 25 to 30 minutes.
  7. Carefully transfer the cooked packages to individual plates and cut open at the table. Drizzle each with a bit of extra-virgin olive oil.
IMG_0234

Edit 10/26:
It should be noted that the leftover sauce/veggies from the fish make an excellent pasta sauce over whole wheat linguini. Be sure to serve it with a nice piece of crusty bread and a good, healthy sprinkling of Pecorino Romano!

IMG_0242

Cornbread Salad with Buttermilk-Lime Dressing

IMG_0230

This is another one of those recipes that I have had bookmarked forever, but still hadn't got around to making. After I had my plane ticket home, I knew that I would be doing a TON of cooking back in Florida so I was sure to add this recipe to the menu.
The salad was quite scrumptious and the dressing added a multitude of delicious flavors from the many herbs as well as the sweetness imparted from the honey offset by the tartness of the vinegar and lime. Additionally, the texture the peeled tomatoes provide is really something beautifully different. The cornbread itself is really tasty and I would definitely bake up some of it again just to nosh on with a little butter smeared on a piece piping hot from the oven!

Cornbread Salad with Buttermilk-Lime Dressing
recipe from Smitten Kitchen who adapted it from here

Cornbread Salad:
ingredients:
  • 1 recipe Crispy Cornbread, 3 cups of 1 inch cubes (see below)
  • 1 1/2 lbs ripe tomatoes (I used heirloom)
  • 6 cups roughly-torn, sturdy lettuce (such as Bibb or Boston)
  • 1 large Vidalia onion, sliced into very thing rings
  • 1 recipe Buttermilk-Lime Dressing (see below)
  1. Preheat oven to 250 degrees. Scatter the cornbread in a single layer on a baking pan and bake until the pieces are lightly toasted, about 7 minutes.
  2. Cut an X in the bottom of each tomato and blanch in a large pot of boiling water for 10 seconds. Immediately transfer to an ice bath to cool. Pell the tomatoes and chop them.
  3. Place lettuce greens, cornbread, onion, and tomatoes in a large bowl and toss to combine. Drizzle with dressing and season with salt and pepper. Toss once more and serve immediately.
IMG_0221

Crispy Cornbread:
ingredients:
  • 1 tbsp unsalted butter
  • 1 1/2 cups stone-ground cornmeal
  • 1 tsp baking powder
  • 1 tsp baking soda
  • 1/2 tsp salt
  • 1 tsp sugar
  • 1 large egg
  • 1 1/2 cups buttermilk
  • 2 tbsp unsalted butter


  1. Preheat oven to 450 degrees. Grease a 12-inch skillet with 1 tbsp of butter and place into the oven.
  2. In a large bowl, whisk the dry ingredients together.
  3. In a medium bowl, whisk the egg until frothy and then whisk in the buttermilk.
  4. Add the wet ingredients to the dry ingredients and mix thoroughly.
  5. Melt the remaining butter in the microwave and mix into the batter.
  6. While the butter in the skillet is smoking, carefully remove the skillet from the oven and swirl the butter around to coat the bottom and sides evenly. Pour the batter into the skillet; it should "sizzle alluringly."
  7. Bake for 15 minutes, or until the top of the bread is golden brown and the edge has pulled away from the sides of the skillet.
  8. Let cool and reserve for salad.
IMG_0218

Buttermilk-Lime Dressing:
ingredients:
  • 3/4 cup buttermilk
  • 5 tbsp freshly squeezed lime juice
  • 2 tbsp olive oil
  • 1 tbsp apple cider vinegar
  • 1 tbsp honey
  • 1/4 cup finely minced fresh basil
  • 1/4 cup finely minced fresh flat-leaf parsley
  • 1/4 cup finely minced green onions
  • 1/2 tsp salt
  1. Whisk all of the ingredients together in a small bowl until combined.
  2. Cover tightly and store in the refrigerator for up to two days.

Thursday, October 22, 2009

Ducklings Stewed in Red Wine and Winter Fruits

IMG_0201

This was my first ever venture cooking duck and I think it turned out fairly well. The recipe itself was superb but I think I could have browned the duck a bit more in the pan so that more of the fat rendered. All in all, it was a tasty dish with with a delicate sweetness from the figs, apricots, and creme de cassis, paired with savory goodness from the garlic, duck, and red wine. My personal favorite part was the sweet potatoes. They got so wonderfully soft and soaked up the delicious sauce.

Ducklings Stewed in Red Wine and Winter Fruits

ingredients:
  • 4 cups dry red wine
  • 1 cup prepared beef stock
  • 1 lb dried figs (I used a mixture of Turkish and Black Mission)
  • 3 lbs sweet potatoes
  • 4 tbsp unsalted butter (whether this is needed or not is debatable as the duck has a TON of its own fat)
  • 3 ducklings (4 1/2 lbs each), well-rinsed, patted dry, and cut into 6 pieces each
  • coarsely ground black pepper to taste
  • 2 cups dried apricots
  • 6 large garlic cloves
  • 1/4 cup creme de cassis (black currant flavored liqueur)
  • 2 tbsp dark brown sugar
  • fresh flat-leaf parsley, chopped


  1. Combine 3 cups of the wine and the stock in a saucepan, and bring just to a boil. Remove the pan from the heat, add the figs, and set aside.
  2. Peel the potatoes, and cut them into balls with a melon baller; you should have about 4 cups. Place the potato balls in a large saucepan, cover with cold water, and bring to a boil. Lower the heat and simmer for 5 minutes, then drain the potatoes and set them aside.
  3. Preheat the oven to 350 degrees F.
  4. Melt the butter in a large deep flameproof casserole or dutch oven. Brown the ducklings, a few pieces at a time, over medium heat. (While the ducks are browning, it may be necessary to pour off some of the fat. There should be no more than 4 tablespoons in the casserole.) As they are browned, transfer the pieces to a plate.
  5. When all the duck has been browned, pour off any remaining fat from the casserole and return it to the heat. Add the remaining 1 cup wine and bring to a boil over medium heat, scraping up any brown bits in the casserole.
  6. Return the duckling to the casserole, and sprinkle it with the pepper. Add the figs and their soaking liquid, the potatoes, and the apricots, garlic, creme de cassis, and brown sugar. Stir well, and bring to a boil over high heat.
  7. Cover the casserole, transfer it to the oven, and bake for 30 minutes. Then stir it thoroughly, and bake another 30 minutes.
  8. Arrange the duck, fruits, and vegetables on a large serving platter. Skim the grease from the sauce. Pour a bit of the degreased sauce over the duck, and sprinkle it with the parsley. Serve the remaining sauce on the side.
IMG_0205

Fresh Fig, Micro Arugula, and Mascarpone Bruschetta

IMG_0187

I can not even explain to you how utterly delicious this bruschetta was- like, there's a chance I will make it again tomorrow it was so good. Sautéing the figs really brings out their flavor and when paired with the mascarpone it is just a dream. The lemon adds a surprising level to the little hors d'oeuvres that is only heightened by the basil and balsamic vinegar.
The best part about this recipe is that you can use as little or as much of each ingredient as you wish; there is no "right way"!


Fresh Fig, Micro Arugula, and Mascarpone Bruschetta
recipe adapted from here

ingredients:
  • baguette
  • olive oil
  • fresh figs (I used Black Mission)
  • mascarpone cheese
  • lemon (zest and juice)
  • aged balsamic vinegar
  • micro arugula
  • fresh basil
  • sea salt and pepper
  1. Slice the baguette and brush each slice with olive oil. Bake in a 450 degree oven for about 5 minutes or until golden brown. Set aside.
  2. Cut each fig into quarters and saute with a bit of olive oil until caramelized.
  3. Spread each slice of the baguette with a bit of mascarpone cheese and top with a pinch of micro arugula.
  4. Lay one to two fig quarters on each piece of bread and then drizzle with both the lemon juice and the balsamic vinegar.
  5. Sprinkle with sea salt and crushed black pepper, then top with the lemon zest and sliced basil leaves over the top. Serve and enjoy!
IMG_0190

The pictures certainly aren't of the prettiest ones, but they're of what was left over after the stack was torn apart!

IMG_0189

Roasted Strawberry Salad with Baked Goat Cheese

IMG_0181
Closet Cooking has become one of my very favorite blogs to go to for recipes. Kevin's blog entries are always creative and inspired and it helps that I seem to have very similar taste buds to him! I saw this Roasted Strawberry Salad with Baked Goat Cheese and I instantly knew I had to make it.
The balsamic vinegar complements the strawberries so nicely and the creamy goat cheese is a great contrast to the tartness.

Roasted Strawberry Salad with Baked Goat Cheese
recipe adapted from here

ingredients:
  • 8 ounces goat cheese
  • 1/2 cup bread crumbs (I used Panko)
  • 4 cups strawberries, stemmed and halved
  • 2 tbsp honey
  • 2 tbsp balsamic vinegar
  • 15 ounces Romaine lettuce, cut or torn onto bite-sized pieces (I used baby romaine and romaine hearts)
  • 2 green onions, sliced
  • 2/3 cup pecans, toasted
  • 2 tbsp olive oil
  • 2 tsp whole-grain mustard
  • salt and pepper to taste
  1. Preheat oven to 425 degrees and freeze the goat cheese for 20 minutes.
  2. Slice the goat cheese into discs and dredge them in the bread crumbs. (I rolled mine into small balls and then flattened them out for smaller discs) Bake for 5 minutes, or until golden brown (since I used Panko it didn't really brown). Set aside.
  3. Toss the strawberries in the honey and balsamic vinegar to coat and place in a single-layer baking dish. Bake for 10 to 12 minutes, or until slightly caramelized.
  4. Pour the juices from the strawberries into a bowl and mix with the olive oil, mustard, salt, and pepper.
  5. Toss the lettuce, strawberries, and dressing together and place goat cheese on top. Serve immediately.
IMG_0186
IMG_0183

Thursday, October 15, 2009

Japanese Curry

IMG_0174

I saw this recipe over at Closet Cooking and have been wanting to try it for a couple of months now and have even had the curry roux stashed in my pantry for a while but I just never got around to it. Boy am I glad I finally found the time to make this!

Japanese Curry
recipe from here

ingredients:
  • 1 tbsp oil (I used Canola)
  • 1 lb beef, cut into bite-sized pieces (I just used the pre-cut beef for stewing)
  • 2 onions, chopped
  • 1 sweet potato, grated
  • 2 carrots, cut into bite-sized pieces
  • 2 potatoes, cut into bite-sized pieces
  • 1 sweet apple, grated (I used a Honeycrisp apple)
  • 1 tbsp honey
  • 1 box Japanese curry roux
  • beef stock


  1. Heat oil in a large dutch oven.
  2. Add the beef and brown on all sides. Remove beef and set aside.
  3. Add onions and saute until soft.
  4. Add the beef back in and cover with beef stock.
  5. Bring to a boil, reduce heat and simmer until beef is fall apart tender, about 1 to 2 hours.
  6. Add the carrots, potatoes, apple, honey, and curry roux and cover with more beef stock.
  7. Stir until the curry roux is fully dissolved.
  8. Bring to a boil, lower heat and simmer until vegetables are tender, about 20 minutes.
IMG_0176
IMG_0175

I love Japanese curry and this recipe does not disappoint in the least. The sweet and savory combo that you get from the honey and apple with the beef and curry is absolutely sublime! I served mine with some Jasmine rice to soak up all of that tasty sauce.

Monday, October 12, 2009

Lemon Blueberry Scones

After a busy weekend of football games (Go Seahawks!) and skeet shooting (my first time!), it's nice to be able to bake again. I thought the best way to jump back into things would be with one of my most-loved baked delights- scones!

IMG_0154

Scones are some of my favorite treats and they make a delectable breakfast. I based this recipe off of Ina Garten's recipe for Strawberry Scones. These scones turned out great! They are moist and sweet with a nice tart aftertaste from the lemon zest.

Lemon Blueberry Scones
recipe adapted from here

ingredients:
  • 4 cups plus 1 tbsp all-purpose flour
  • 2 tbsp sugar, plus additional for sprinkling
  • 2 tbsp baking powder
  • 2 tsp salt
  • 12 oz cold unsalted butter, diced
  • 4 large eggs, lightly beaten
  • 1 cup cold heavy cream
  • 1 cup blueberries (I used frozen)
  • 1 tbsp lemon zest
  • 1 egg, beaten with 2 tbsp milk, for egg wash (I just used 1 tbsp of heavy cream instead of 2 tbsp of milk because I had it out already)
  1. Preheat oven to 400 degrees.
  2. In the bowl of an electric mixer fitted with a paddle attachment, combine 4 cups of the flour, 2 tbsp of sugar, baking powder, salt, and lemon zest. Blend in butter at lowest speed and mix until the the butter is in pea-size pieces.
  3. Combine the eggs with the heavy cream and quickly add them to the flour and butter mixture. Combine until just blended.
  4. Toss the blueberries with 1 tbsp of flour. Add them to the dough and mix quickly.
  5. Dump the dough onto a well-floured surface and flour your hands and a rolling pin. Roll the dough 3/4 inch thick- you should see lumps of butter in the dough.
  6. Cut into squares with a plain or fluted cutter and then cut them in half diagonally to make triangles (I just used a 3 inch circular cutter as I don't own a square one). Place on a baking sheet lined with parchment paper or a Silpat.
  7. Brush the tops with the egg wash and sprinkle on sugar.
  8. Bake for 20 to 25 minutes (mine baked for 15 min in their circular shape), until the outsides are crisp and the insides are fully baked.
IMG_0147
IMG_0155

They're great with a nice pat of butter, but they are equally good with a smear of English Clotted Cream.

IMG_0144

Friday, October 9, 2009

Snickerdoodles

IMG_0140

Cookies might just be my absolute favorite things to bake (though scones are a close runner-up). I have tried my hands at countless creative cookie recipes, yet, I still haven't made some of the classics. Well, today I'm able to check a quintessential cookie recipe off of my "never made" list- the snickerdoodle. I might not have made a snickerdoodle before these, but I have certainly eaten my fair share and I have to say, these are by far the best that I have ever had. This recipe comes from Smitten Kitchen who adapted it from Martha Stewart.

Snickerdoodles
recipe from here

ingredients:
  • 2 3/4 cups all-purpose flour
  • 2 tsp cream of tartar
  • 1 tsp baking soda
  • 1/4 tsp salt
  • 1 cup unsalted butter, at rom temperature
  • 1 3/4 cups sugar, plus more if needed
  • 2 tbsp ground cinnamon, plus more if needed
  • 2 large eggs
  1. Preheat the oven to 400 degrees. Move a rack to the top third of the oven, and one to the bottom third. Line two baking sheets with Silpat or parchment paper; set aside.
  2. Mix together flour, cream of tartar, baking soda, and salt and set aside.
  3. In the bowl of an electric mixer fitted with a paddle attachment, combine butter and 1 1/2 cups of sugar. Beat on medium speed until light and fluffy, about 2 minutes. Add eggs and beat until combined.
  4. Slowly add in dry ingredients and beat until combined.
  5. In a small bowl, combine remaining 1/4 cup sugar and the cinnamon.
  6. Use a small cookie scoop to form balls of the dough and roll them in the cinnamon-sugar. Place about 2 inches apart on prepared baking sheet.
  7. Bake 10 minutes (rotating the baking sheet after 5) or until the cookies are set in the center and begin to crack.
  8. Cool on cookie sheet for five minutes and then transfer cookies to a wire cooling rack.
IMG_0138
Cookies can be stored in an air-tight container for up to a week.

Thursday, October 8, 2009

Sesame Soba Noodles with Napa Cabbage

IMG_0124
I love Asian noodle salads and as soon as I saw this one posted by Ree over at The Pioneer Woman I knew I had to try it. Her recipe has simple spaghetti noodles dressed in a scrumptious oily sauce and topped with sliced green onions. I kept the green onions and added a few twists that I think you will agree only add to the mouth-watering appeal of this dish!
I loved the crisp, refreshing crunch from the cabbage paired with the spicy sauce. This recipe is so simple and so delicious that you have absolutely no reason not to go make these noodles right now, go on, you won't be disappointed!


Sesame Soba Noodles with Napa Cabbage
recipe adapted from here

ingredients:
  • 4 ounces soba noodles, cooked, drained, and rinsed with cool water
  • 1 tbsp soy sauce (I used shoyu)
  • 1 1/2 tsp dark brown sugar (I used palm sugar because I'm trying to use it up)
  • 1 clove garlic, minced
  • 1 1/2 tsp rice vinegar
  • 1 tbsp pure sesame oil
  • 1/8 tsp hot chili oil (or if you're like me and like your food extra spicy add 1/2 tsp)
  • 1 tbsp canola oil
  • 1 1/2 tsp hot water
  • 1 green onion, thinly sliced
  • 1 cup raw napa cabbage, sliced
  • 1 tsp sesame seeds, toasted
  1. Whisk all ingredients (minus the noodles, cabbage, green onions, and sesame seeds) together in a bowl; taste and adjust as desired.
  2. Pour sauce over noodles (only add as much sauce as desired; it is not necessary to use it all), add in cabbage and green onions and toss.
  3. Sprinkle with sesame seeds.
This serves 1 very hungry individual, or can be served as a side dish for up to 4 people.

IMG_0119

I like my food very spicy, so I added a little dollop of sriracha, delish! Next time, I'm going to add in some sliced cucumbers as well.

IMG_0129

Curry Chocolate Chunk Banana Bread

IMG_0103

This bread is scrumptious. The curry flavor blends so nicely with the sweet mellow bananas and creamy chocolate. The coconut adds a familiar aspect and presents itself as a way for all of the flavors to come together. I highly suggested warming your slice in the oven or microwave and topping it with a nice pat of butter and letting it melt down into every nook and cranny... Mmmm!

IMG_0107IMG_0110

The Curry Chocolate Chunk Banana Bread makes a great breakfast, or just a nice afternoon snack! Don't be scared of the curry, I promise the flavor is subtle enough that it doesn't overpower the other ingredients, but pronounced enough to give it a tasty exotic flair. Serve this to your friends and neighbors and it won't soon be forgotten!


Curry Chocolate Chunk Banana Bread
recipe adapted from here

ingredients:
  • 1/2 cup unsweetened shredded coconut
  • 1 1/2 cups all-purpose flour
  • 1 tsp baking soda
  • 1/2 tsp salt
  • 1/2 cup unsalted butter, melted
  • 3/4 cup granulated or caster sugar
  • 2 large eggs, beaten
  • 2 mashed overripe bananas (I find if the are very overripe like mine which were frozen, you don't need to mash them first and can simply put them in whole and they will blend up just fine)
  • 1 tsp coconut extract
  • 1 cup chopped curry milk chocolate (I used 3400 Phinney Chocolate by Theo Chocolate in Organic Coconut Curry Milk Chocolate)
IMG_0084
  1. Preheat your oven to 325 degrees and butter and flour a 9x5 loaf pan.
  2. Toast coconut in a skillet on the stove, being careful not to let it burn. Set aside to cool. IMG_0095
  3. Mix the flour, baking soda, salt, and coconut in a bowl and set aside.
  4. In a large mixing bowl, cream the butter and sugar, then add the eggs and beat until fully incorporated. Next add the bananas and coconut extract and mix well.
  5. Slowly add the dry mixture to the wet mixture and mix until just combined. Fold in the chocolate chunks.
  6. Pour batter into buttered and floured pan and bake for 45-60 minutes or until a toothpick inserted into the center comes out clean. Let the bread cool in the pan for 15 minutes and then remove, allowing it to cool to room temperature before slicing.
IMG_0104

The bread can be stored at room temperature for two days in a sealed container, or refrigerated up to a week.

Wednesday, October 7, 2009

Ch-ch-ch-changes!

IMG_0022

I have decided to do a bit of an overhaul on the blog (hey why not I still don't have any readers ha ha). Instead of chronicling each and every one of my meals, I have decided to just blog about the most interesting! Maybe that will be all three one day, maybe it will only be a cool baked item I happened to make on another. I don't really know yet, but I think that's part of the fun- figuring it all out! My schedule is just such weird hours because of work and figuring out school and whatnot to be able to promise three square meals- creatively thought-up and plated every day so I feel this will be the next best option. Things may change again down the line, and that's okay too, because the point of this blog is to share my love of cooking and baking with others, no matter the fashion it is presented!

IMG_0021
IMG_0032IMG_0033
IMG_0024
UltimateChocChip2
SaltedCaramelCupcakes2UltimateChocChip3

Related Posts with Thumbnails